
In this article, we will show you how the Datatech payroll import file is formatted and where in Pago you can change the data that is included in the import file. The Datatech payroll import file is in a CSV file format.
For more information on importing payroll data into Datatech, see this article: Datatech: Importing payroll data
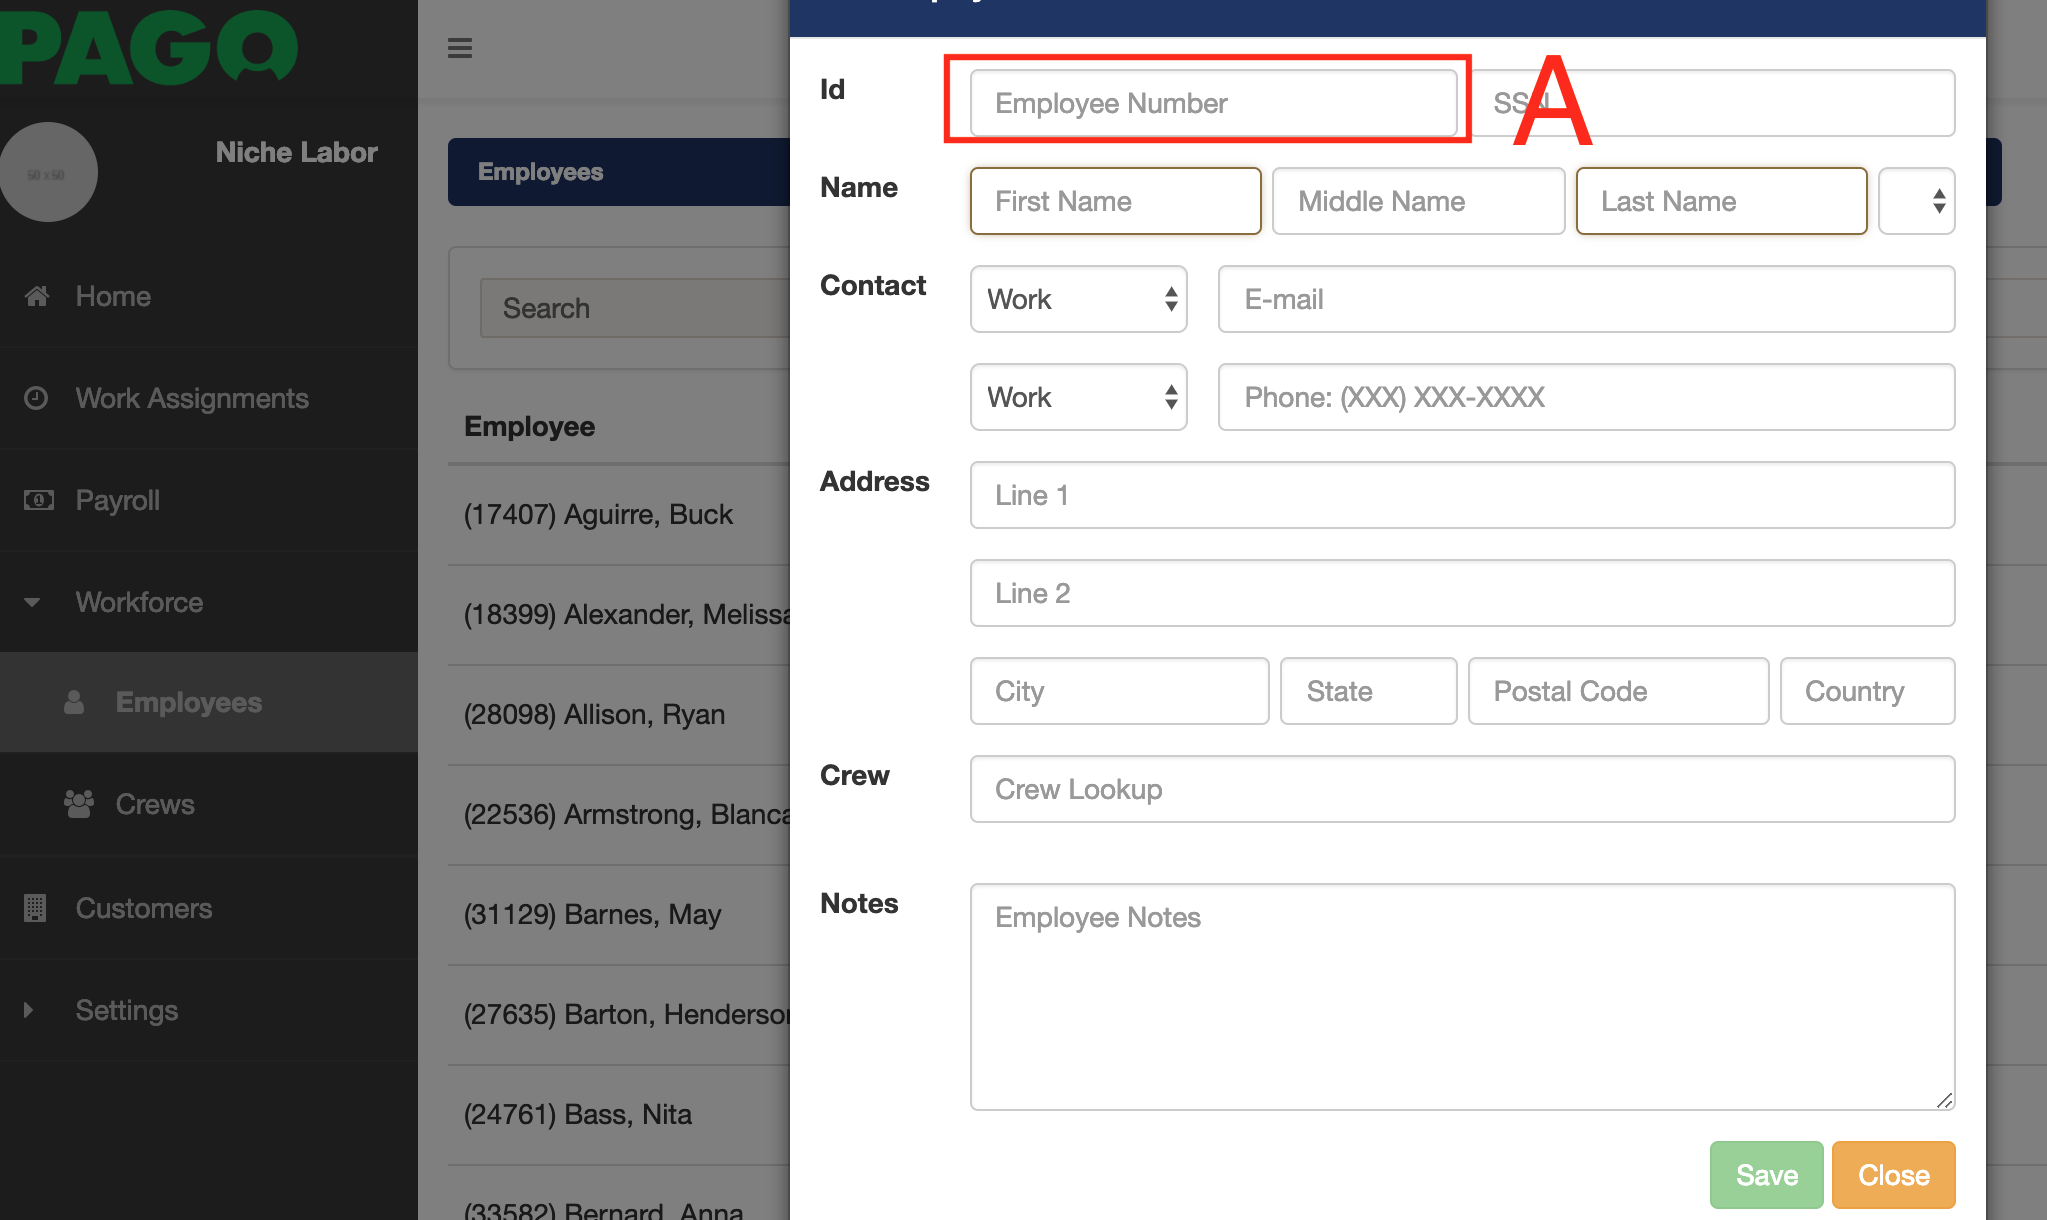
Column A: EMPLOYEE ID - In Pago, the employee id can be found when you view the details of an employee. Workforce > Employee > Click on an Employee. This id value corresponds to the employee account number in Datatech.

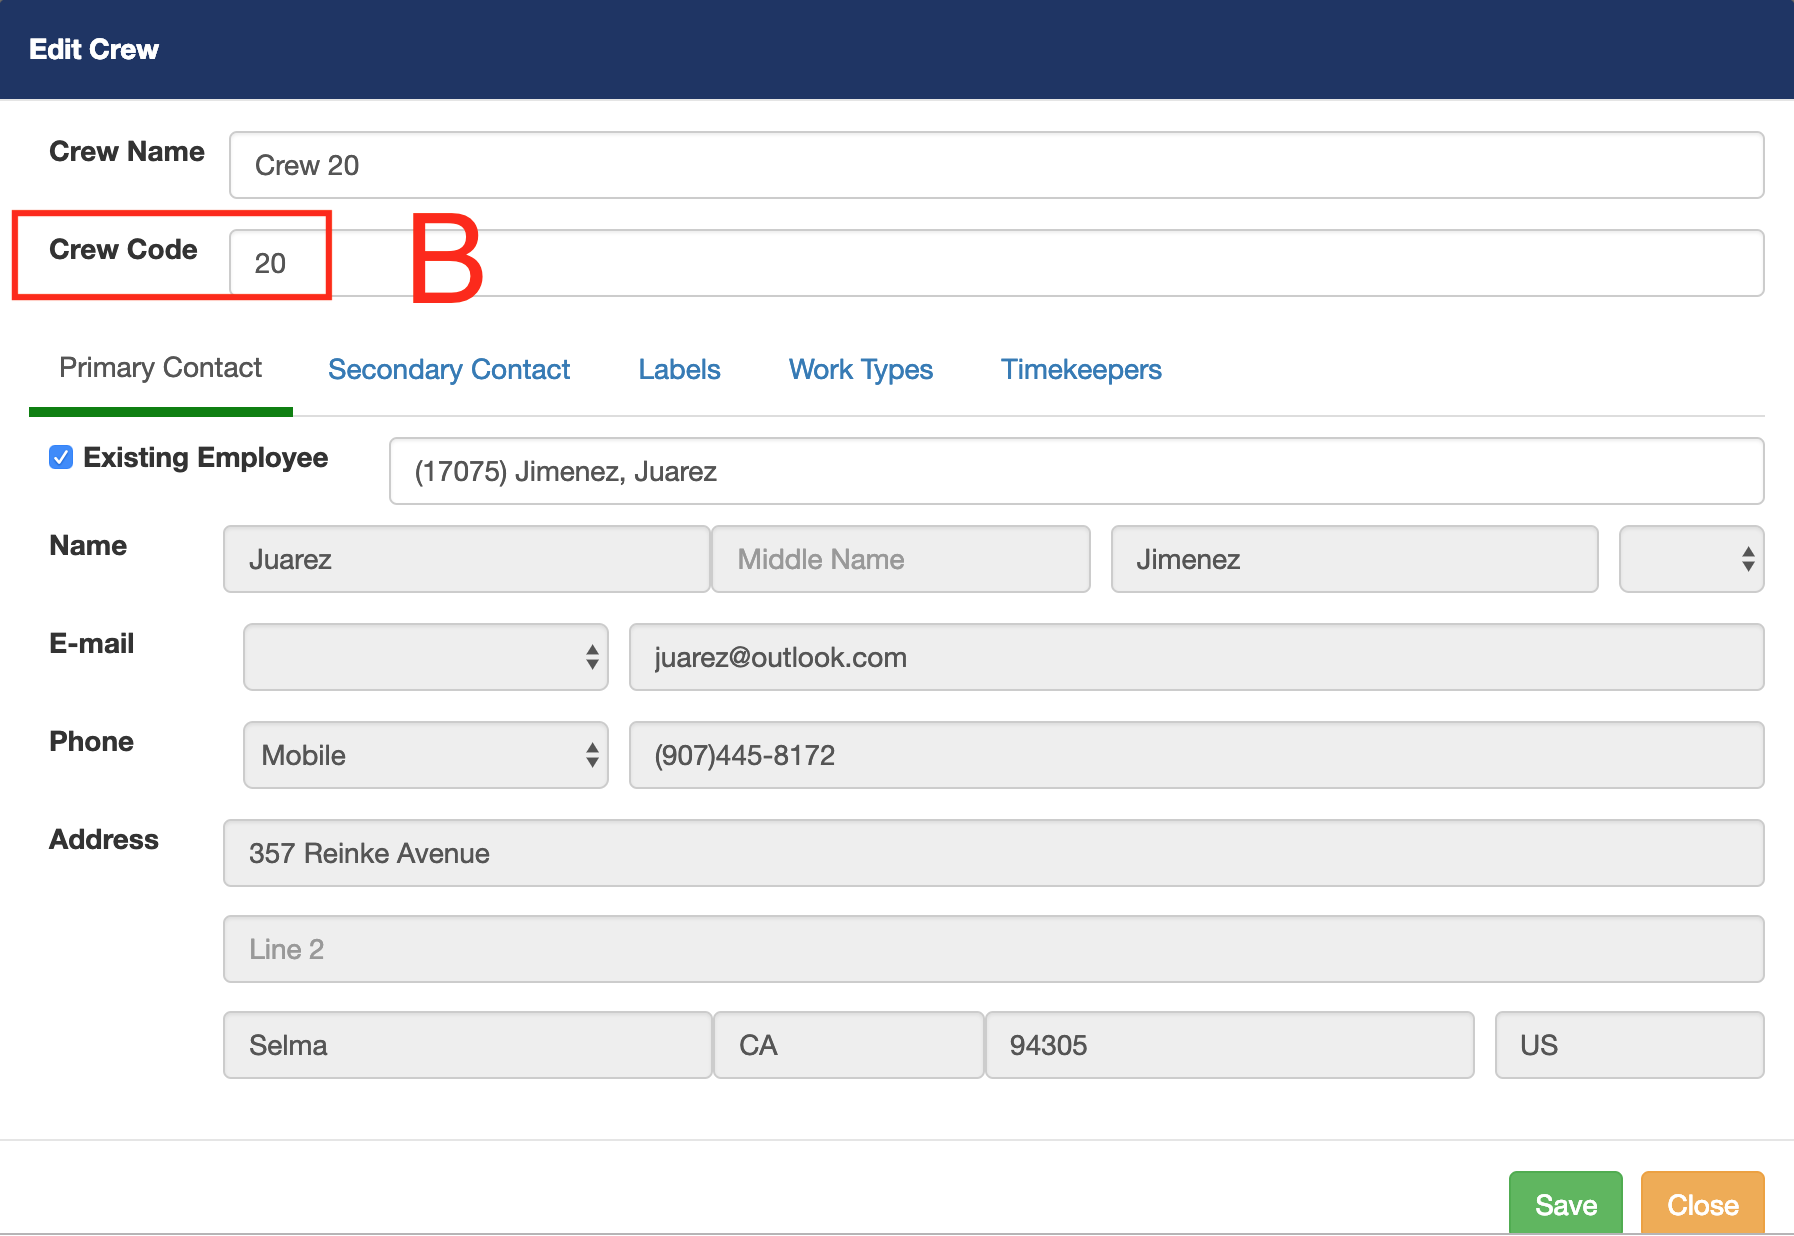
Column B: CREW NUMBER - In Pago, the crew code can be found when you view the details of a crew. Workforce > Crews > Click on a Crew. This number is the crew number in Datatech.

Column C: DATE - In Pago, this is the date of the work assignment.

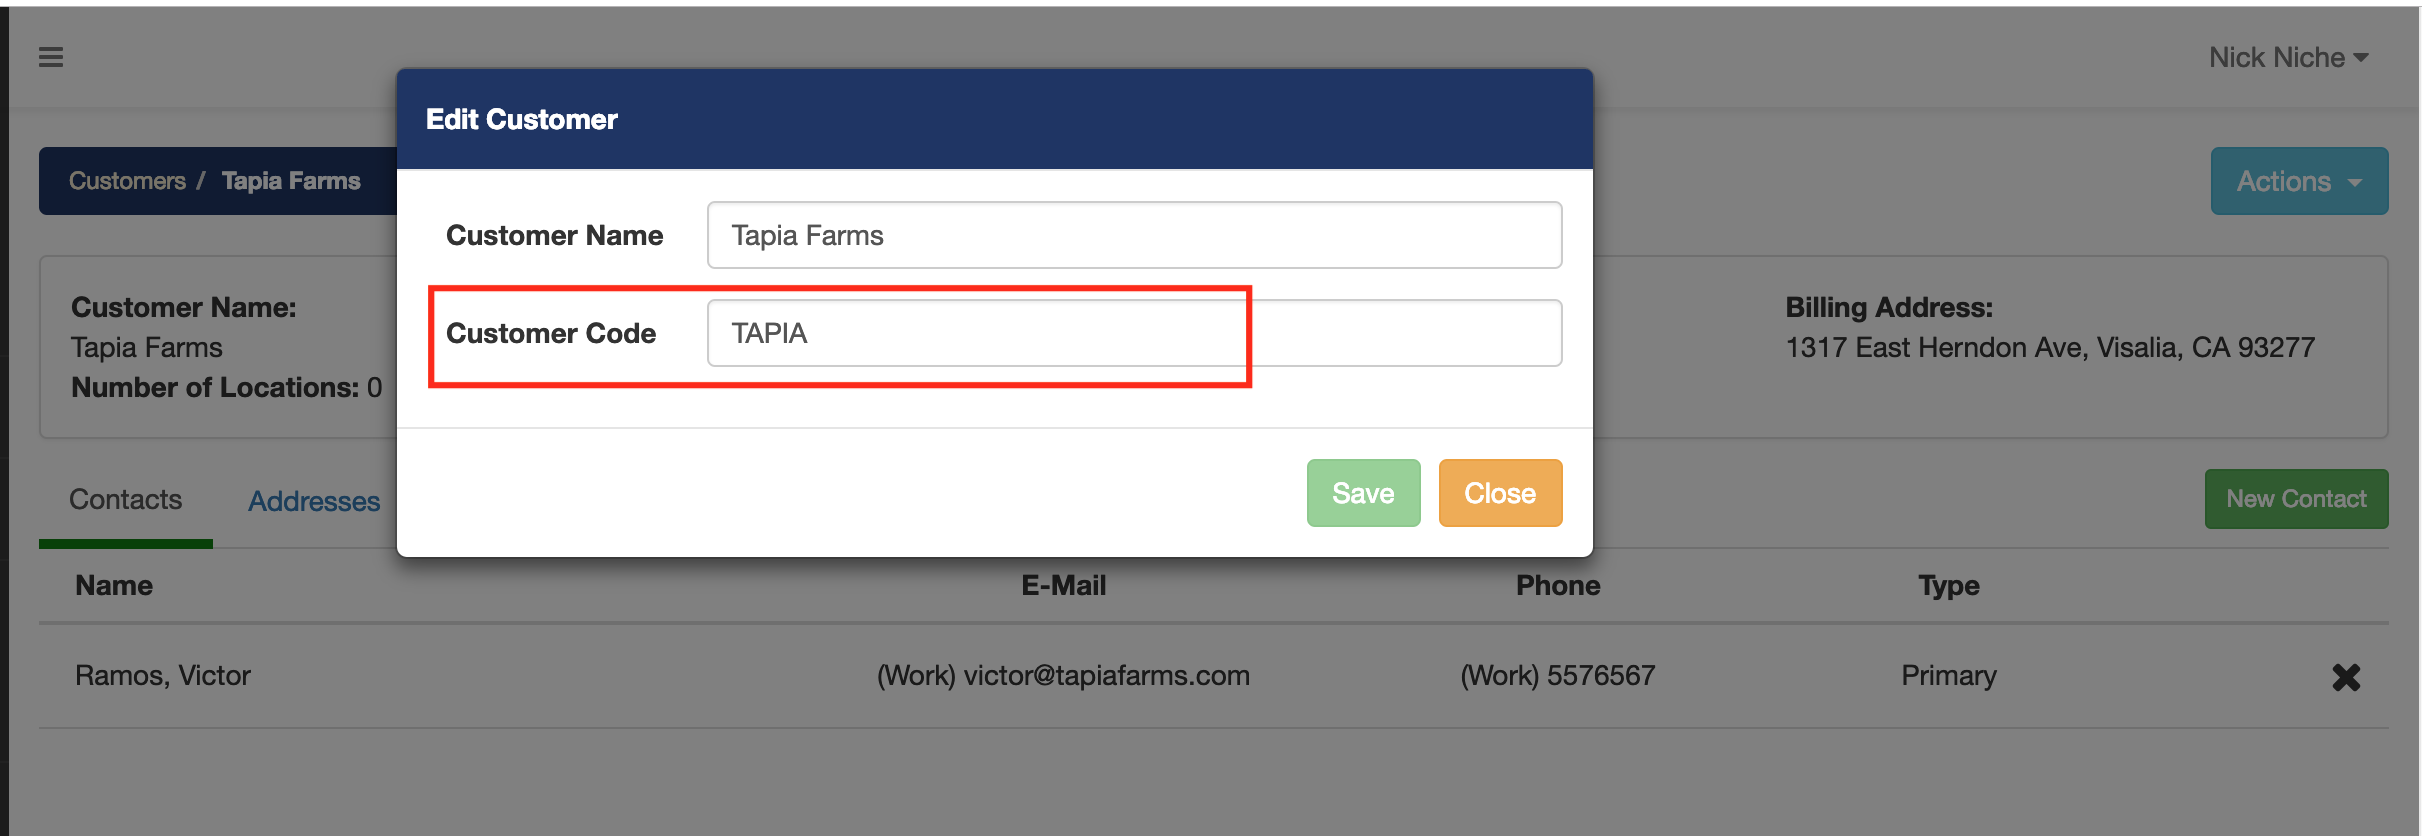
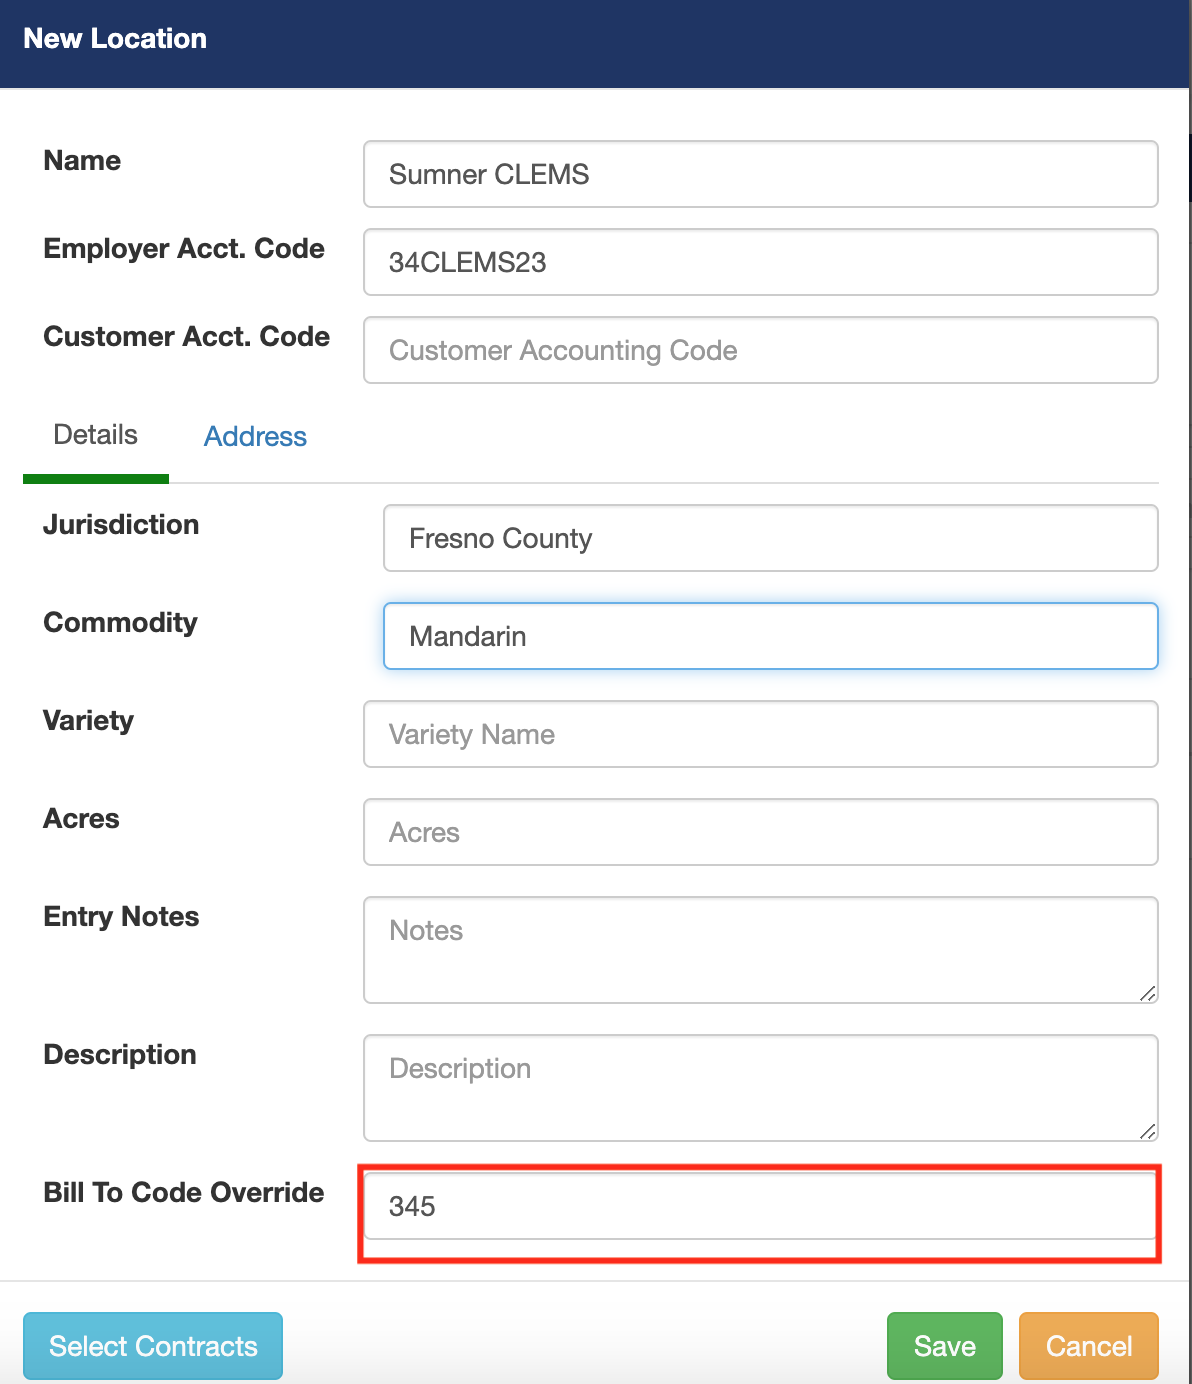
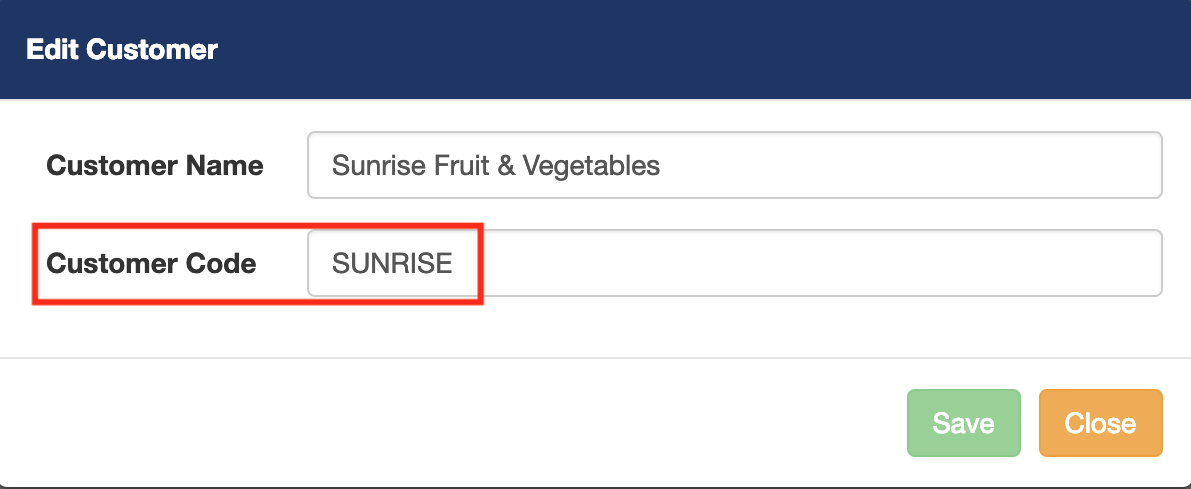
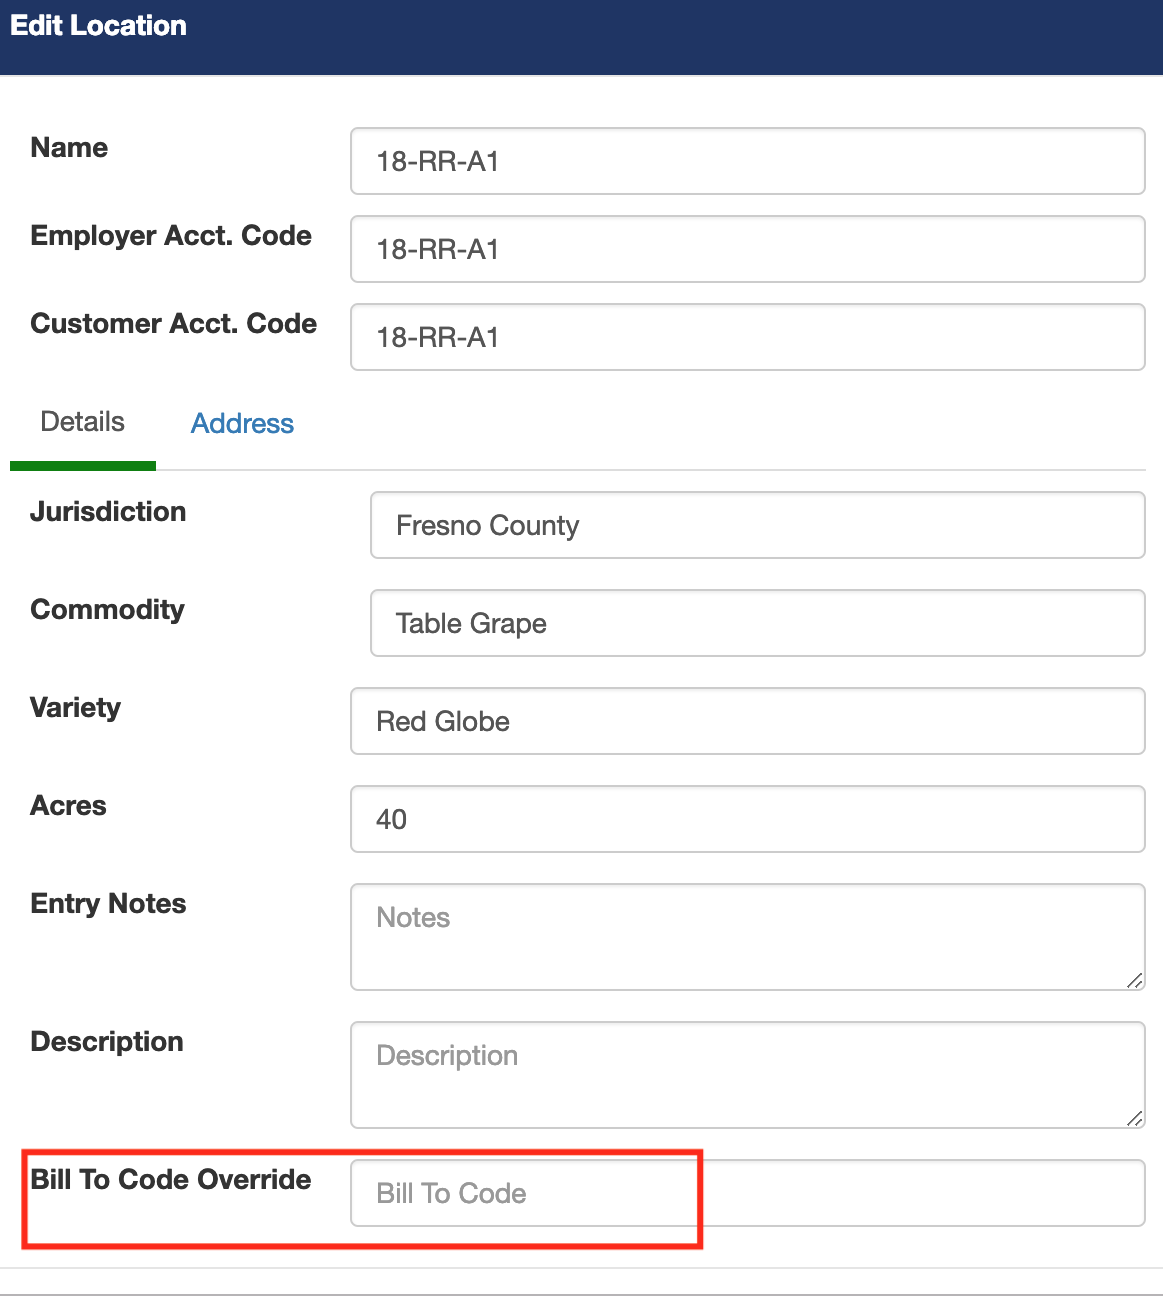
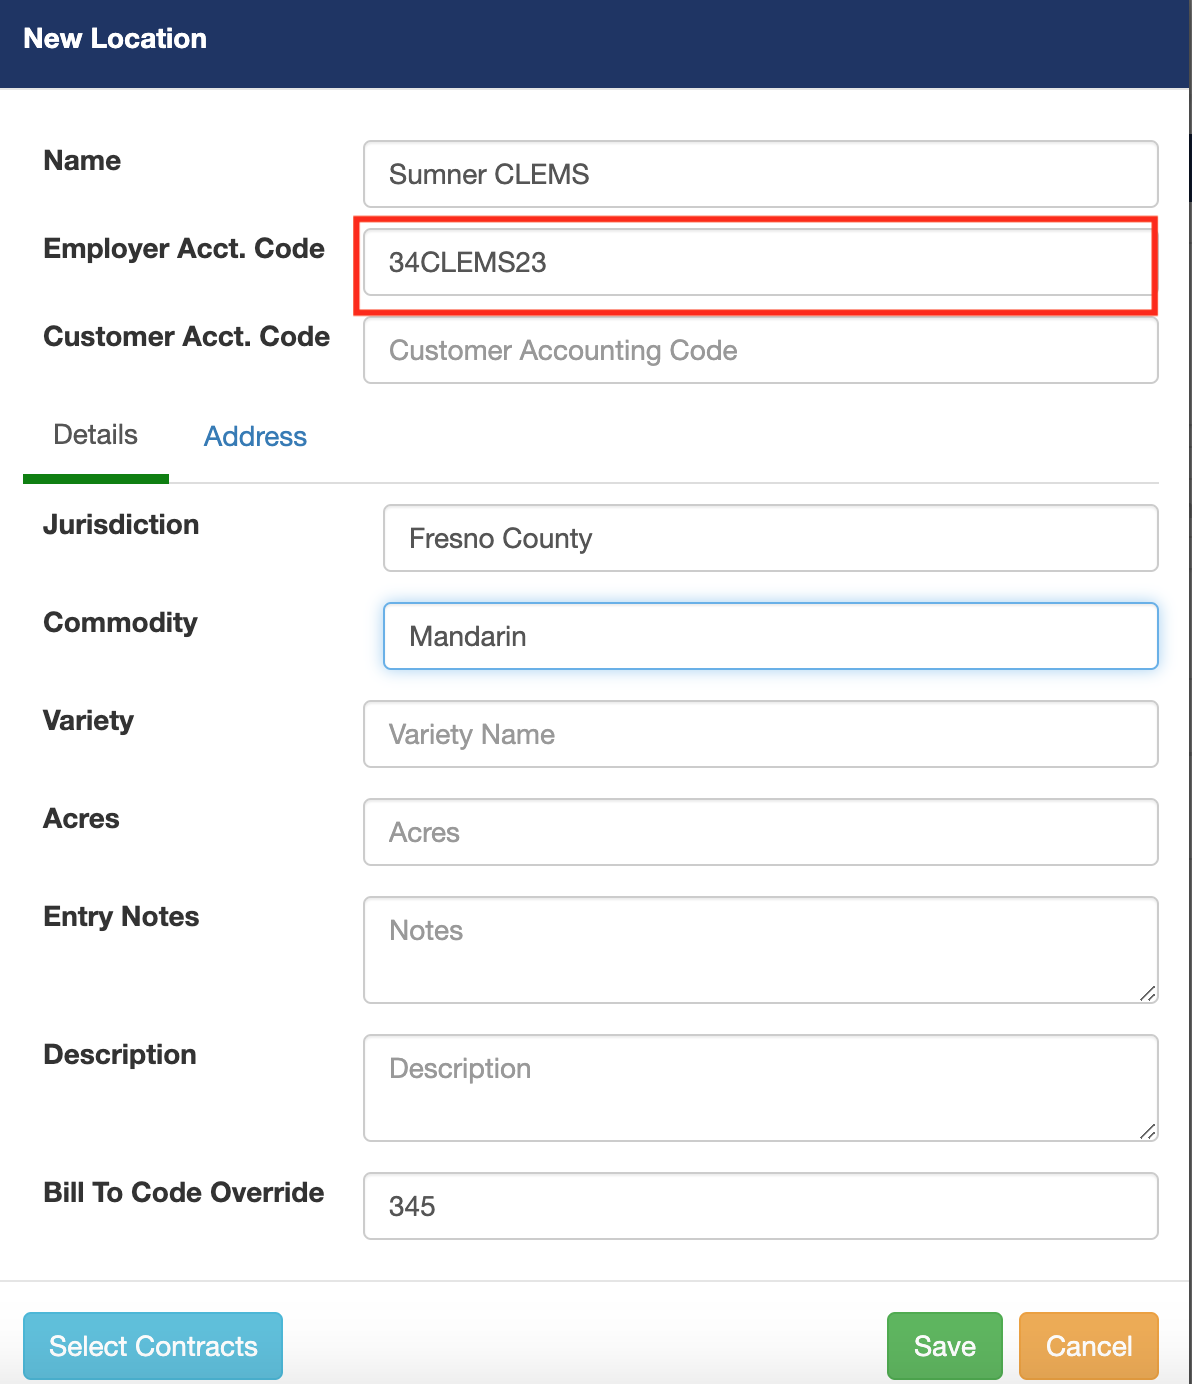
Column D: CUSTOMER CODE/GROWER ID - In Pago, the customer code can be found in the customer details. Customers > Click on a Customer. In Datatech, this is the grower account number. By default, column D will be populated with the Customer Code. (Please note: the customer accounting code is NOT the same as the customer code.) Optionally, you can set a Bill To Code Override value in a customer location. If the location used on a work assignment has a Bill To Code Override, then that value will be loaded into the payroll import file. See the following two examples.
EXAMPLE A: For this example notice how the customer code is TAPIA however the locations bill to code is 345, so Pago populates column D with 345 for the day worked in that location.
 +
+
=

EXAMPLE B:
For this example notice how the customer code is SUNRISE and the customers' bill to code for this location is empty. Pago populates column D with the customer code since the bill to code for this location is empty.
 +
+
 =
=

Column E: EMPLOYER ACCOUNTING CODE/CROP ID - In Pago, the employer accounting code is found in the location details. Customers > Click on a Customer > Click on Locations. In Datatech, this is the Crop Id value.

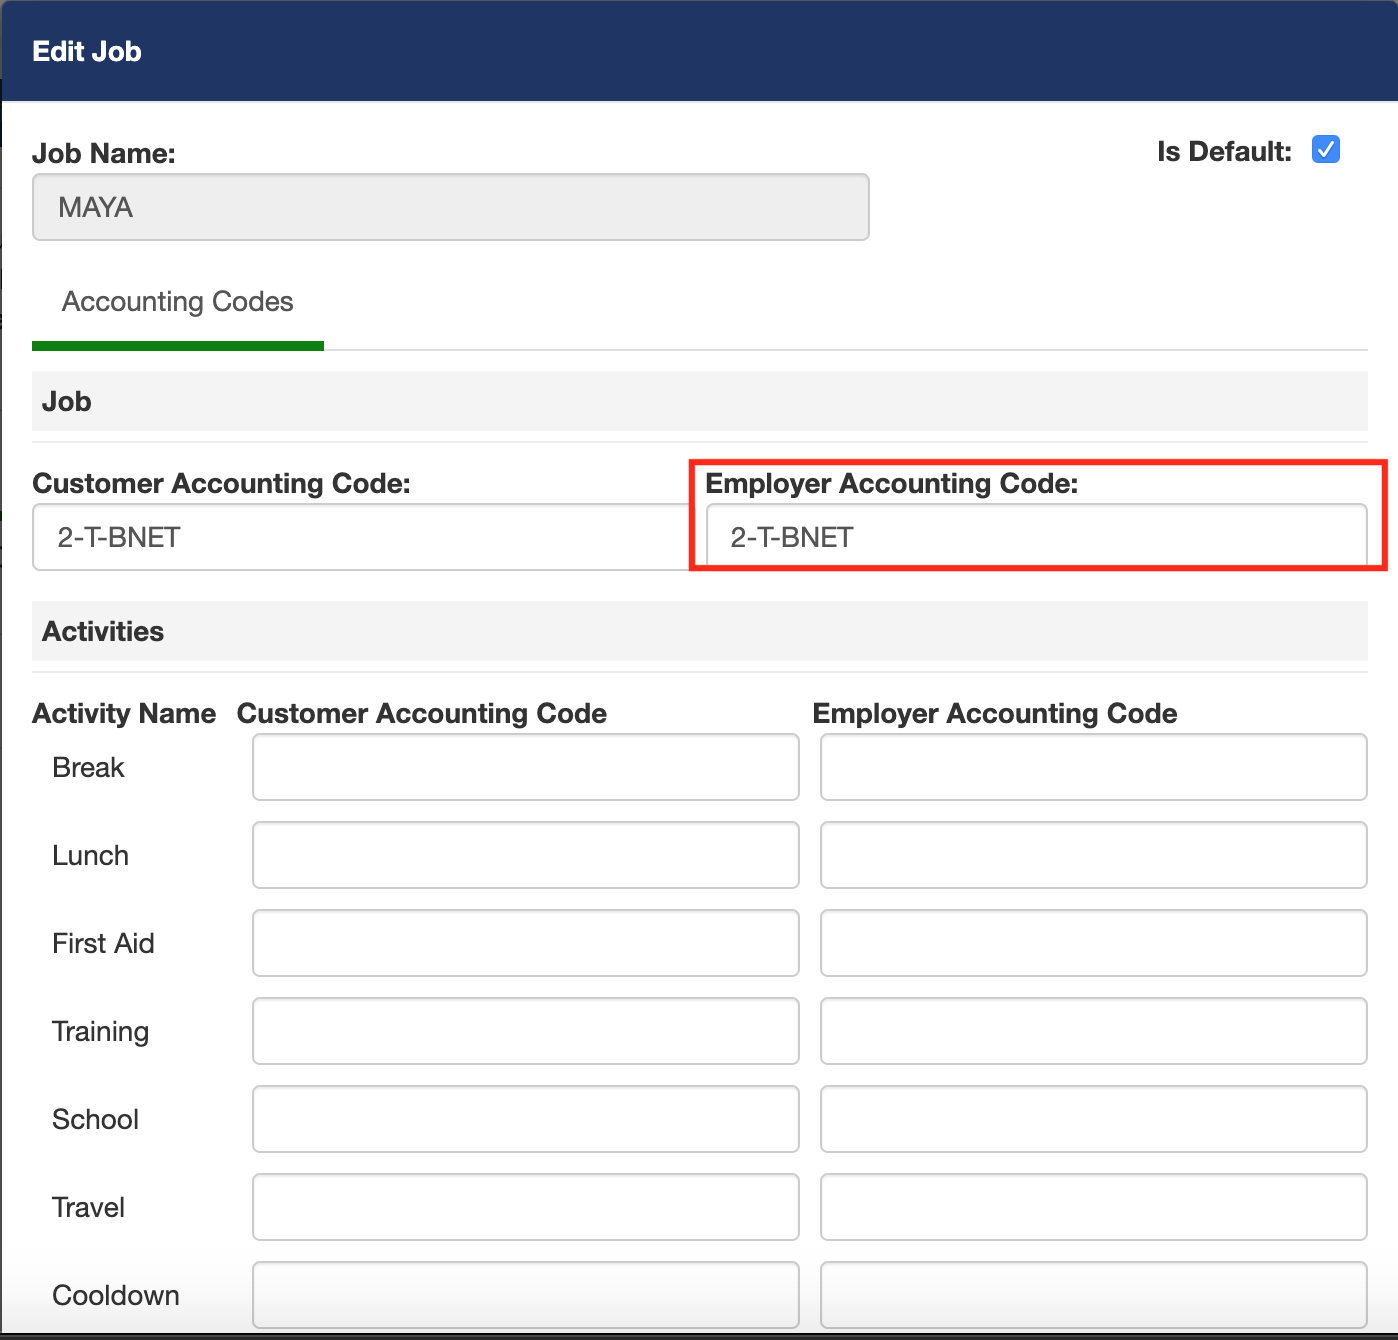
Column F: JOB ID - In Pago the job id is in the details of the job. Customers > Click on a Customer > Click on a Contract > Click on a Work Type > Select a Work Type > Click on Jobs. The Job Id is the Employer Accounting Code value from the job.

Column G: WAGE TYPE - In Pago, the wage type values are hard coded into the system.

Column H: PIECEWORK HOURS - In Pago, an employee is paid for piecework, then this value will be the number of piecework hours worked. If an employee is not paid for piecework, then this value will be "0".

Column I: UNITS - In Pago, this will be the hours an employee has worked, or the number of pieces if the employee is being paid for piecework.

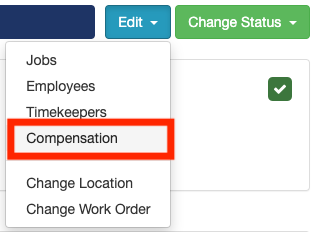
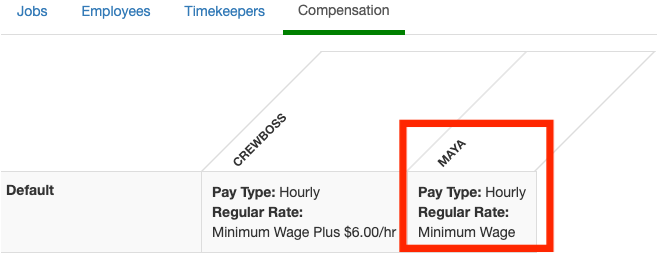
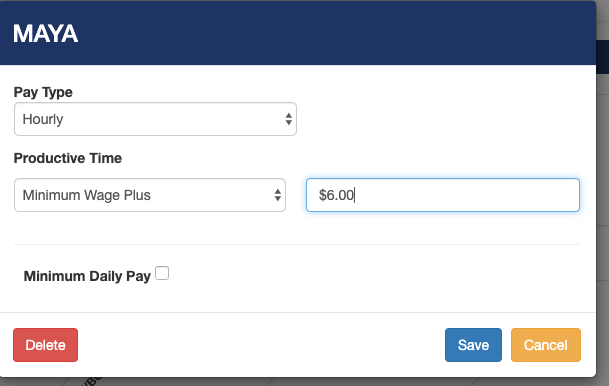
Column J: RATE - In Pago, this is the rate at which the employee will get paid. This rate can be set in the job compensation plan. Work Assignments > Select a work assignment > Edit > Compensation Select a job. (Please note: if you set the job compensation for a work assignment it will only be set for that work assignment. Otherwise, job compensation is set for the job in the contract). If job compensation is set to Employee Rate, then you can find the employee's pay rate in the employee wage history details. Workforce > Employees > Click on an Employee > Wages. The effective date of the wage history will determine the employee wage rate in effect at the time of the work assignment. If there is no employee wage rate in effect at the time of the work assignment, then Pago will default the employee wage rate to minimum wage.

 .
. 
Comments
0 comments
Article is closed for comments.