
This article provides instructions for creating payroll batches.
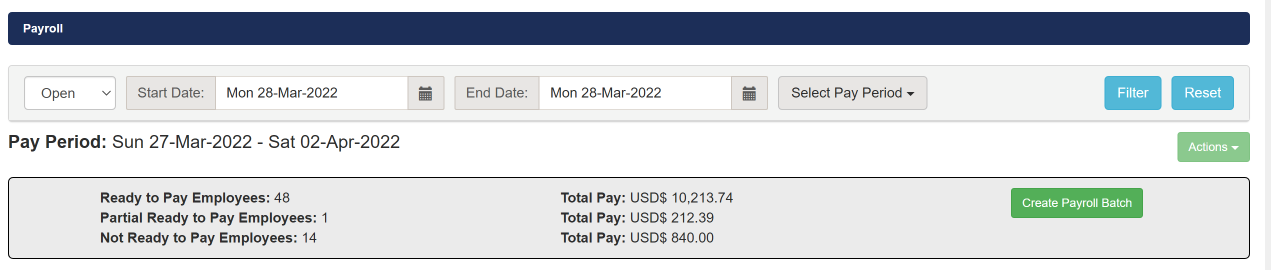
In the Payroll page, filter on the pay period you would like to create a payroll batch for. Then create a batch by clicking on the "Create Payroll Batch" button.
Ready To Pay Employees: An employee is added to this count only after the employee has successfully gone through Pago's compliance engine and the employee has a green checkmark across all the work assignments the employee is a part of.
Partial Ready To Pay Employees: Employees that are in this count have some work assignments that have successfully gone through the compliance engine and some that have not yet gone through compliance.
Not Ready To Pay Employees: These employees are not part of any work assignments that have successfully gone through the compliance engine.
Pay Types:
Regular: Will include all employee pay for the whole pay period.
Off-Cycle: This will include employees from the start of the pay period date through the specified date. So, if the start date of the pay period is Monday and the off-cycle date set is Wednesday the payroll batch will only include employees that worked from Monday - Wednesday.
"Employees" drop-down
-All Unpaid Employees: Includes all the unpaid employees. You can then exclude specific employees from the batch.
-Selected Employees: Will only include employees you specify that worked in the pay period.
-Selected Crews: Will only include employees that have time worked in a crew you specify. You have the option to include additional employees and exclude employees by adding them to the excluded/included employees list.
Options section:
-Crews: Add the crews you would like to create a payroll batch for.
-Include employees: Adding employees to this section will add employees to the batch that aren't already part of it. This option is only visible when the Employees drop-down section is set to "Selected Employees" or "Selected Crews"
-Exuding Employees: Adding employees to this section will exclude any employees from the batch. This option is only visible when the employees drop-down is set to "All Unpaid Employees" or "Selected crews".
-"Include Partially ready to pay employees": Check this box if you would like to include employees that have some pay time that has successfully gone through the compliance engine.
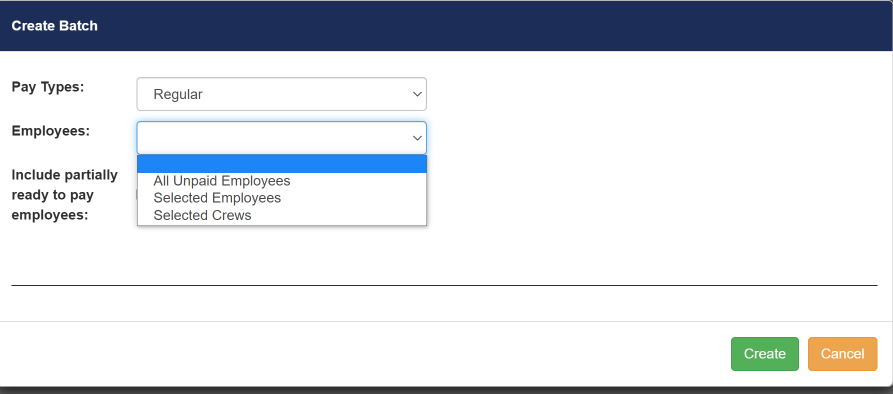
Once you are ready to proceed click the "Create" button.
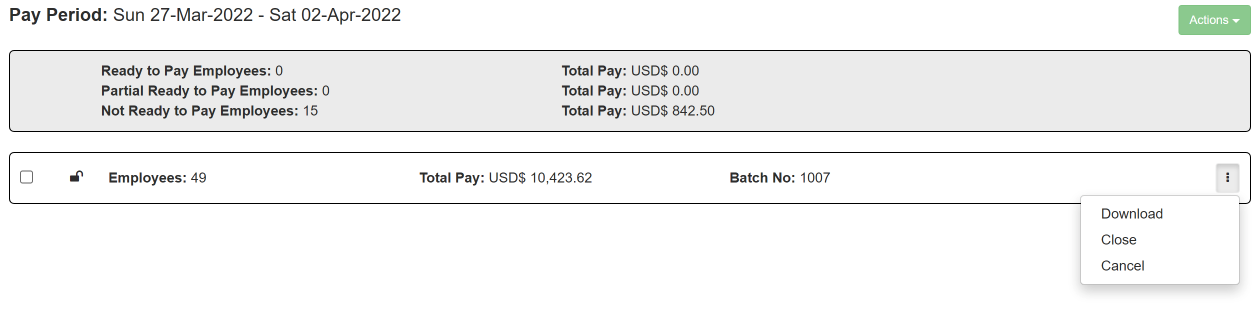
Once you create a payroll batch the system generates a sequential batch number. If you still have "Ready To Pay Employees" or "Partial Ready To Pay Employees" then you can create additional batches.
Download: This will download the payroll file for the batch.
Cancel: Using this option will cancel a payroll batch, which deletes the batch, and adds the employees back to the "Ready To pay Employees" section. A warning dialog is displayed, allowing you to confirm or cancel the action. Canceling a batch is an irreversible action.
Close: Only use this option once you have successfully imported the payroll file to your payroll system and confirmed checks have been distributed to employees. Closing a batch is an irreversible action. Once a payroll batch has been closed it cannot be reopened or modified. Payroll files from closed payroll batches can still be downloaded. Closed payroll batches will have a lock icon next to them. You will be prompted to add transaction number which is generated from the payroll system being used.
Click on the recently created payroll batch to review it.
Has Adjustments: This option is to be used if you would like to find employees who's pay has changed since the batch was created.
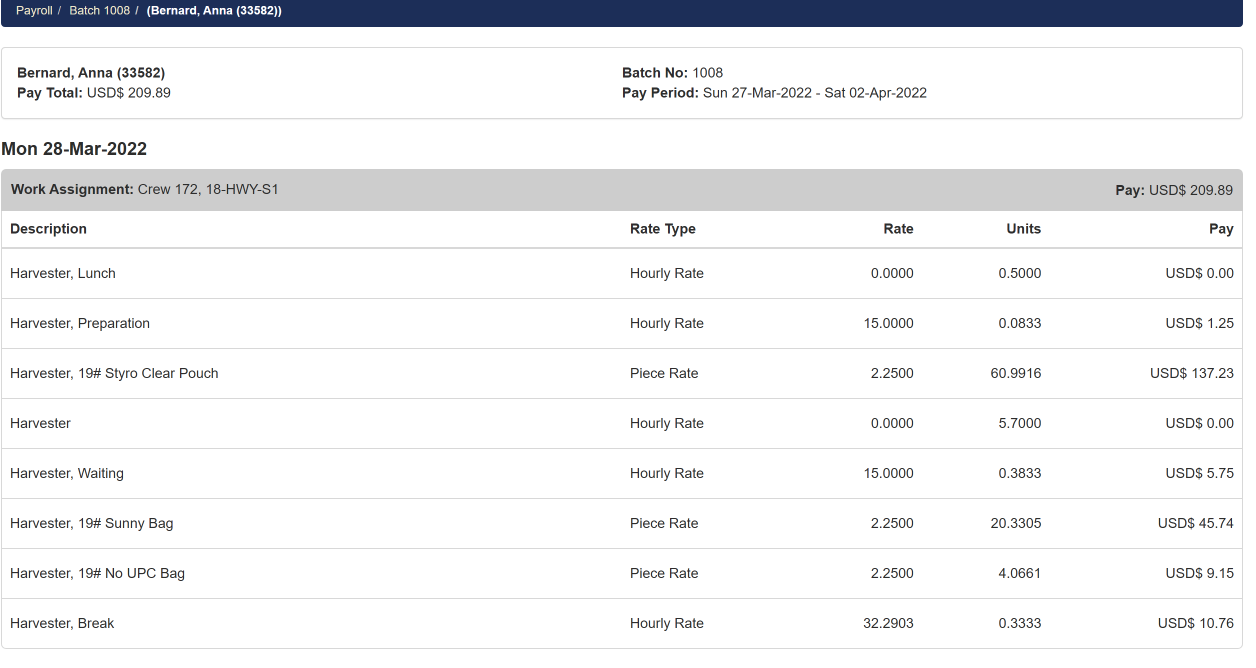
A complete break down of the employees pay can be found by clicking on an employee
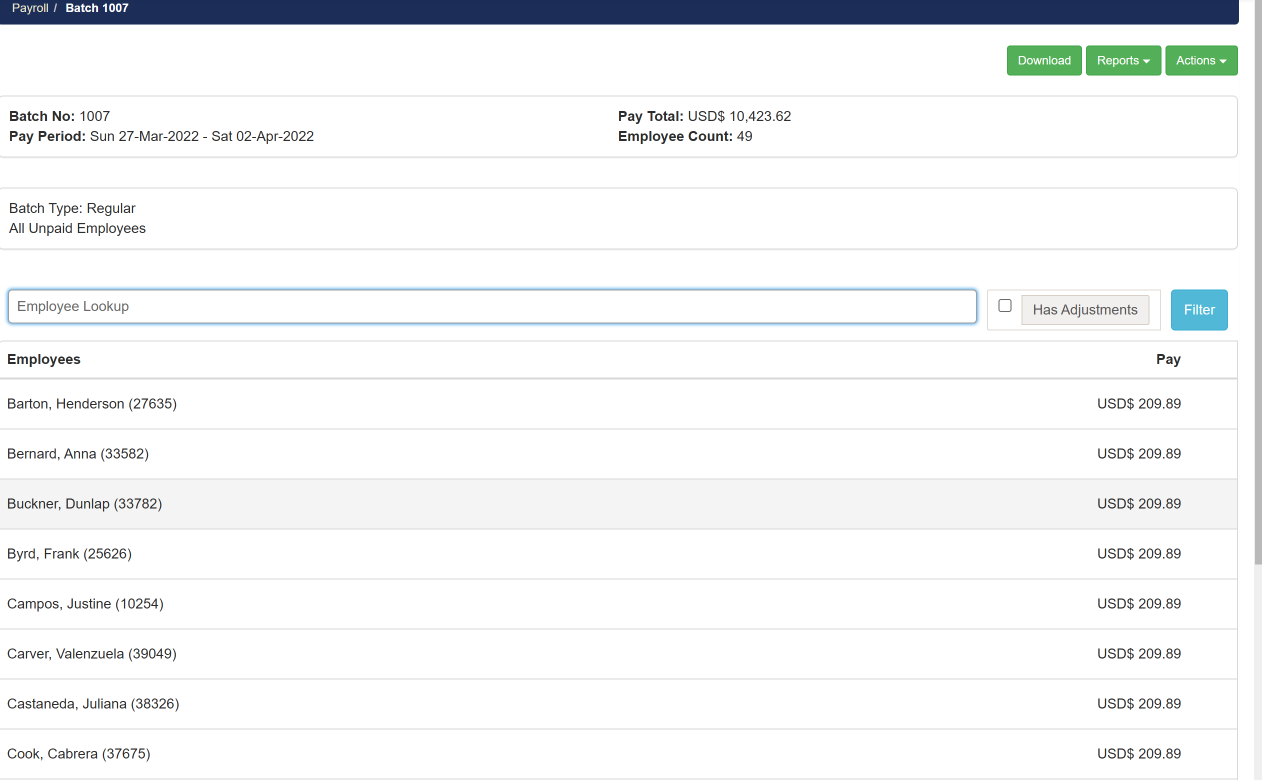
The Payroll Batch Detail screen displays a breakdown of the employee pay.
Comments
0 comments
Article is closed for comments.