
Contracts allow you to set up the jobs that appear on timesheets and the compensation for the jobs.
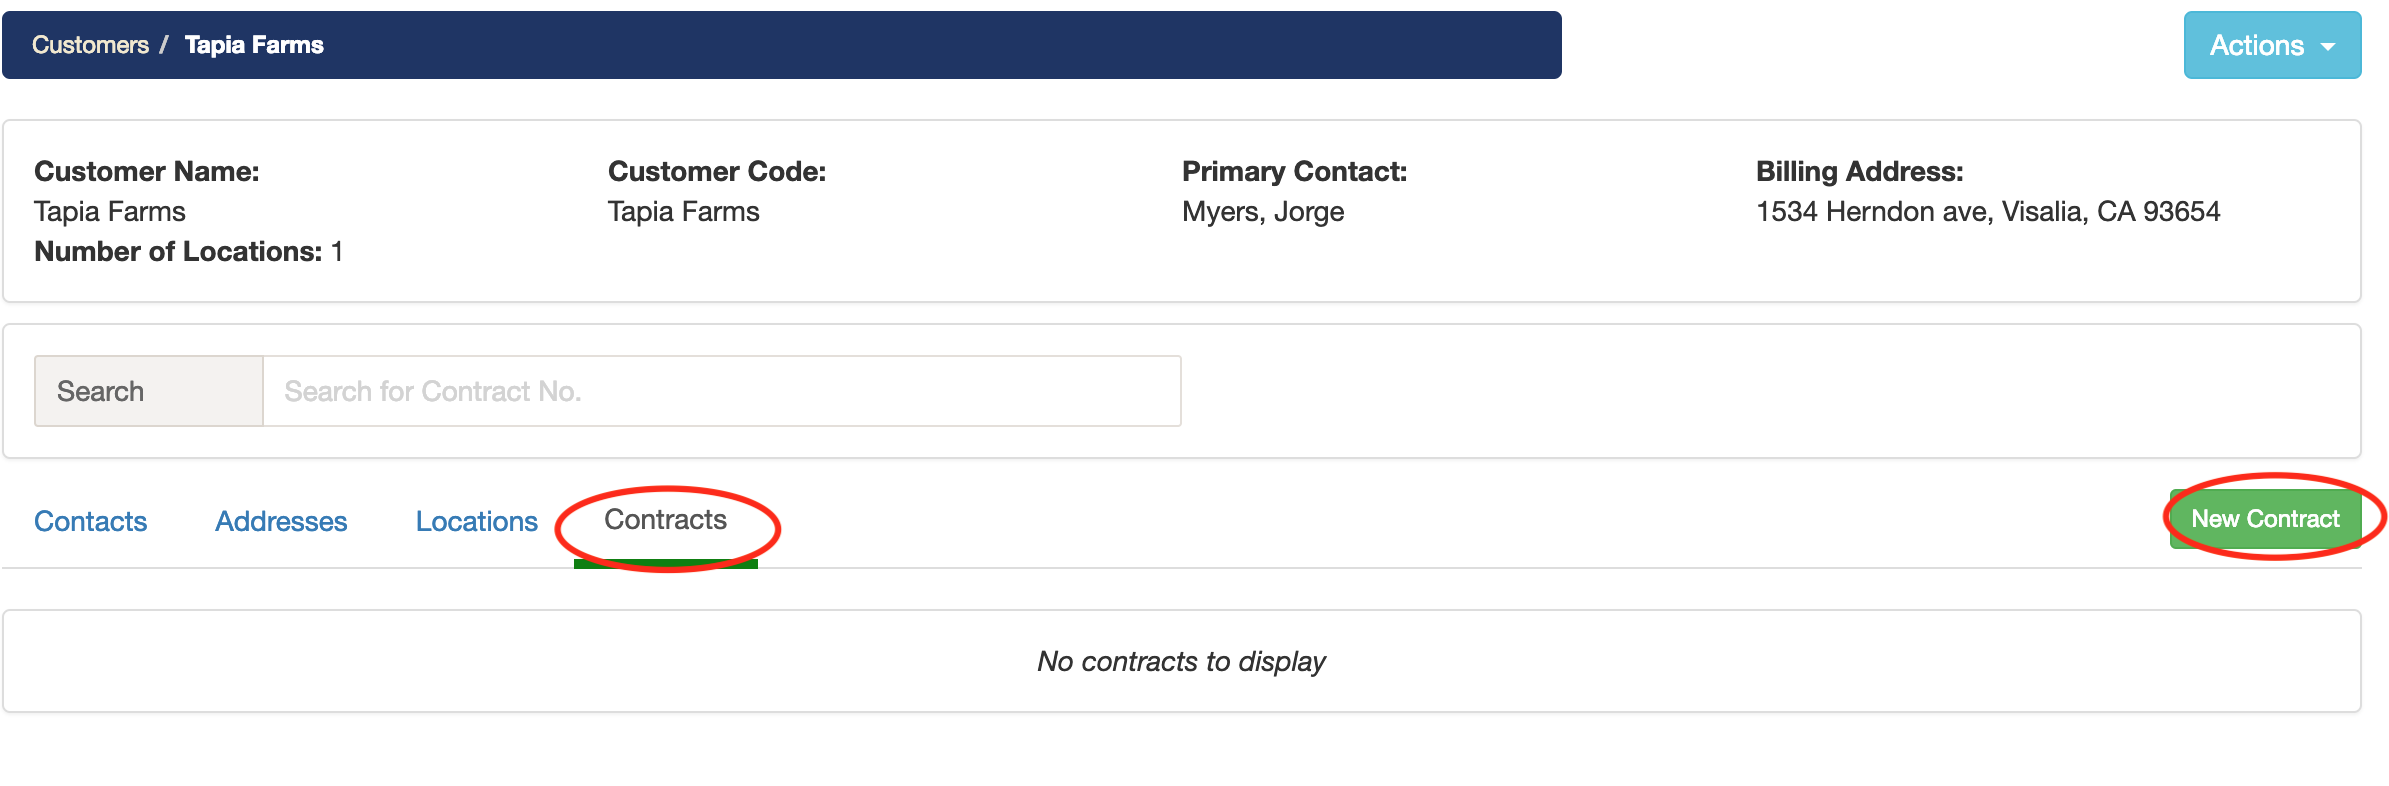
1. When you are viewing a customer, make sure you have added customer locations before creating a new contract. Then, select the Contracts tab and then click on the New Contract button.
2. A window will display with multiple data points. Enter a Contract Number. (You can use any name you desire for the contract number). Now add the effective dates of the contract. (Please note, when you create work assignments only contracts within the range of effective dates will be available.) Lastly, enter the Commission Rate, if applicable. When you are finished entering the data, click on the Save button.

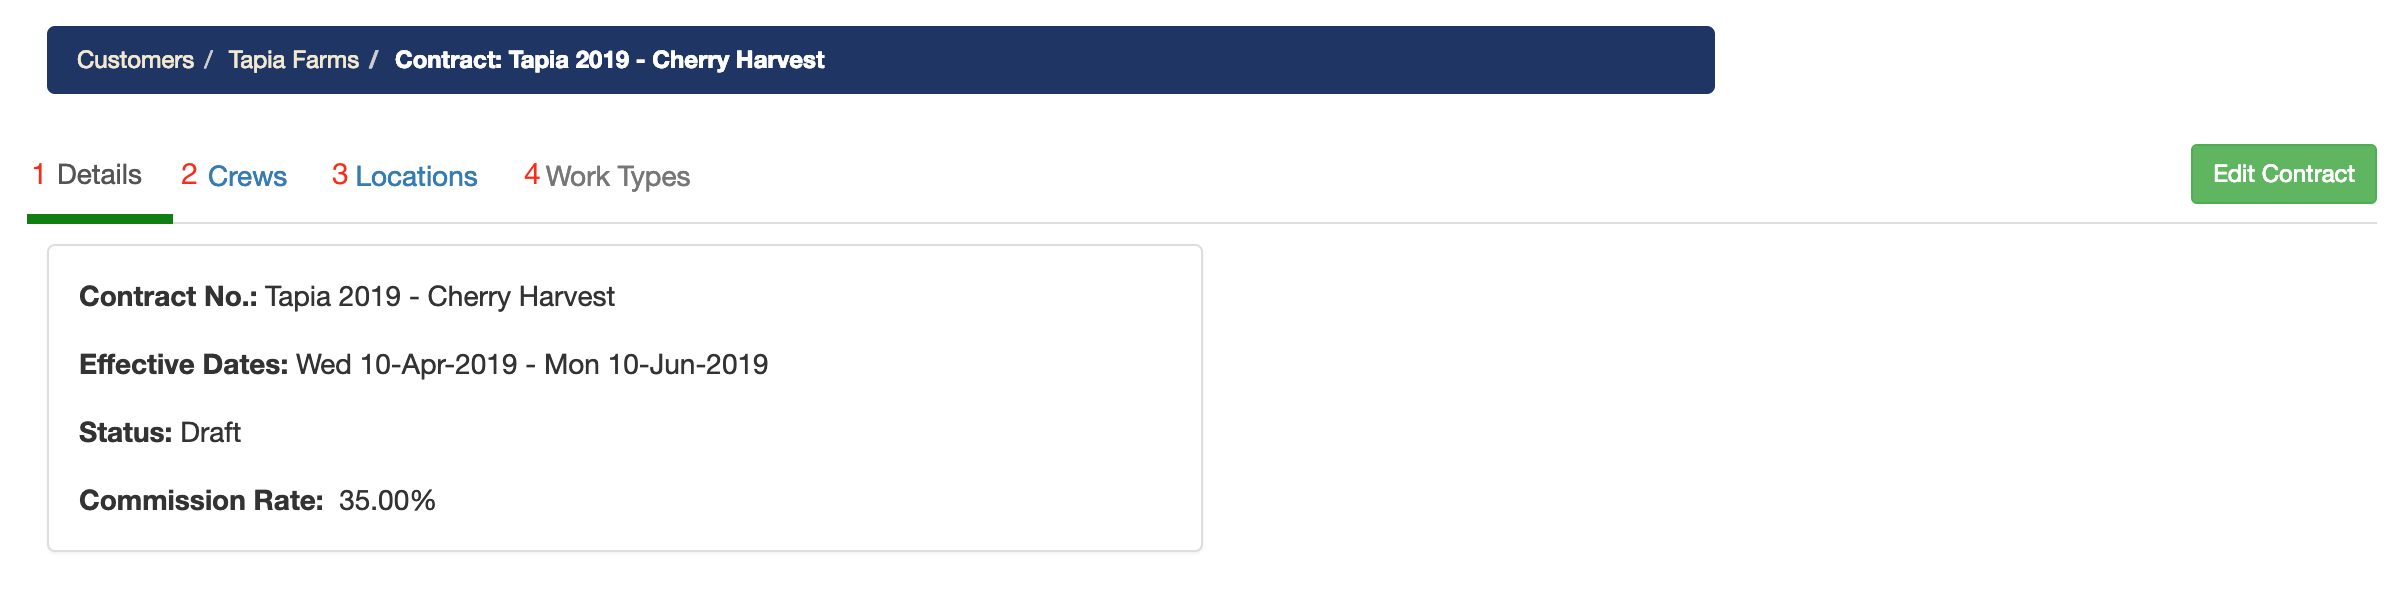
3. Now you will see the newly created contract. You can click on the contract to edit it.

Once you are editing the contract you'll see 4 tabs: (1) Details tab where you can view an overview of the contract. (2) Crews tab where you can add crews that are available to work under this specific contract. (The list of crews comes from the Workforce section. You cannot add new crews here, you must first add them to the crews list in the Workforce section.) (3) Locations: tab where you can add locations that are subject to this contract. (The list of locations comes from the customer's locations. You cannot add new locations here, you must first add them to the customer and then you can add them to a contract.) (4) Work Types tab where you can manage the work types for the contract. (You must first add locations before you can add work types).
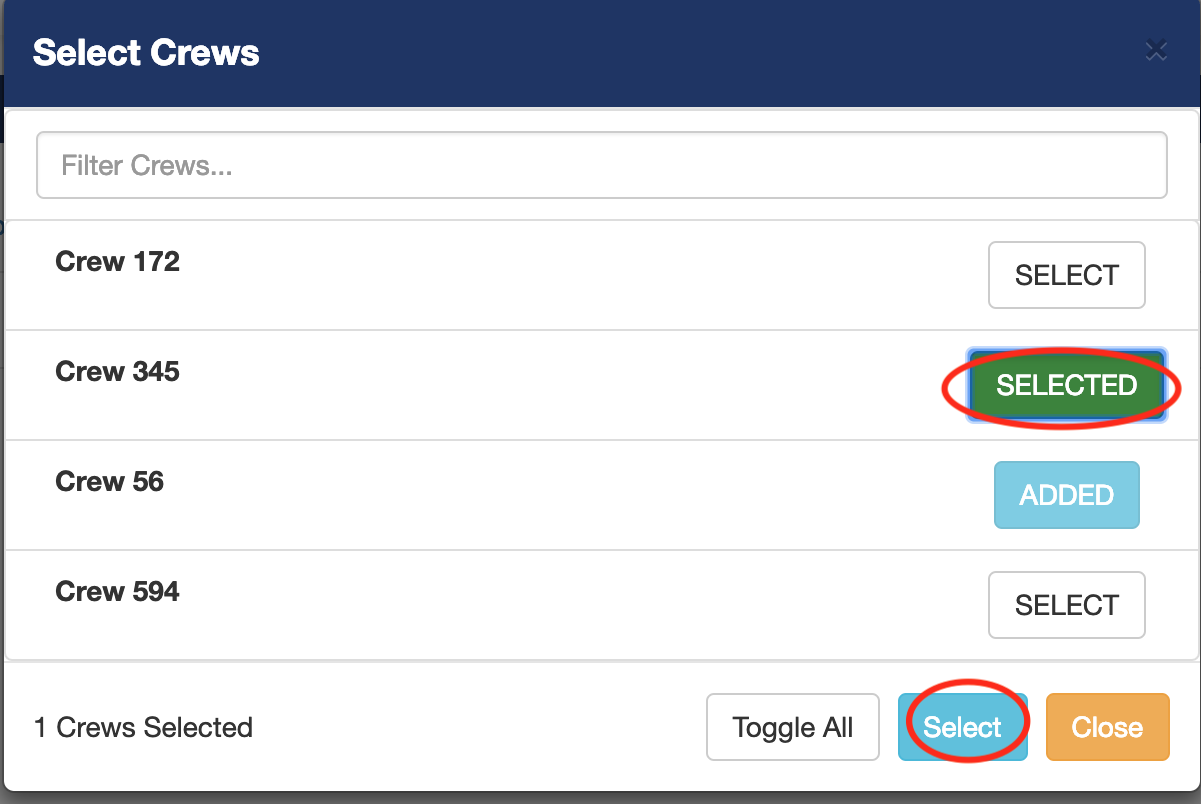
4. Start by selecting crews you'd like to add to the contract (You must first create crews in the workforce section.) Click on the Add Crews button to select crews for the contract.

A list of crews will display and you can select the crews who do work under the contract. When you are done selecting the crews, click on the Select button.
Related link: Managing crews
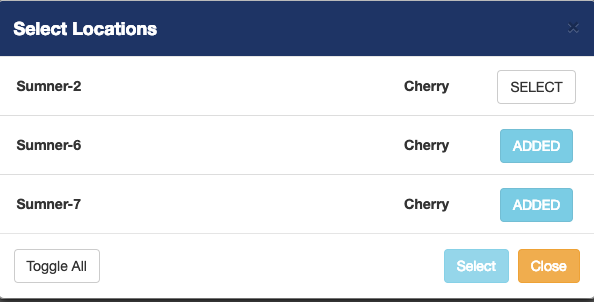
5. Next, select the Locations tab. (Locations must be added to the customer before you can add them to this contract.) Click on the Add Locations to select the locations for this contract.

A list of locations will display and you can select the locations that are applicable to this contract. When you are done selecting locations, click the Select button.
6. The final step to creating a contract is adding the work types. You select relevant work types for this contract. The list of work types are system generated, based on the commodities of the locations that you add to the contract.
Comments
0 comments
Article is closed for comments.