
To find the Work Types section select a Customer -> Contract -> Work type
In the work types, you can add commodities and associate a product to the commodity. You can also add the Jobs the employees will be doing, automatic activities to determine the default length of breaks/lunch or to determine the type of non-productive time. Finally, Compensation to adjust the employee's wages accordingly.
Work type only becomes available after you have selected the locations you will be using.
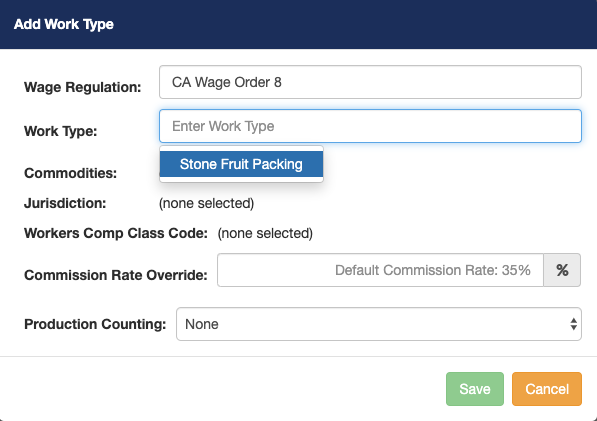
1. Select the work types tab and on the right-hand side adjacent to the work types tab click the add work type button.

Pago lets you choose 3 Wage Regulations. The chosen wage Regulation determines the Work types available. The wage regulations also determine how the Pago compliance engine processes time and production data.

The work type chosen helps in determining the worker's compensation code. Notice a list of work types will be displayed. The list is based on the commodity chosen when you first created a location. (If you don't see the appropriate work type verify that you have chosen the correct commodity when creating a location).
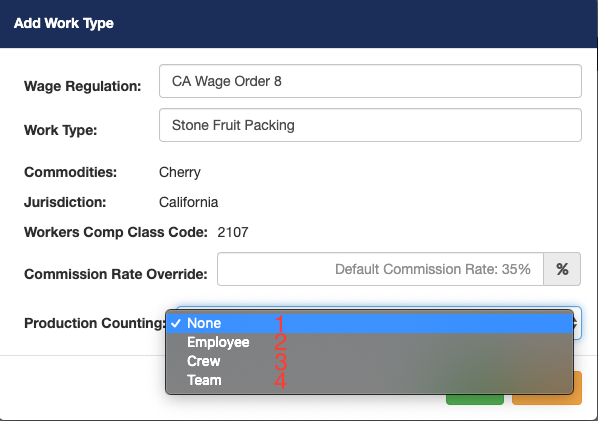
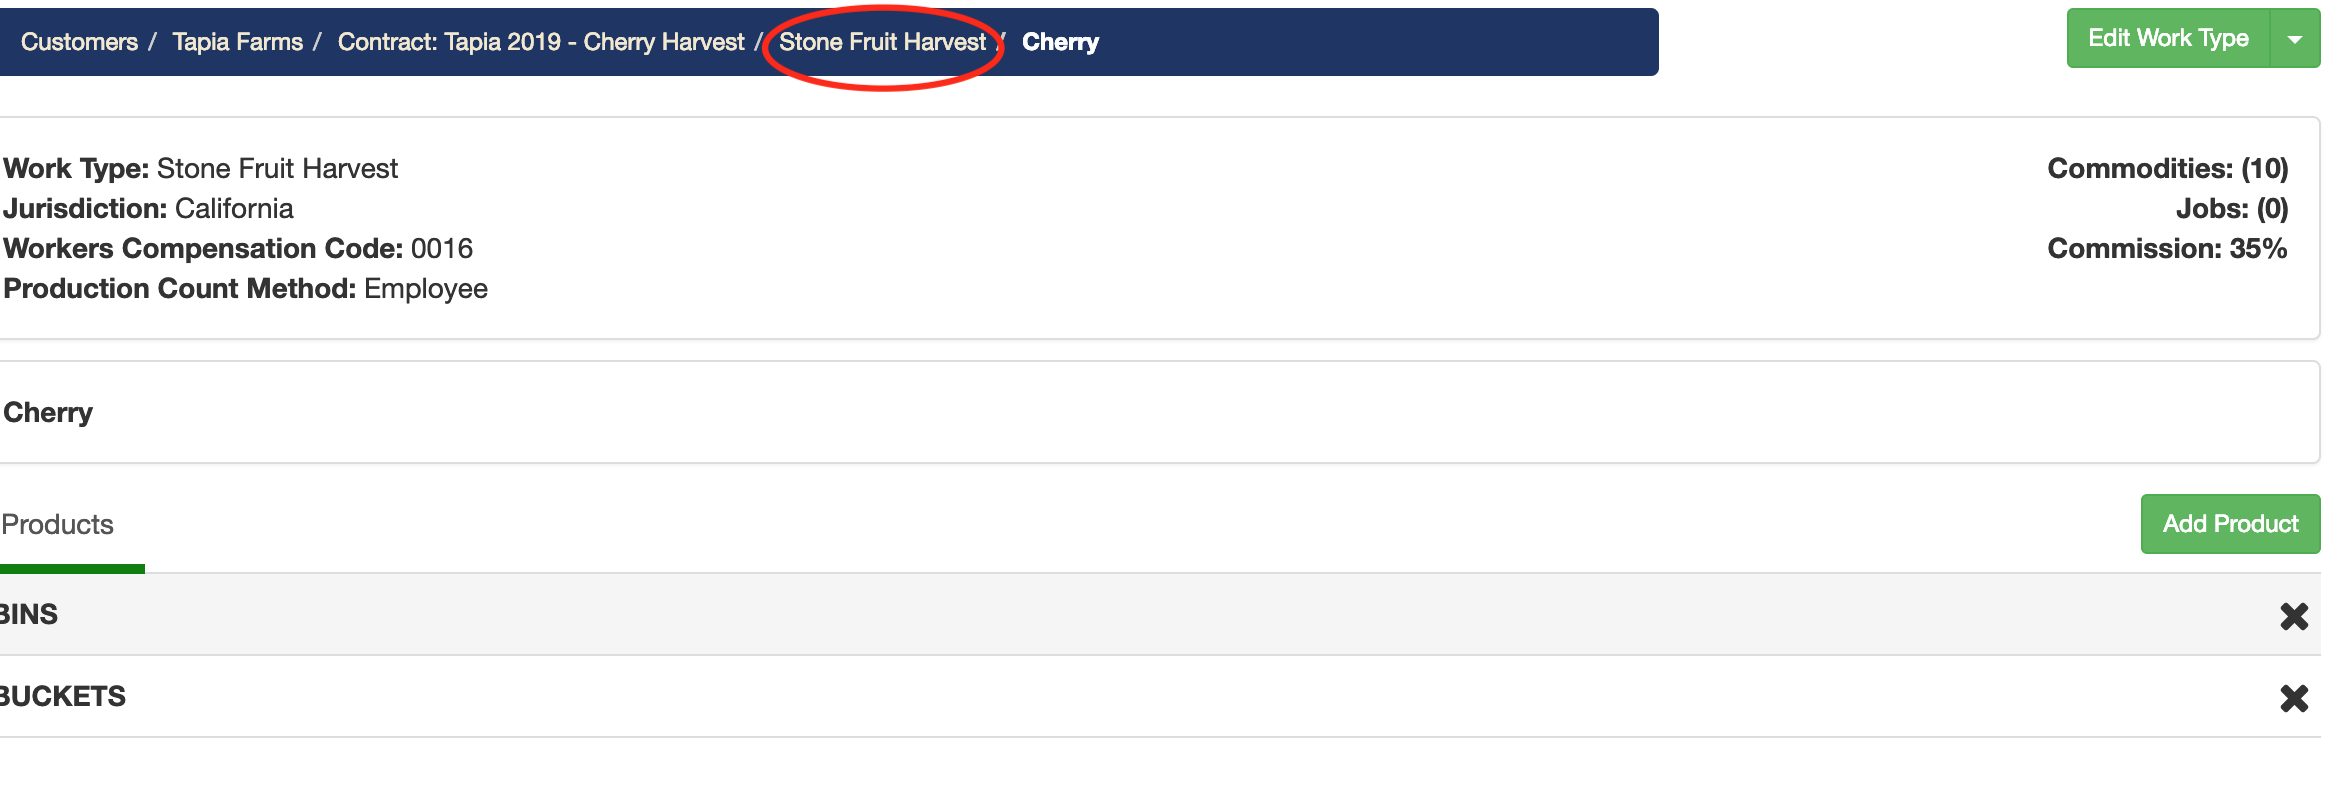
Jurisdiction: Pago currently only supports California, so make sure you select California. You will immediately see the workers' comp code appear underneath jurisdiction.
For our example we chose cherry as the commodity, so we will be choosing Stone Fruit Packing. Now notice production counting. Production counting are items that you count while timekeeping.
You will have four options to choose from. (1) None- by default it will be set to no production recording. (please note. If you leave it set as none you won't be able to select products when creating a work assignment) (2) Employee if you want to keep count of the production count per employee. (3) If you want to keep track of the crews' total production count. (4) If you have the crew split into teams, you can choose this option.
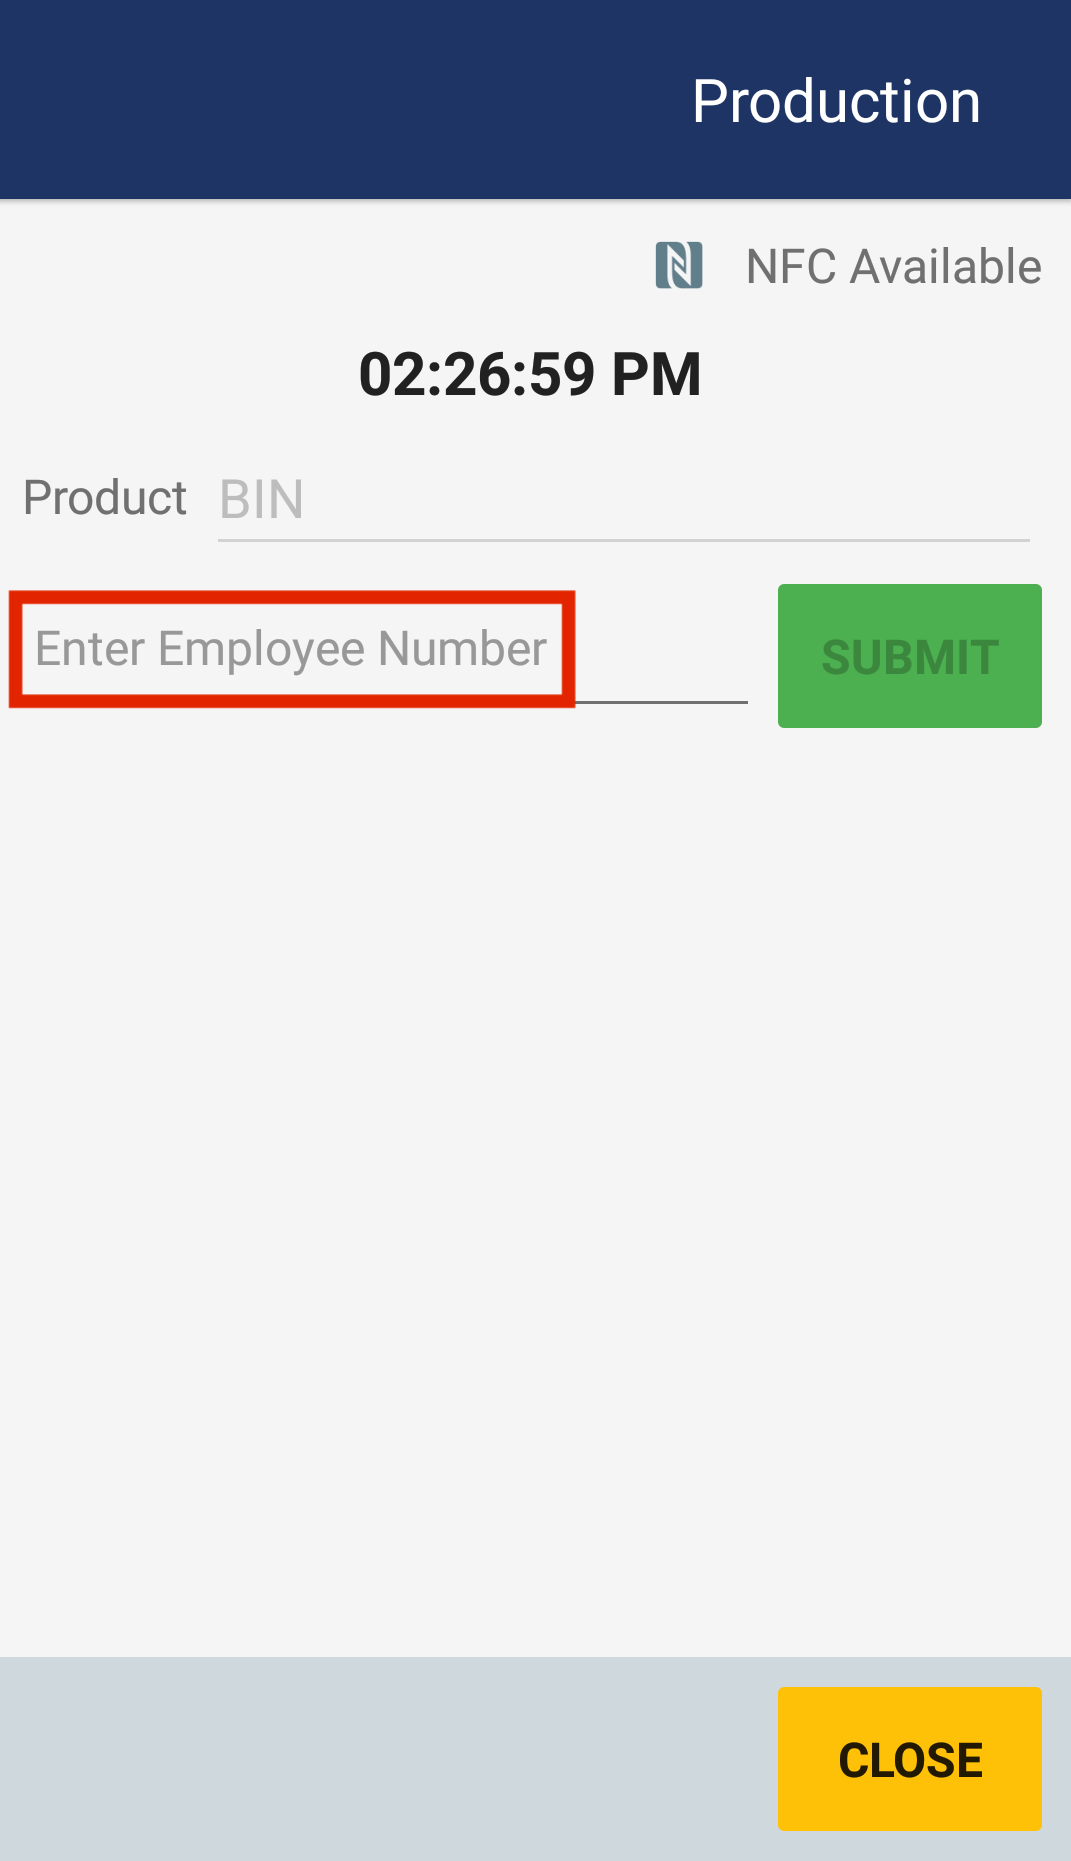
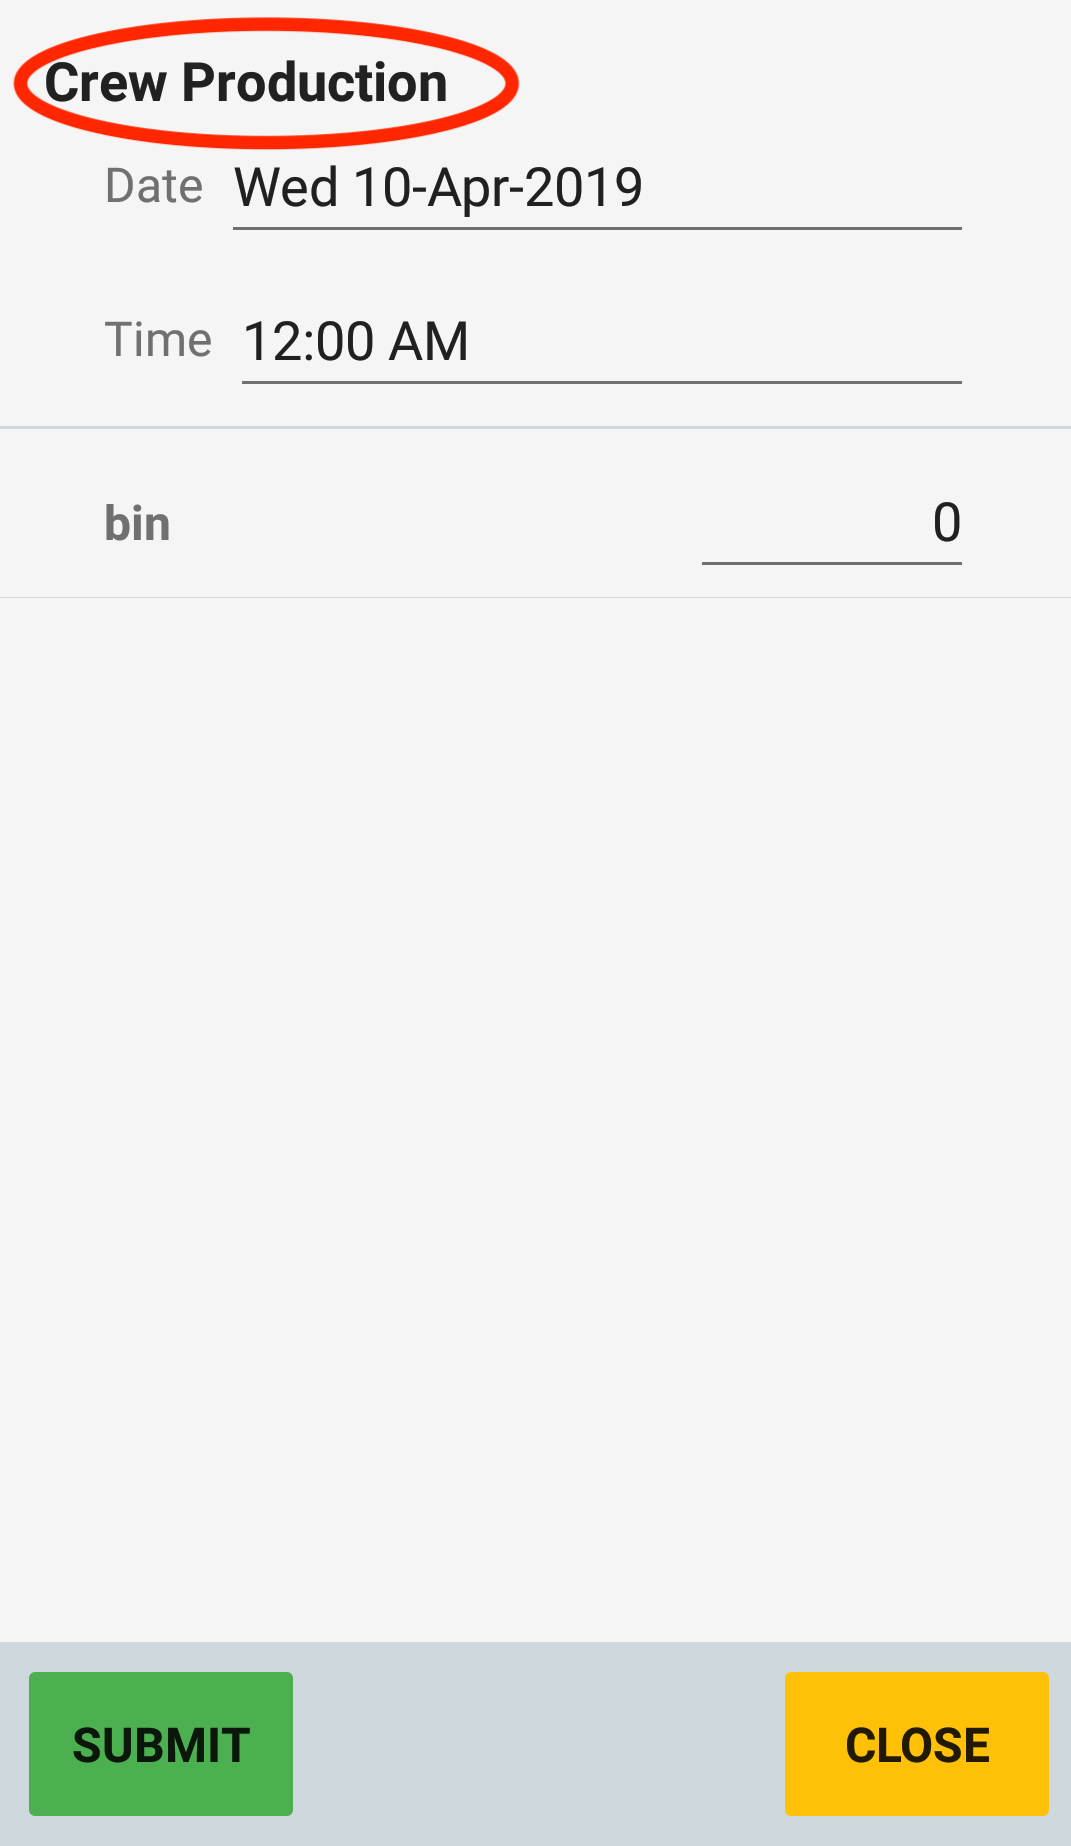
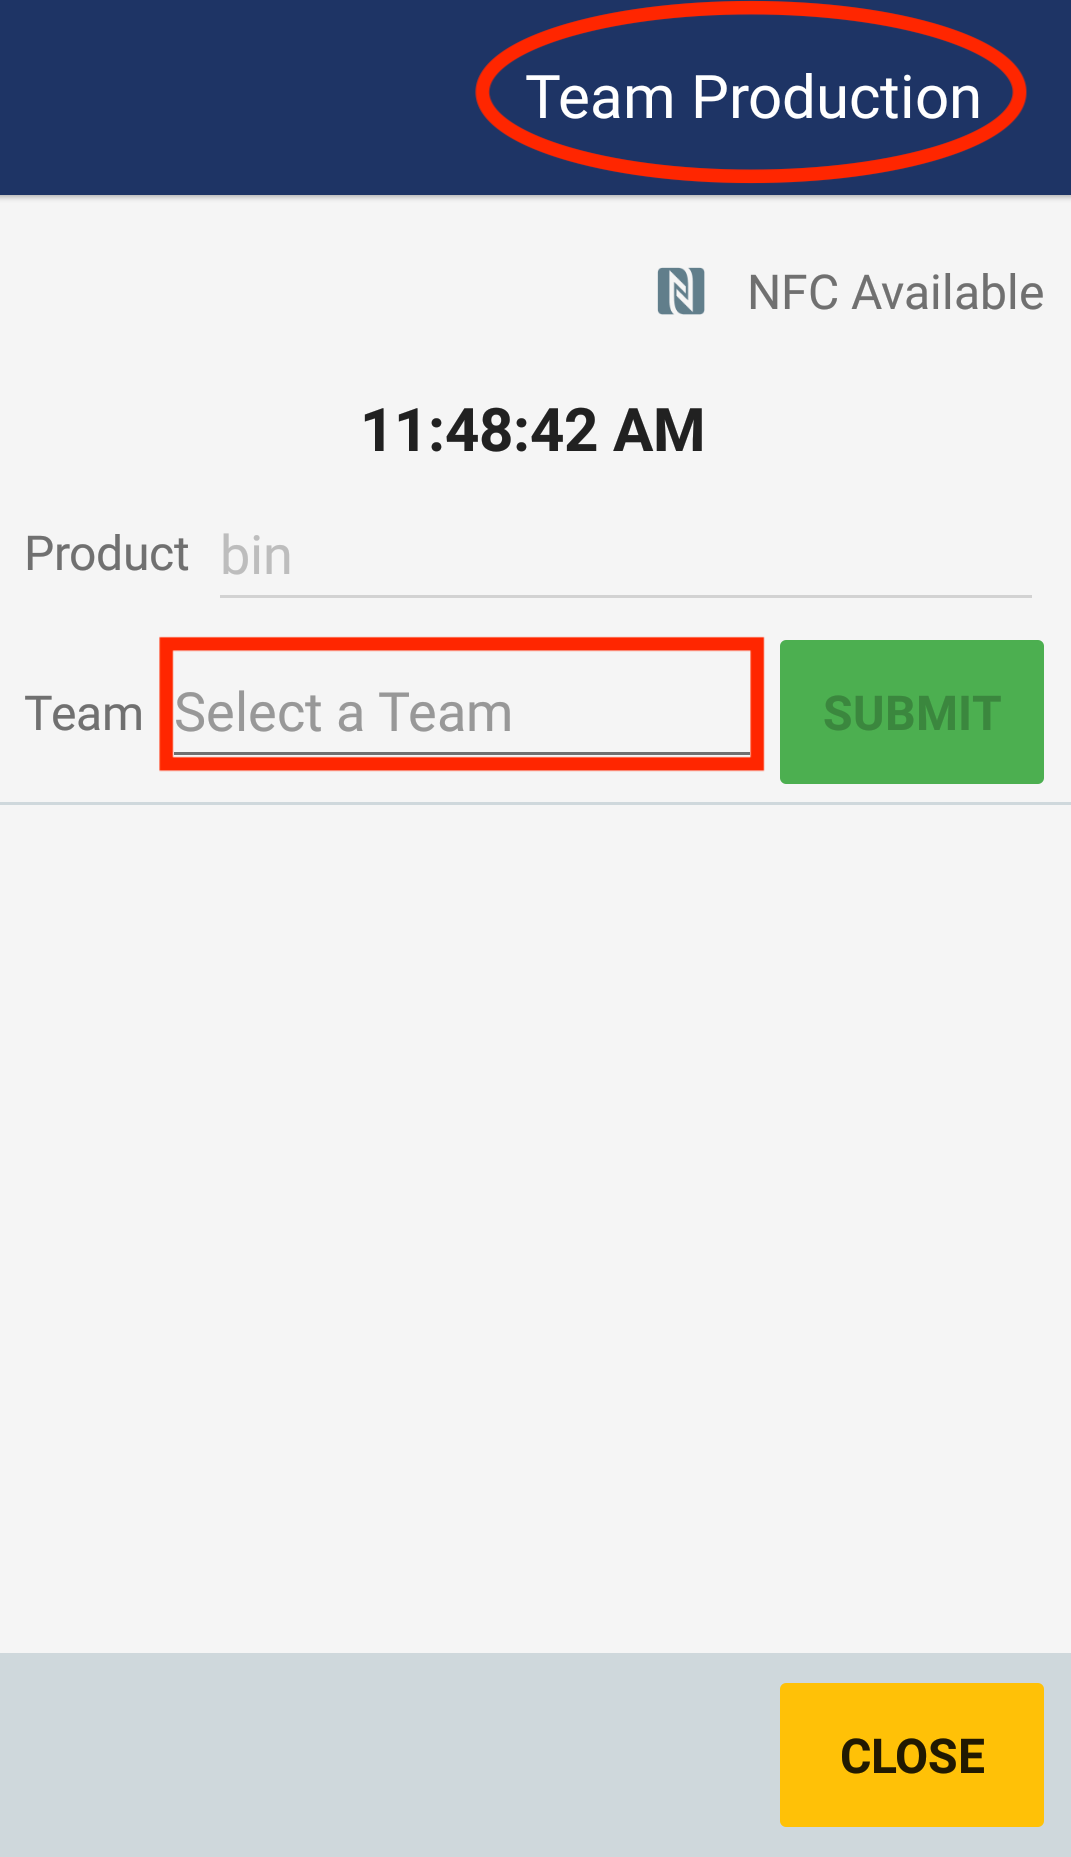
The following screenshots are examples of how production counting will look like on mobile (Please note. If you select none you won't be able to record production)
(2) (3) (4)
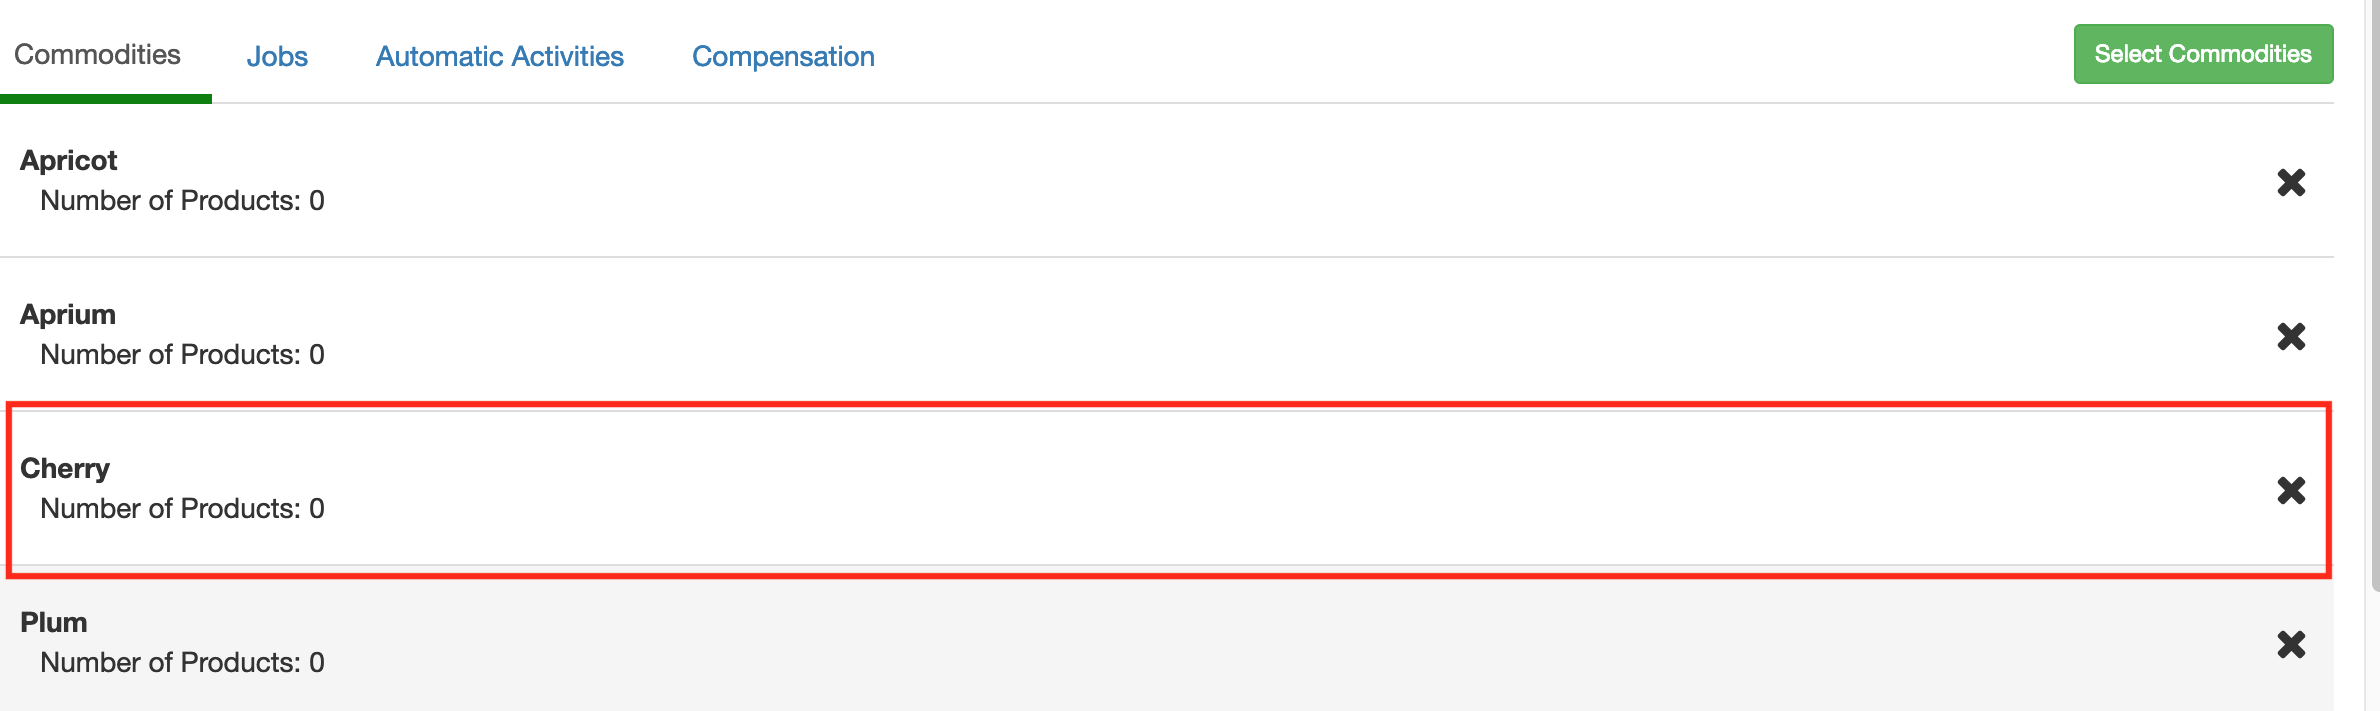
2. Now that you have started a new work type. Start by adding commodities. The commodities displayed are based on the locations.

3. Select the commodity you will be working with.
4. Once you have chosen a commodity, click on Add Product. Products are production items that you count while timekeeping. For cultural work, it could be something like "Trees". For harvest work, it's usually the product codes specified by the grower. (Note: you must add at least one product to the commodity or you won't be able to record production when doing a work assignment).

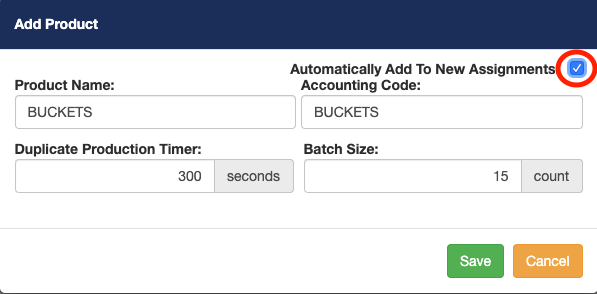
5. When adding a product you will first have to name the product.
The purpose of the duplicate production timer is to prevent employees from scanning the badge multiple times within a given timeframe. (Ex. An employee has just finished his bucket he now goes to scan his card and immediately tries to scan again. The system will not let him only until after 300 seconds from his last scan).
The batch size purpose is to alert the timekeeper once the batch has hit a certain size limit (ex. There are currently 14 buckets in the bin when an employee dumps out bucket number 15 the system will alert the crew boss that the bin is at its maximum capacity). (Note you can leave the production timer and batch size empty if you don't desire to use those features).
Notice on our example we have checked the box Automatically Add To New Assignments. This will add the default product to any new work assignment.
You can have multiple products added to the list and later choose the ones you will require for the specific work assignment at the work assignment level. Now go back one level to add jobs. You can click on the bread crumbs to back one level.
7. Now select the Jobs tab to add jobs to this work type. (ex. CREWBOSS, NETTING, THINNING, HARVESTING)Jobs will be available for workers to clock into. Each job can have its own compensation (Hourly, Piece Rate, Hourly + Piece Rate).

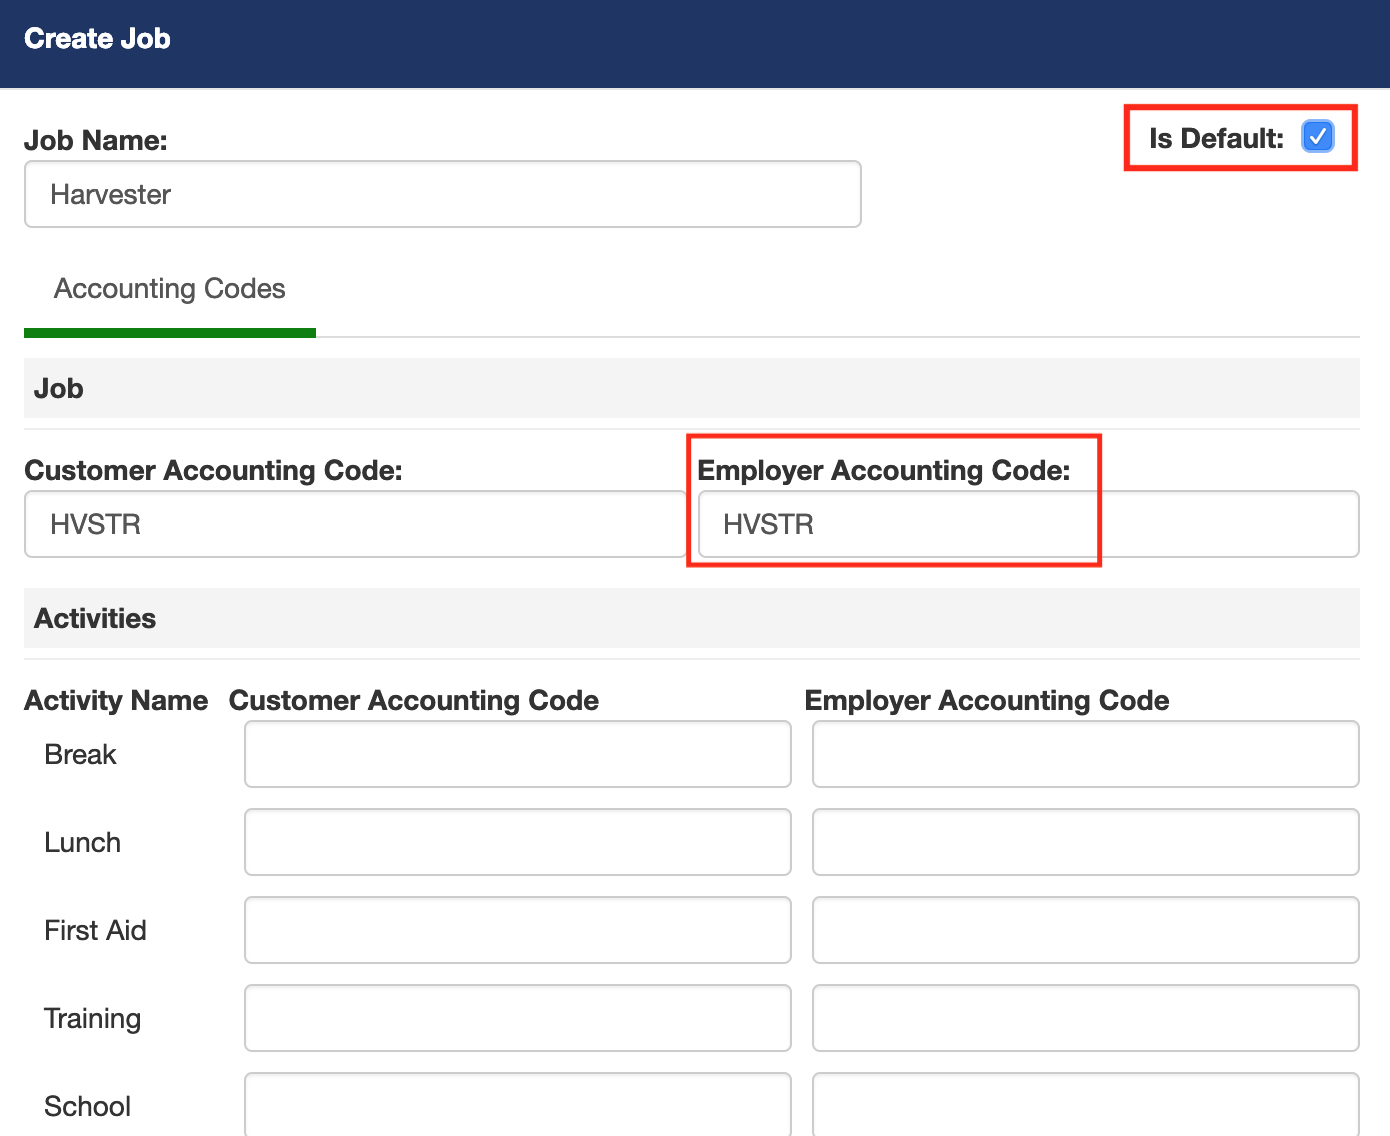
8. The create job window will appear. Add the Job name and customer/ employer account code accordingly. (Please note. Is Default check the box if you want the current job you are creating to be the default job for that work type). Save the job when done. (Also, note the employer acct. code will be used for payroll in the JOB ID column)
Now the following steps would be to add automatic activities. How to add automatic activities and set up compensation How to set up compensation.
Comments
0 comments
Article is closed for comments.