
This article provides an overview of editing work assignment time entries in the Pago web app.
Start Work:
The first step to adding time is selecting the employees you want to add time for. Once you select the employees on the top right click on Worklog Actions. Select Start Work.
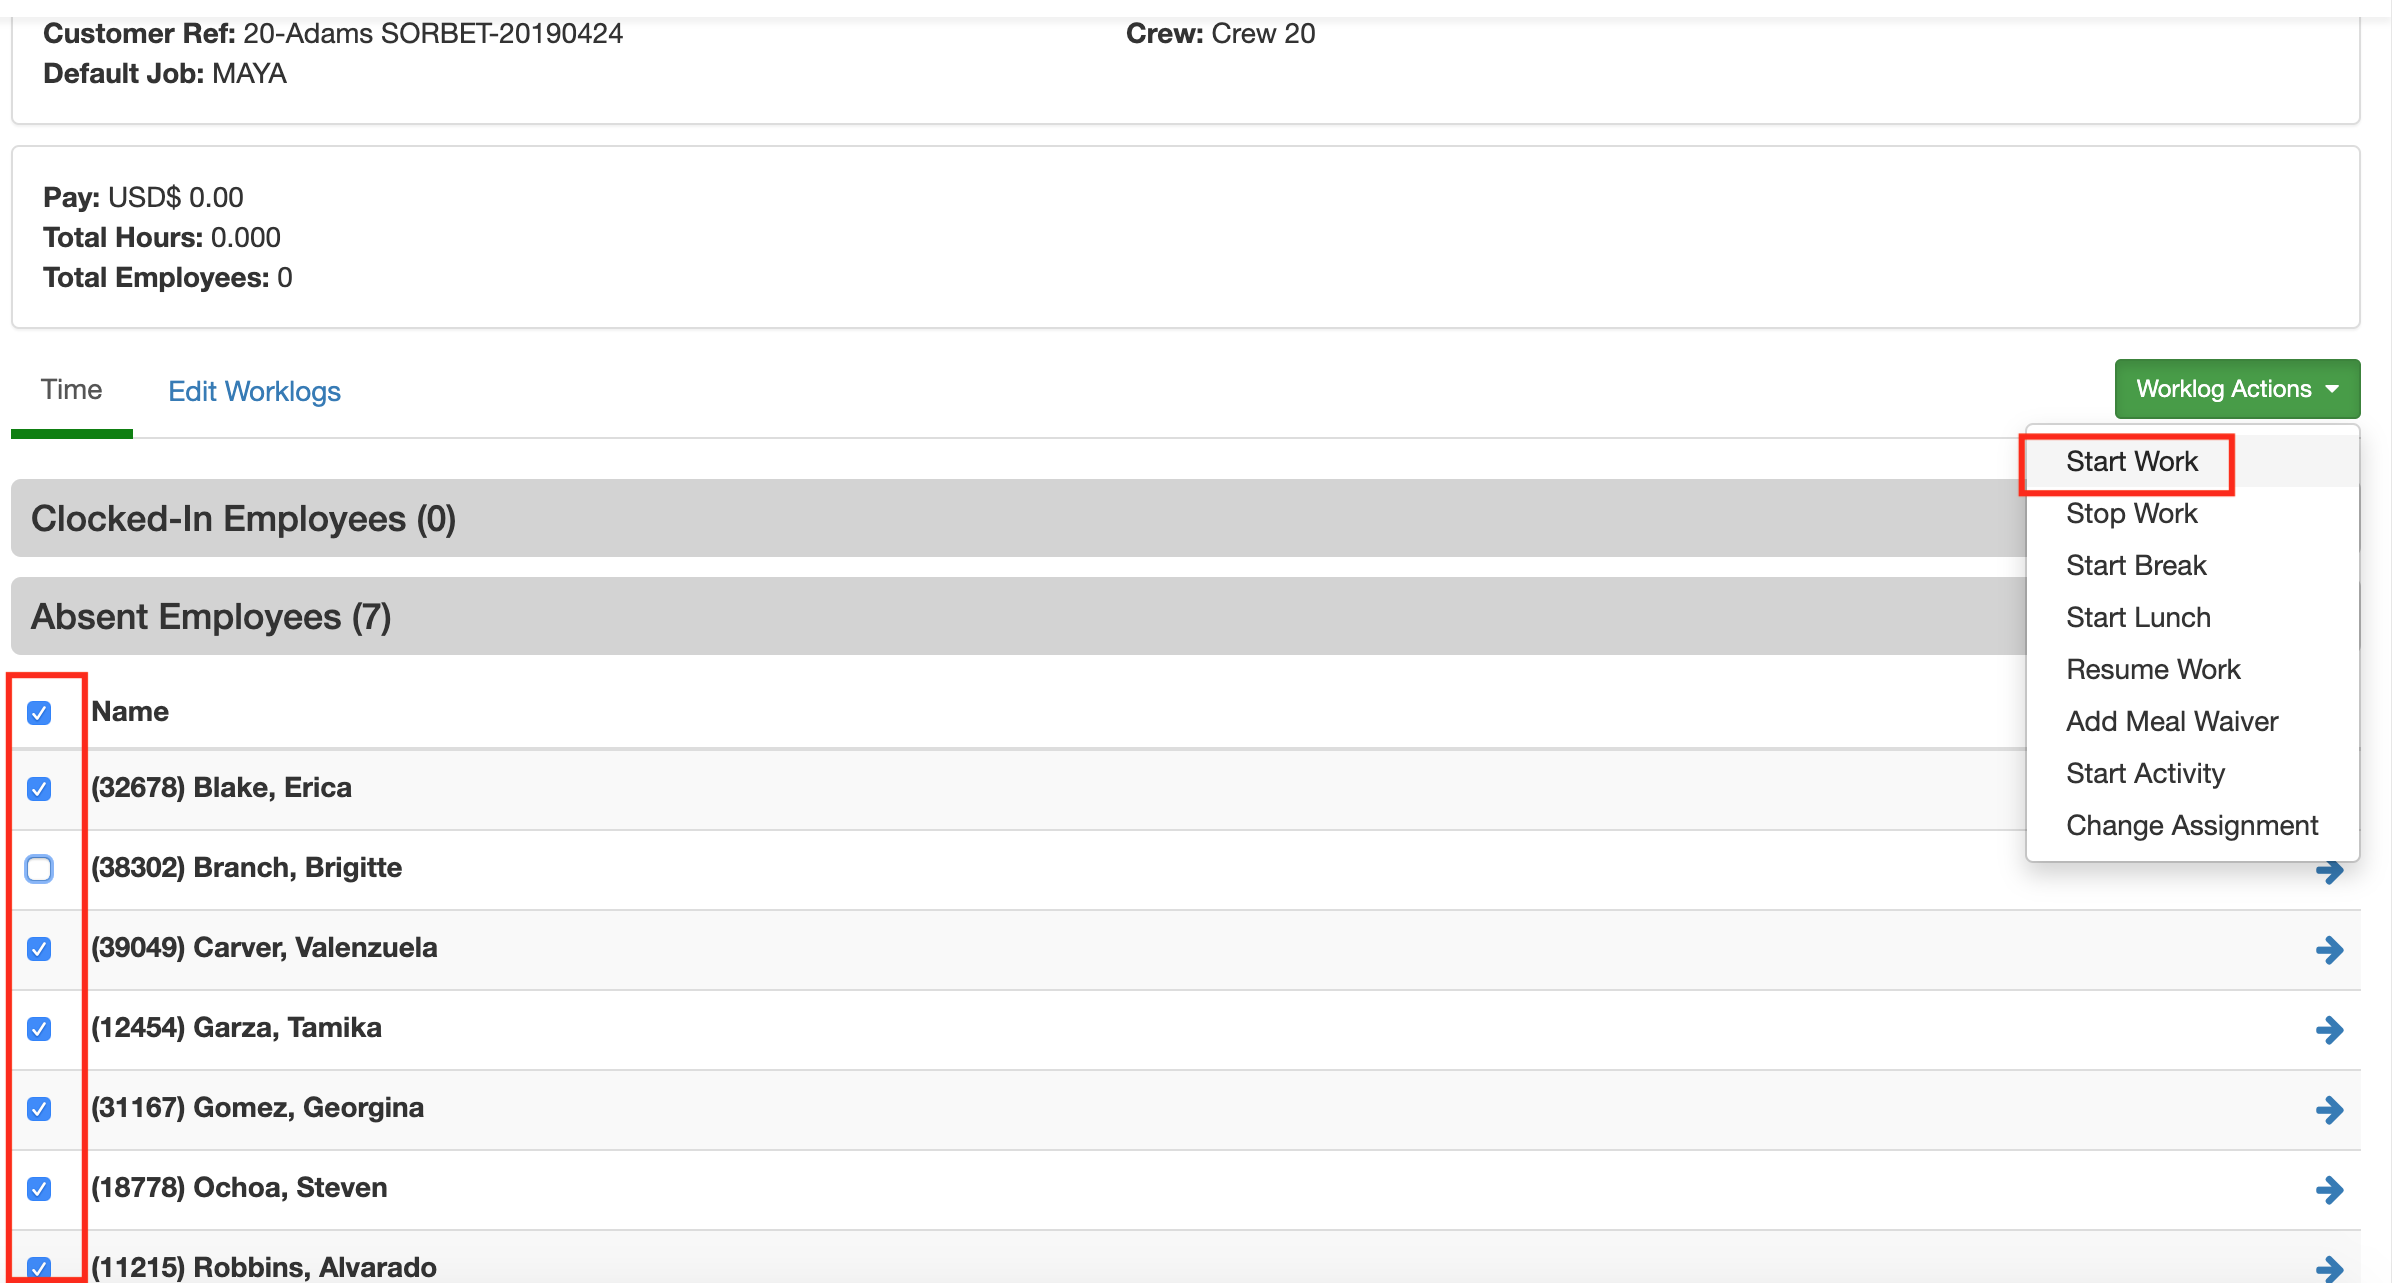
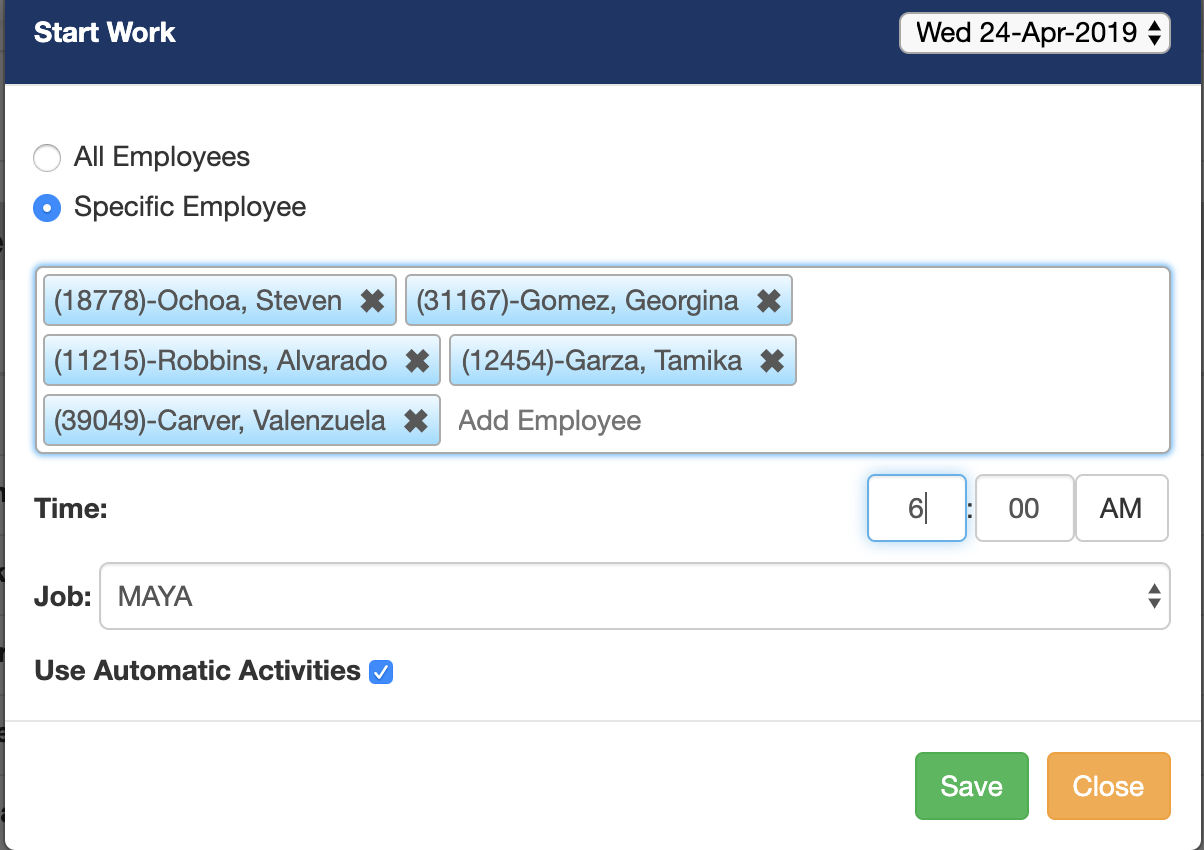
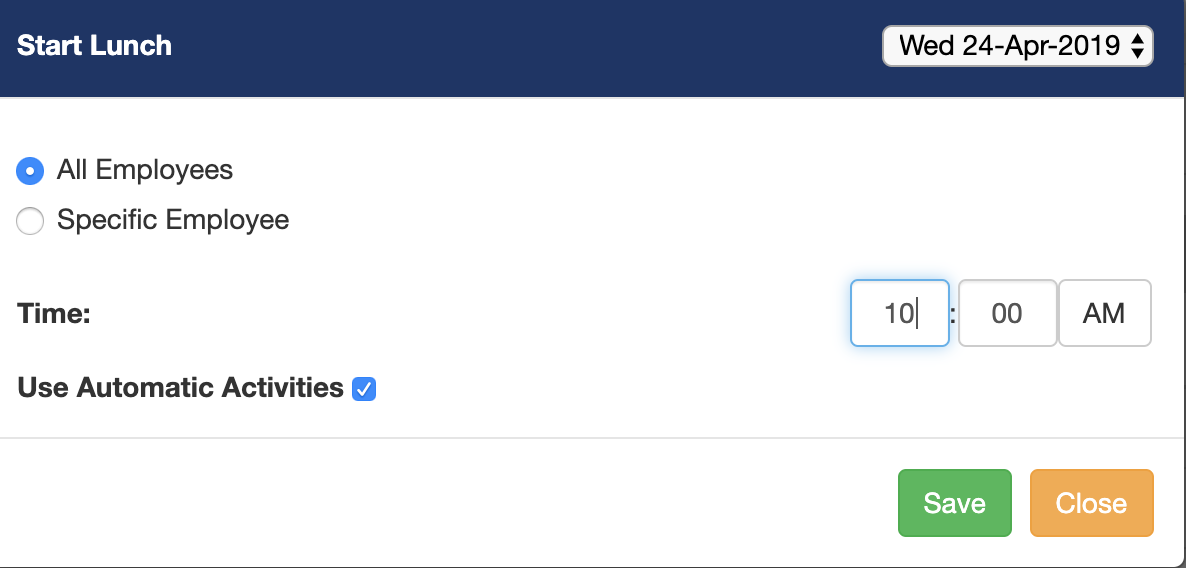
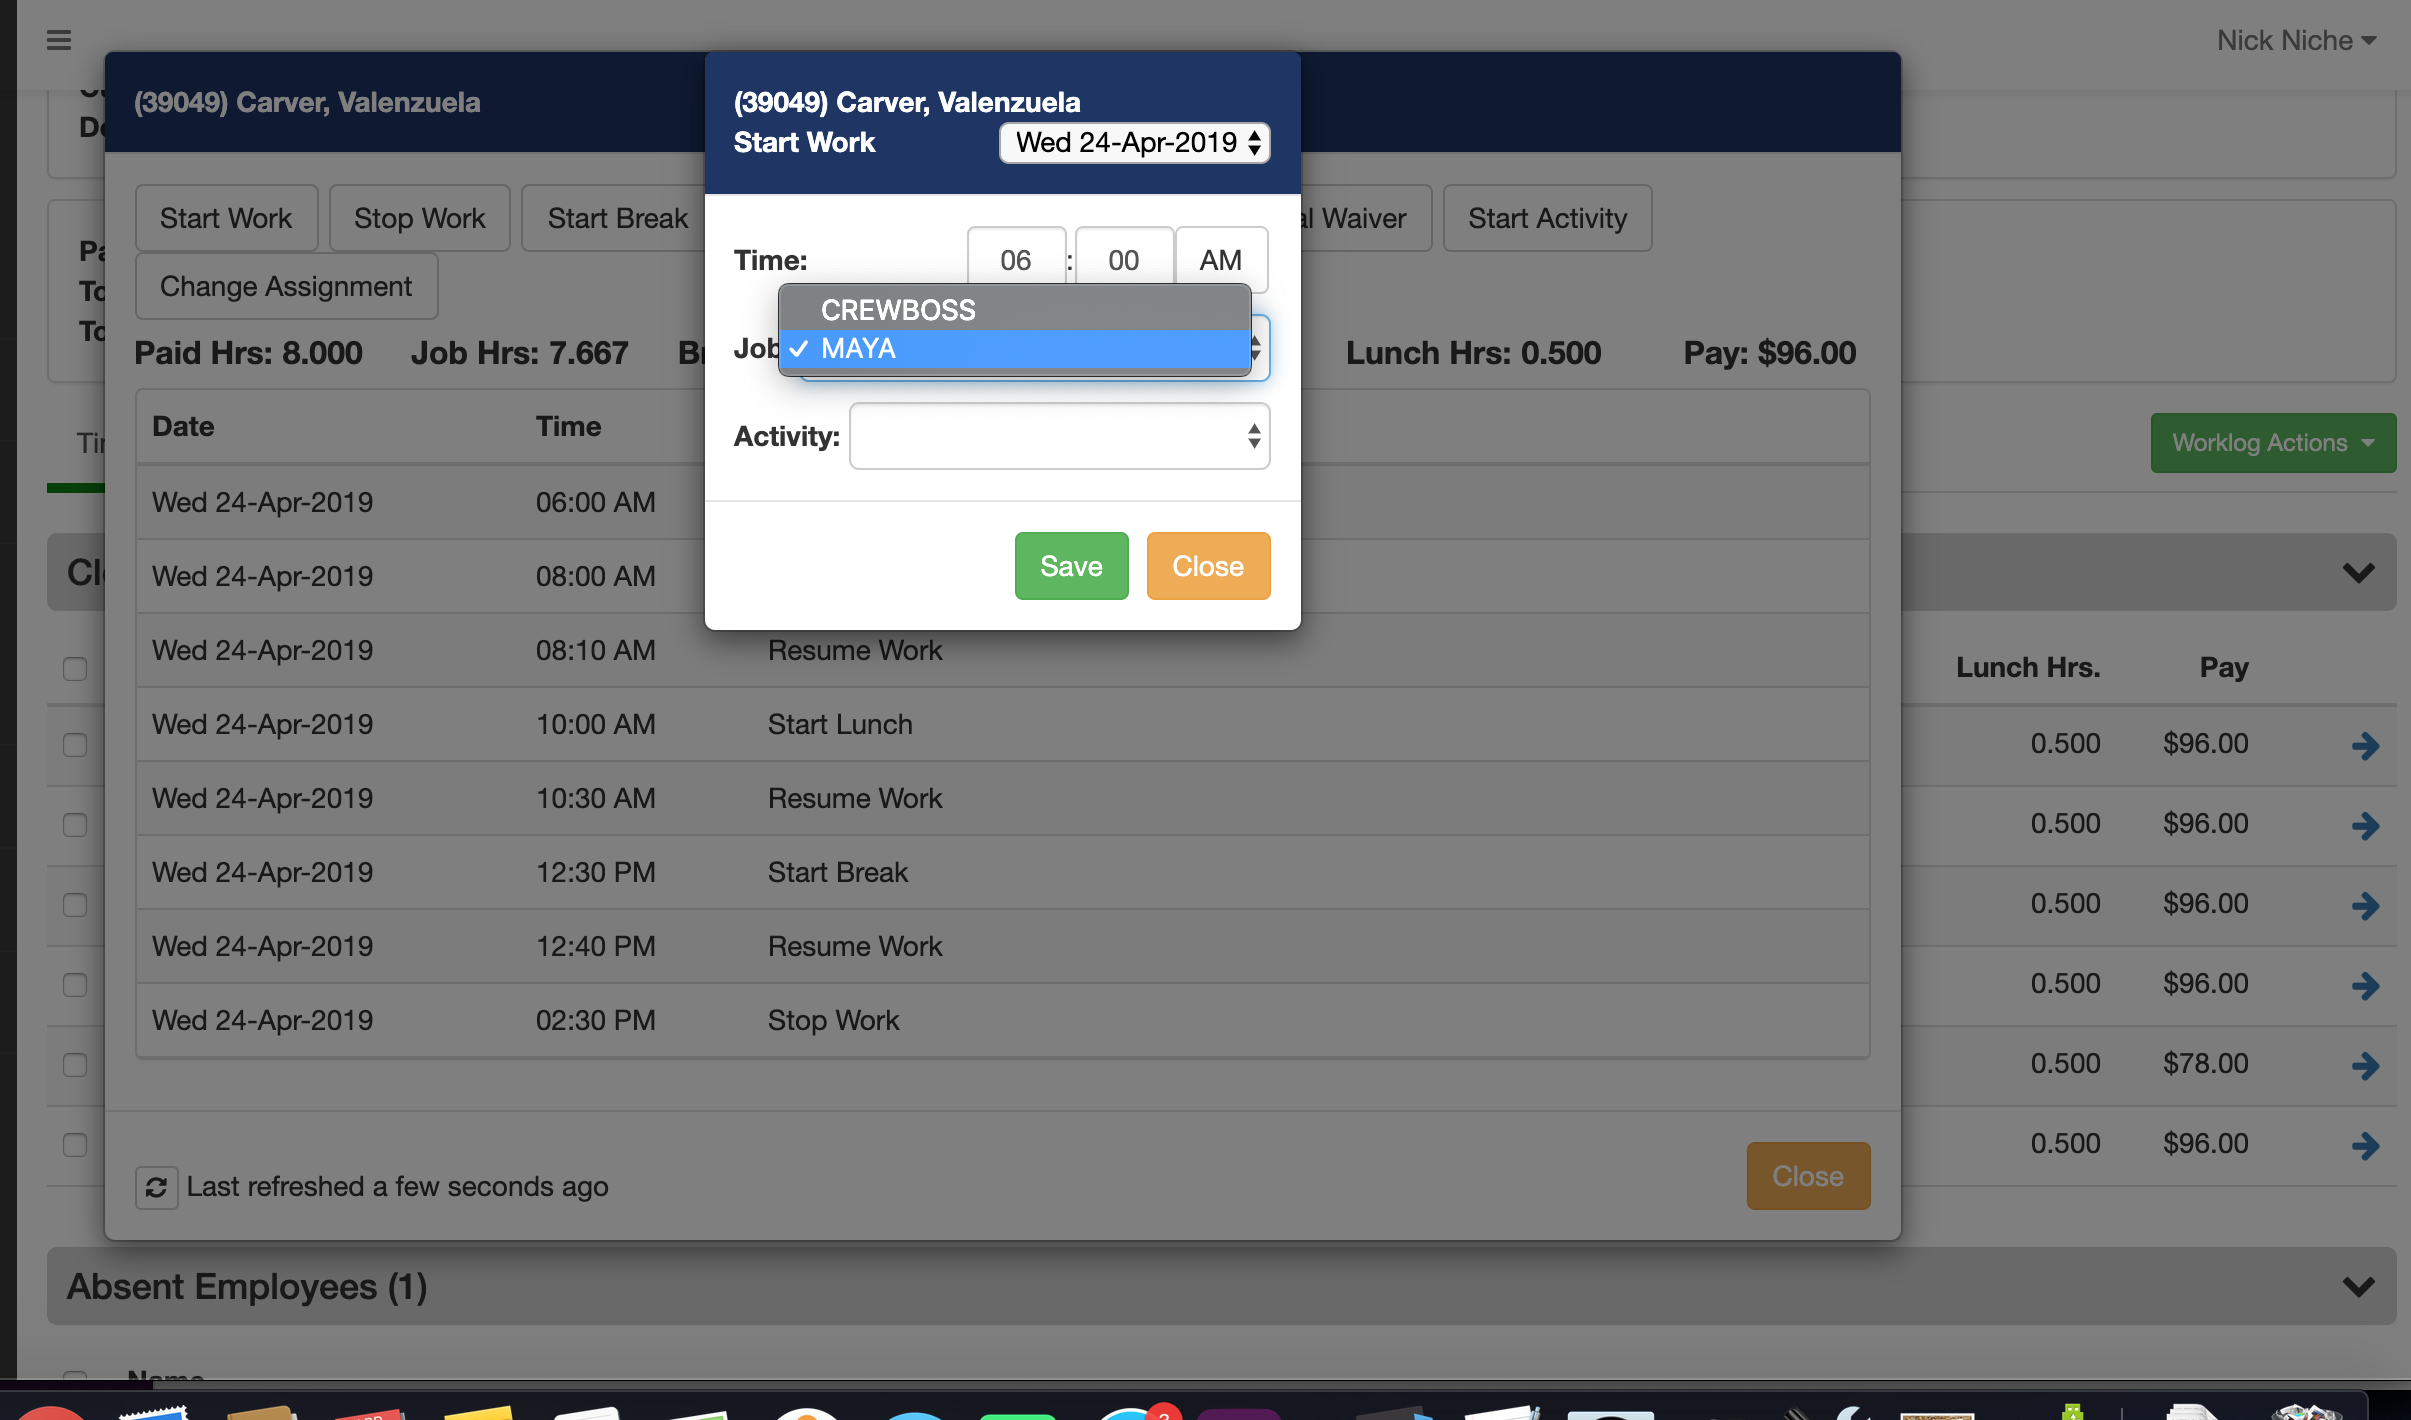
A new popup window will display with the name of the selected employee(s). In the popup window you can also add additional employees if desired.
Adjust the Time of entry for the selected employees.
The initial Job will be the default job for the work assignment. You can change the job if designed.
By default, the Automatic Activities option will be selected. If you unselect the option, Pago will not add automatic activities.
When you are done entering values click on the Save button.
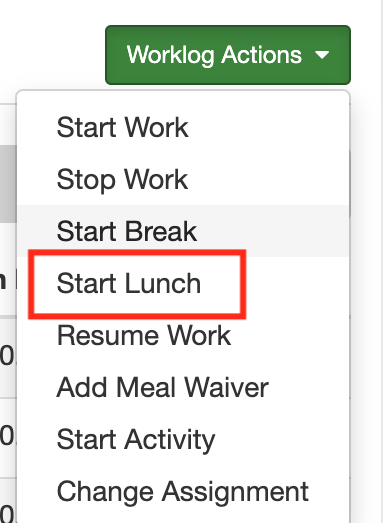
Start Break:
After you have clocked in employees to the work assignment with the Start Work action, you can add additional time entries. One option is to add breaks. From the Worklog Actions list, select the Start Break option.
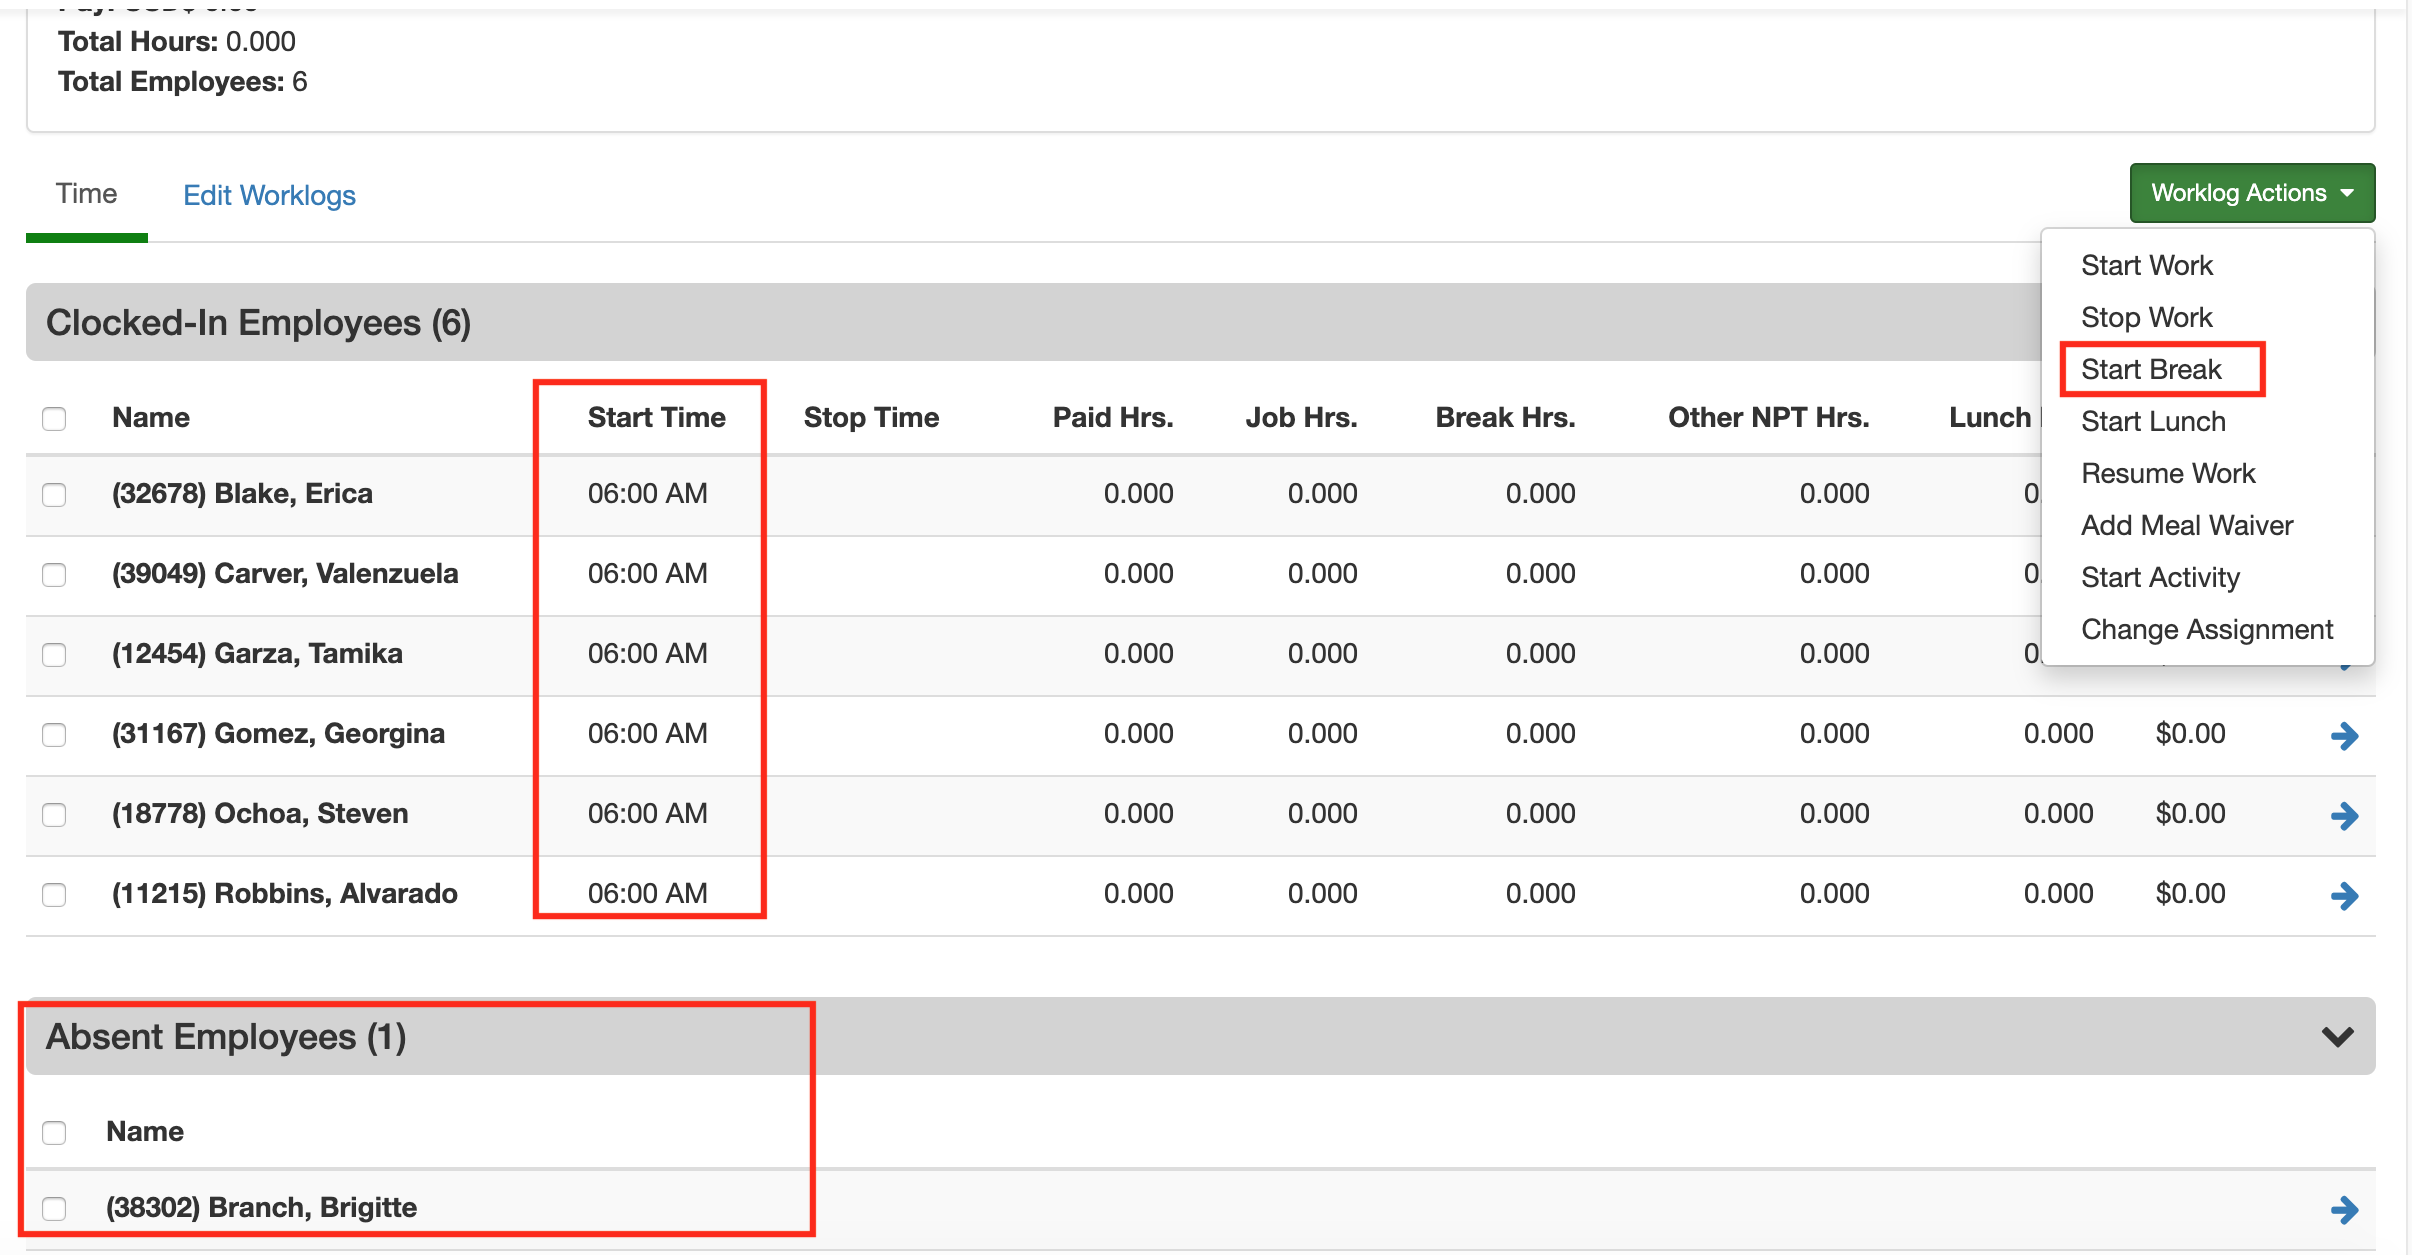
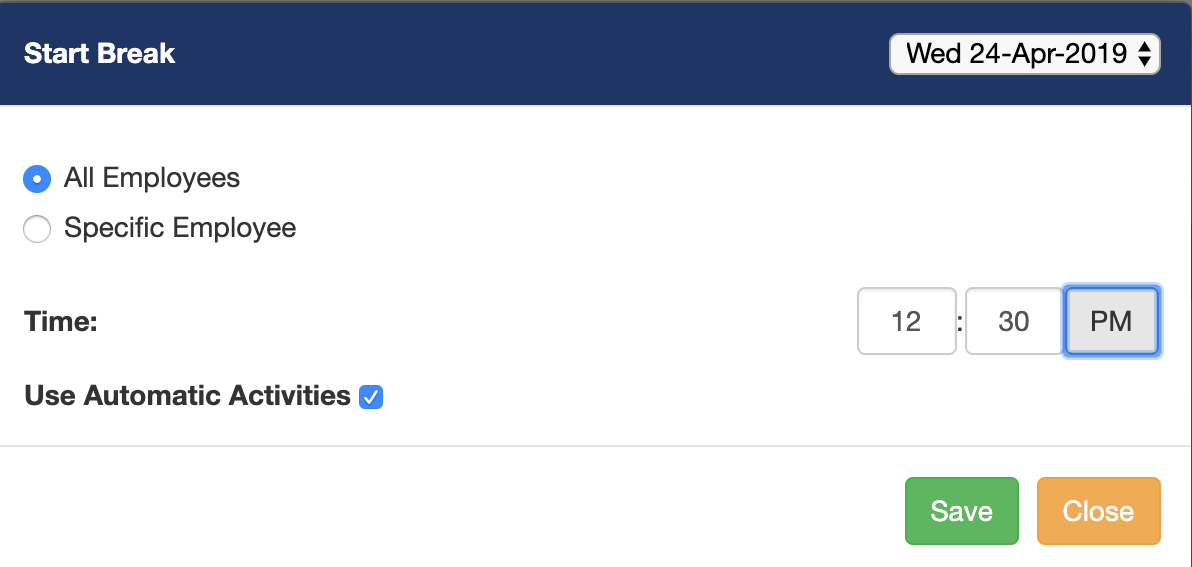
You have the option to start a break for all the clocked in employees or for a specific employee. For our example, we will Start Break for all the employees. You set the break time and decide whether to use activities or not. If you use automatic activities, Pago will automatically add a Resume Work worklog that sets the end of a break.
Start Lunch: Adding a lunch period is similar to adding a rest break.
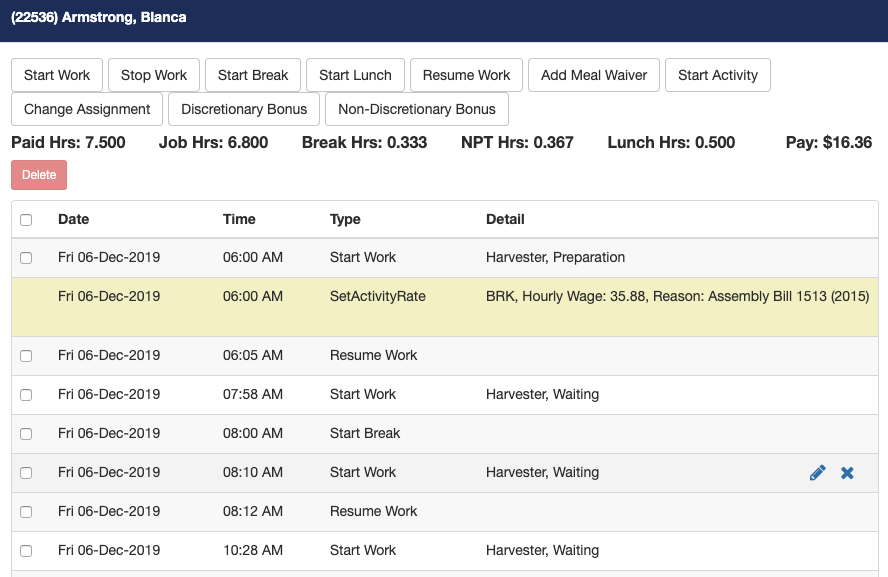
As you add breaks and lunches, you will notice that the employee summary totals will be updated in the work assignment review page. To see an employees detailed time entries, you can click on the employee record.

Once you clicked on a specific employee you will be on the Employee Summary page. On this page, you can view all of the time entries in a work assignment for an employee. If you see Resume Work entries that you did not create, those were created by the automatic activities settings for each job.
If you need to edit a time entry, you can click on the pencil button. If you need to delete a time entry you click on the x button. In addition, you can select multiple work logs and delete them simultaneously. Just select the checkbox next to the worklog and click on the delete button. The work logs with a yellow background are system generated and cannot be deleted.
Edit Jobs for a specific employee: If an employee is clocked into the wrong job, you can edit the time entry to change the job.
Stop Work: Employees are clocked out by adding a Stop Work time entry. Adding a stop work time entry is similar to adding breaks and lunches.
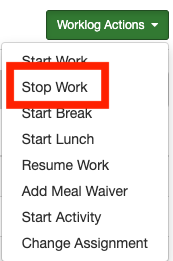
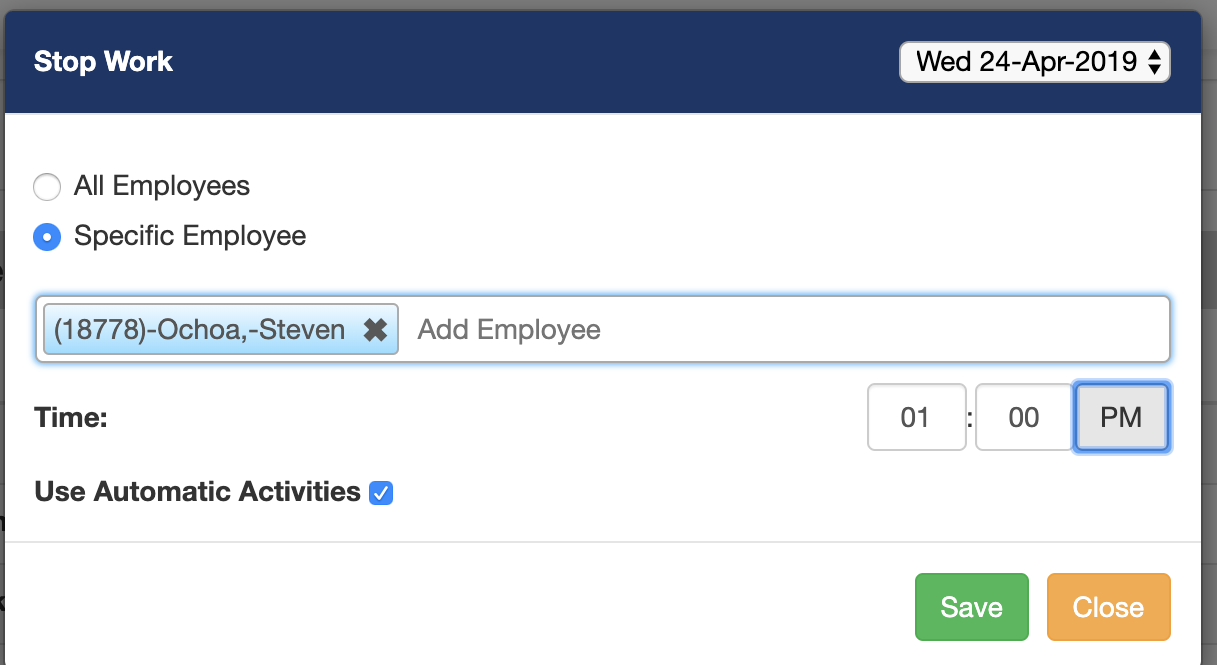
Optionally you can add a stop work entry for all clocked in employees by selecting the All Employees option.
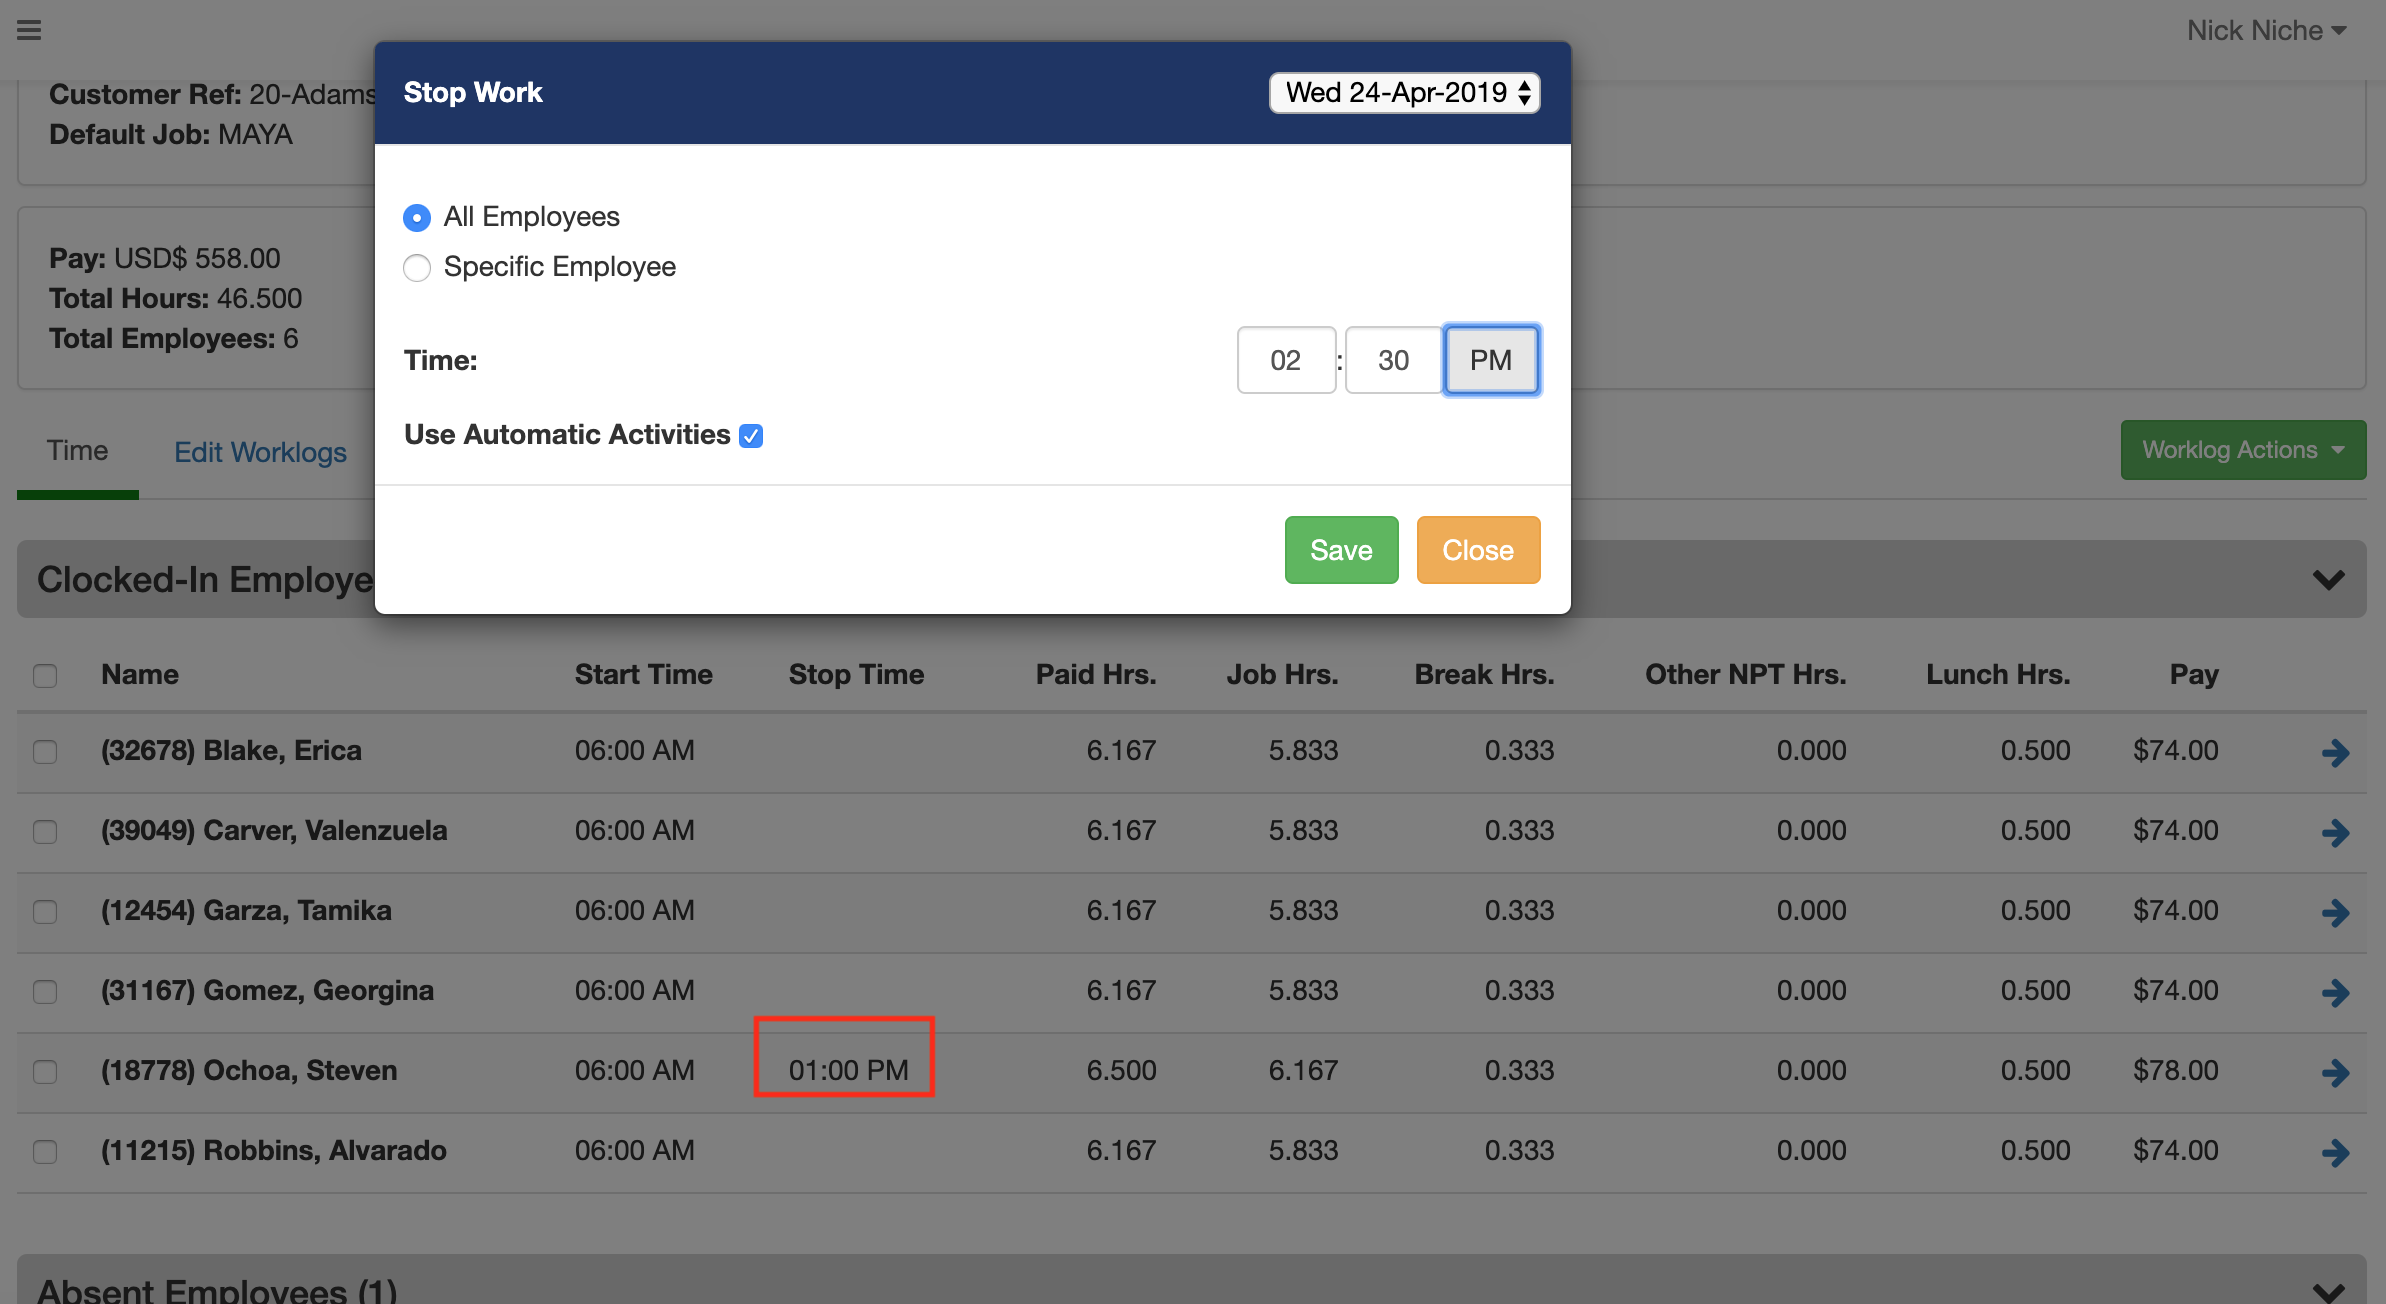
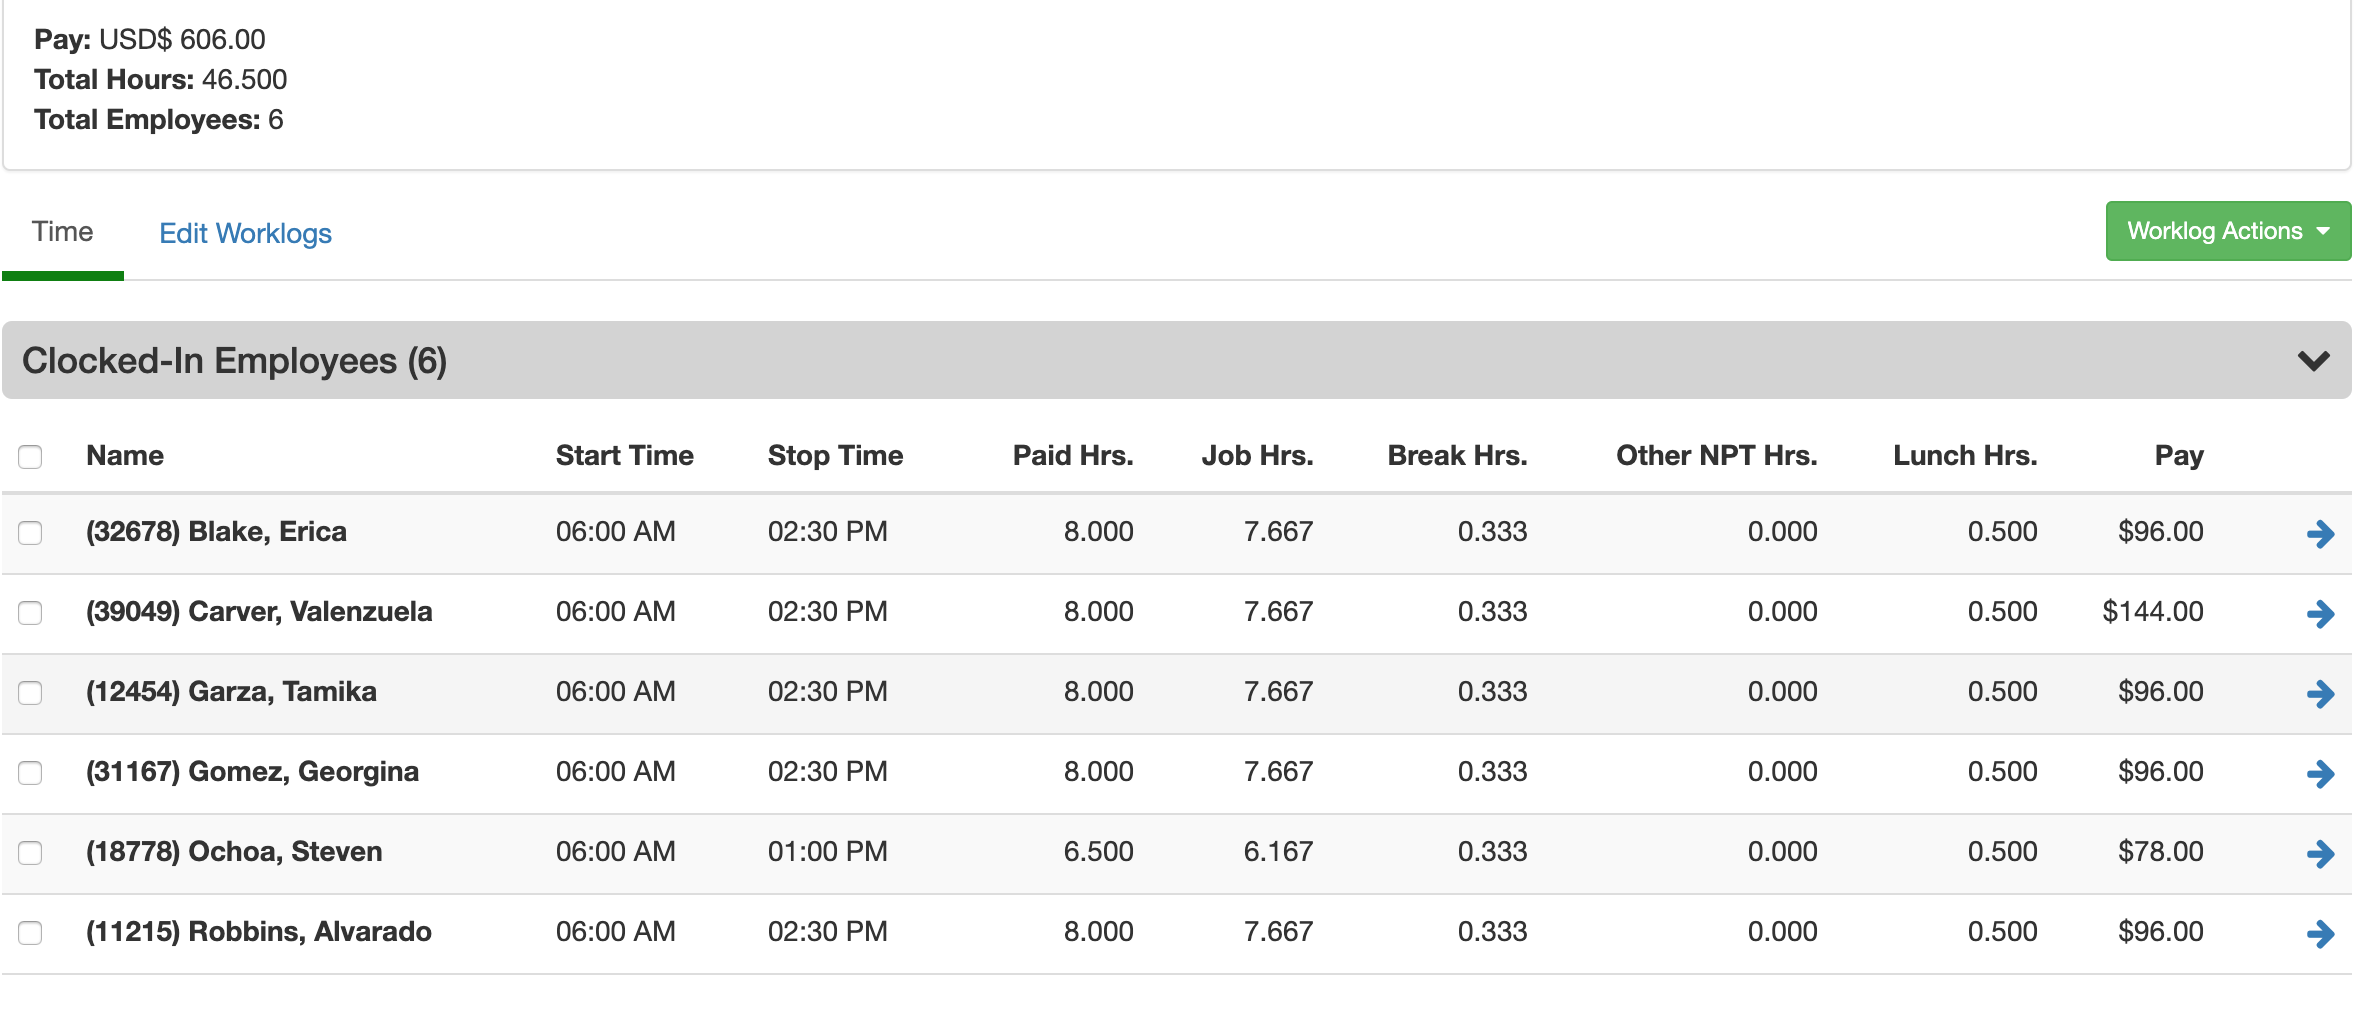
Every clocked in employee should have a Stop Work at the end of the day. This completes the work assignment time entry.
Employee summary values
Paid hours: the amount of hours the employees will be paid for the work assignment (excludes lunch hours).
Job hours: the number of hours the employees worked (excludes breaks).
Break Hrs: the break hours the employee took.
Other NPT: if employees are paid for piece work, this is the Non-Productive time hours.
Lunch Hrs. the total lunch hours.
Pay: this is the calculated time-based pay for employees. If employees are paid piece rate, then their piece rate pay will be found in the production section.
Comments
0 comments
Article is closed for comments.