
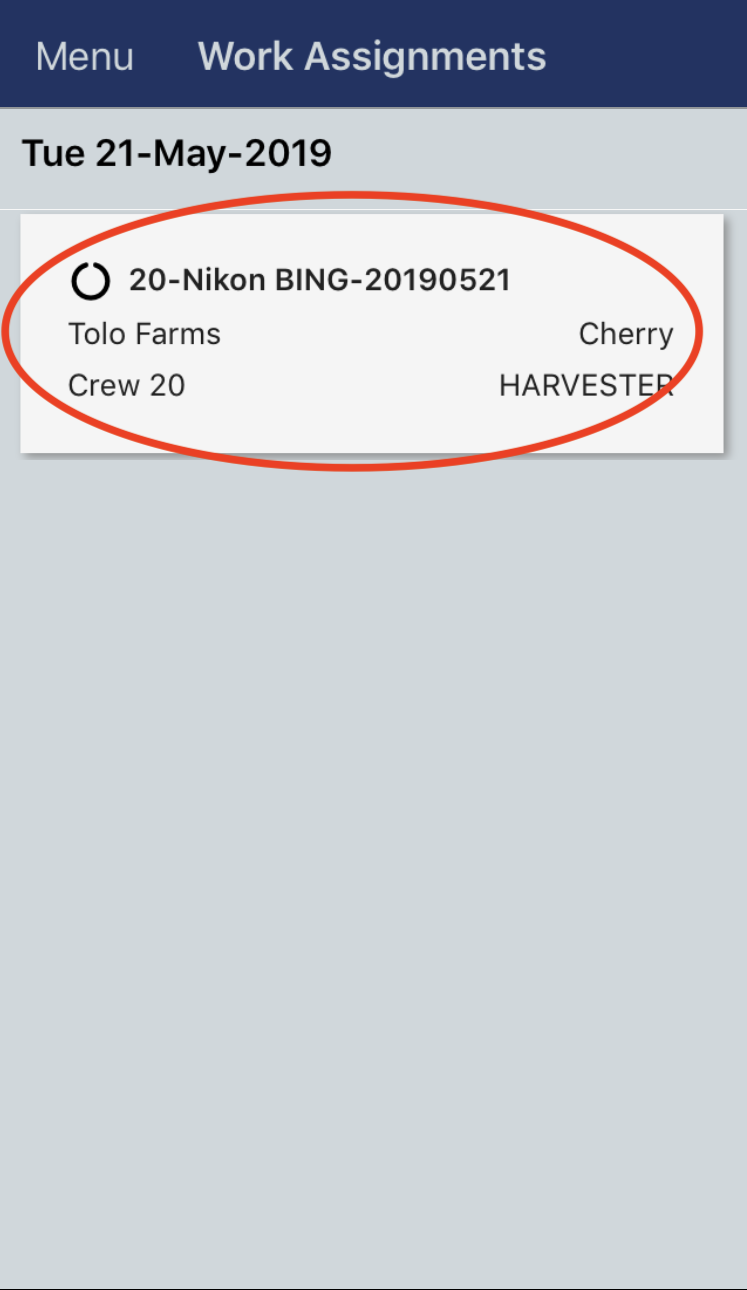
1) When you open the Pago Timekeeper mobile app and login, you will see a list of work assignments that must be completed for the day. Select a work assignment to get started.
Start of Day
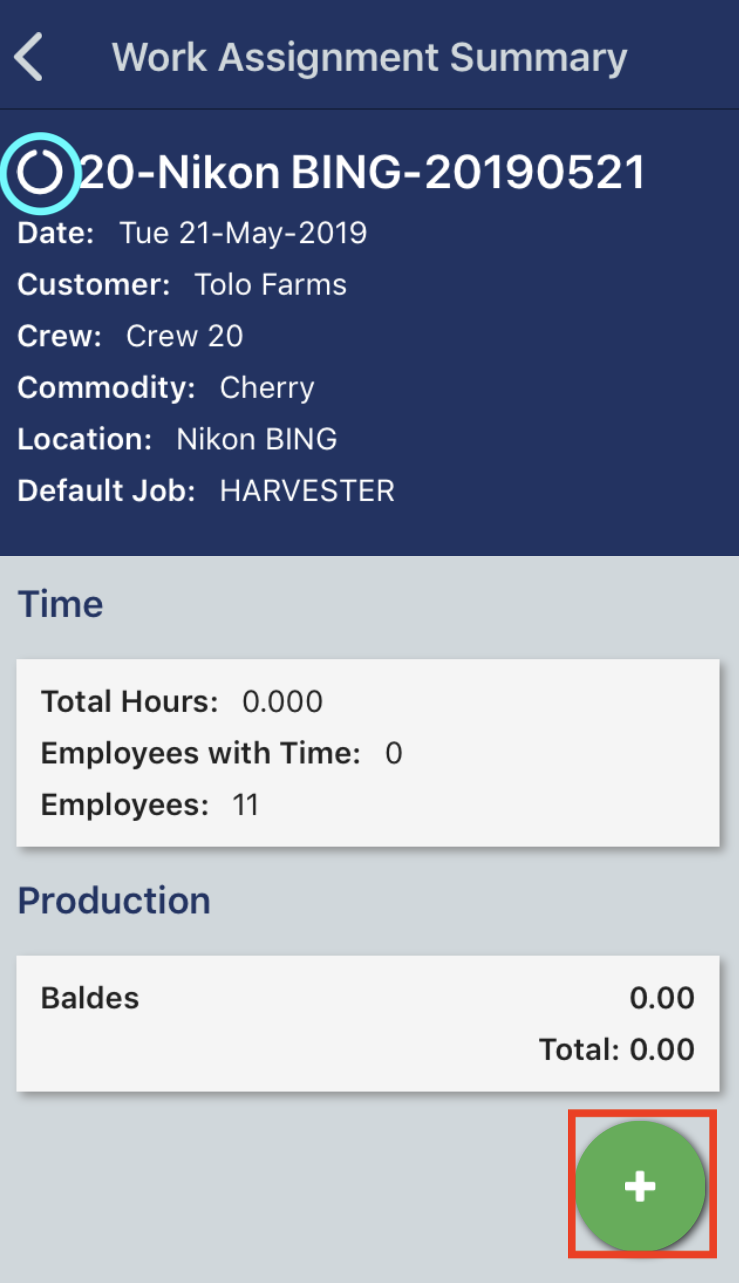
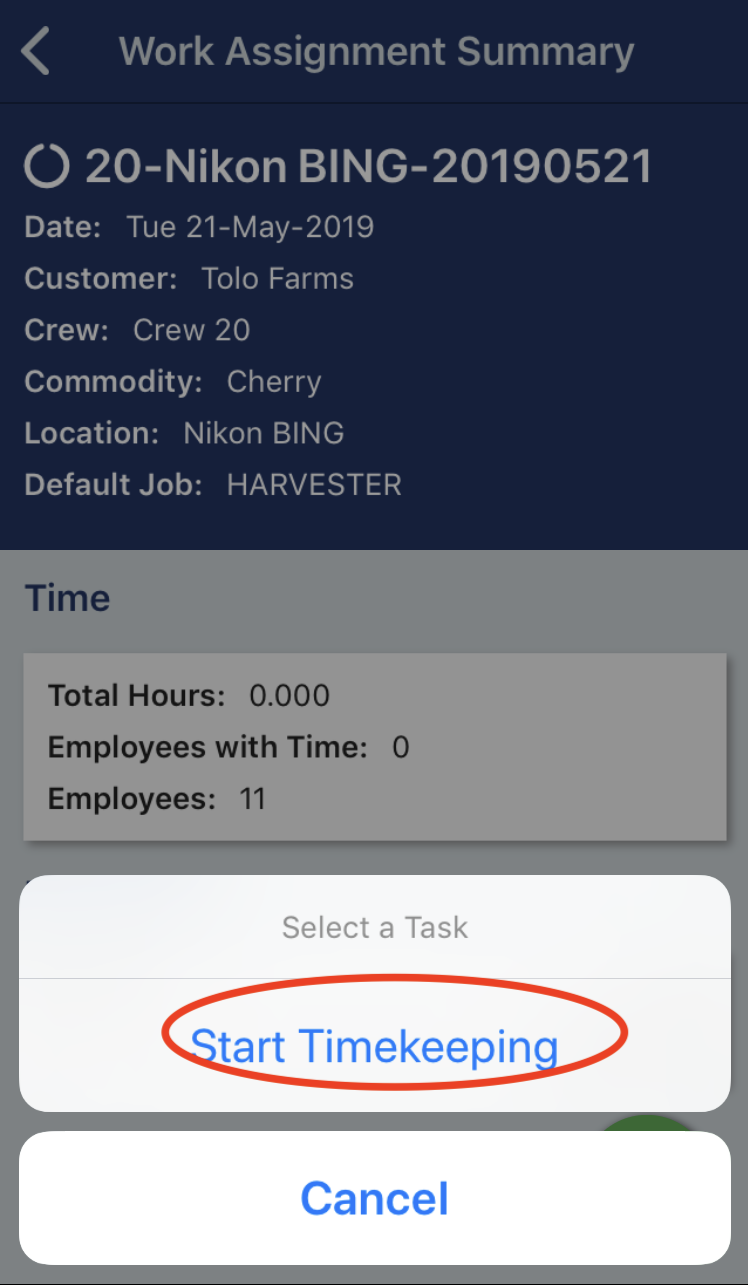
2) In the work assignment summary screen you will see a summary of the time and production counts for the work assignment. (Please note: if your work assignment is not configured to count production then you will not see the Production section). The first thing you need to do is to "Start Timekeeping". Select the green plus icon and select the Start Timekeeping option. This will change the work assignment from Waiting status to Timekeeping. You will not be able to enter time or production until you change the status to Timekeeping.
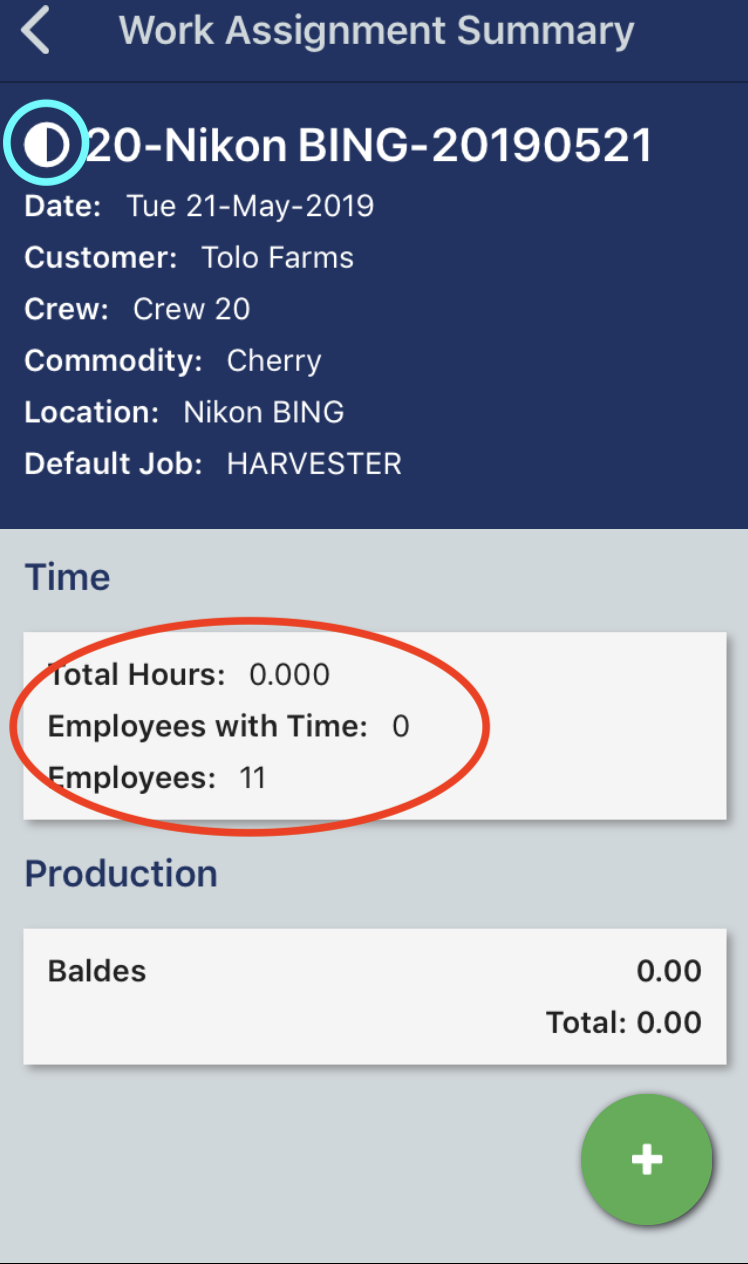
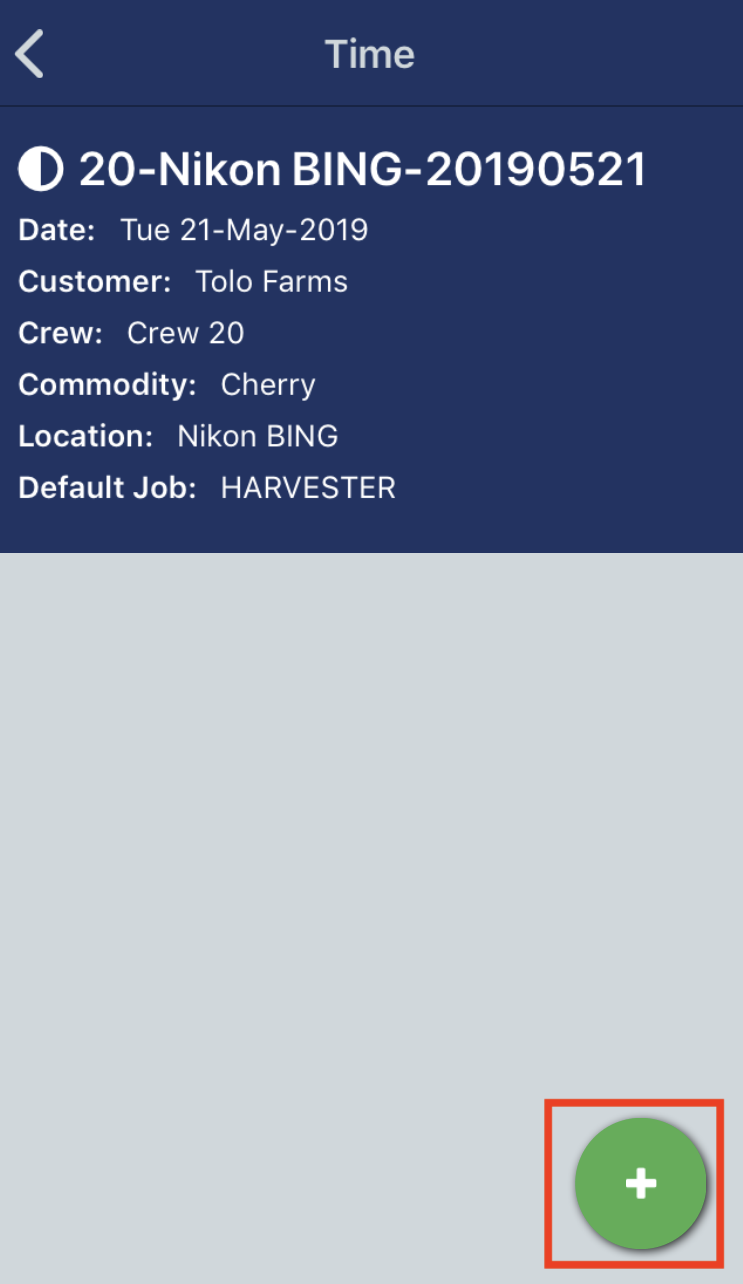
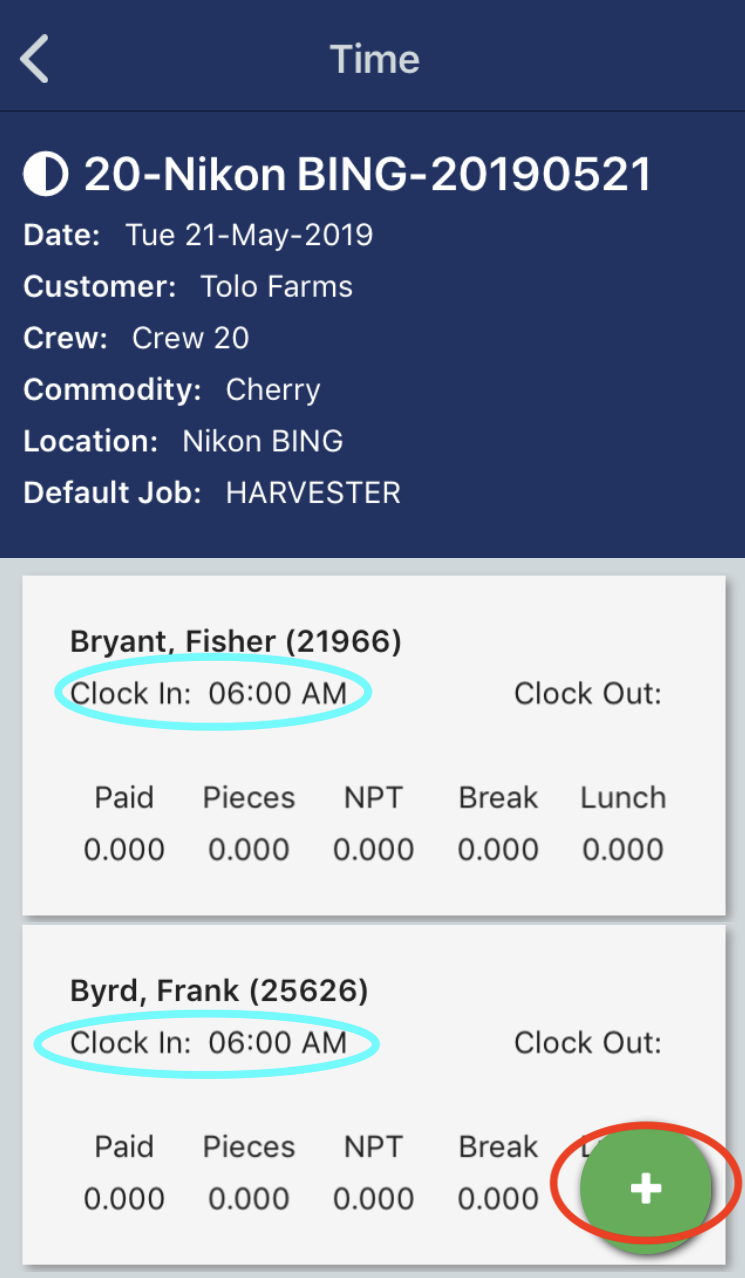
3) When your work assignment is in Timekeeping status, the icon changes to a partially filled in circle. Now you are ready to start timekeeping by clocking in employees. Tap on the Time summary section to navigate to the time page.
4) When you are on the time summary page, you can tap the green plus button to display a list of options. Select the Start Work option to start clocking in your employees.
 .
. 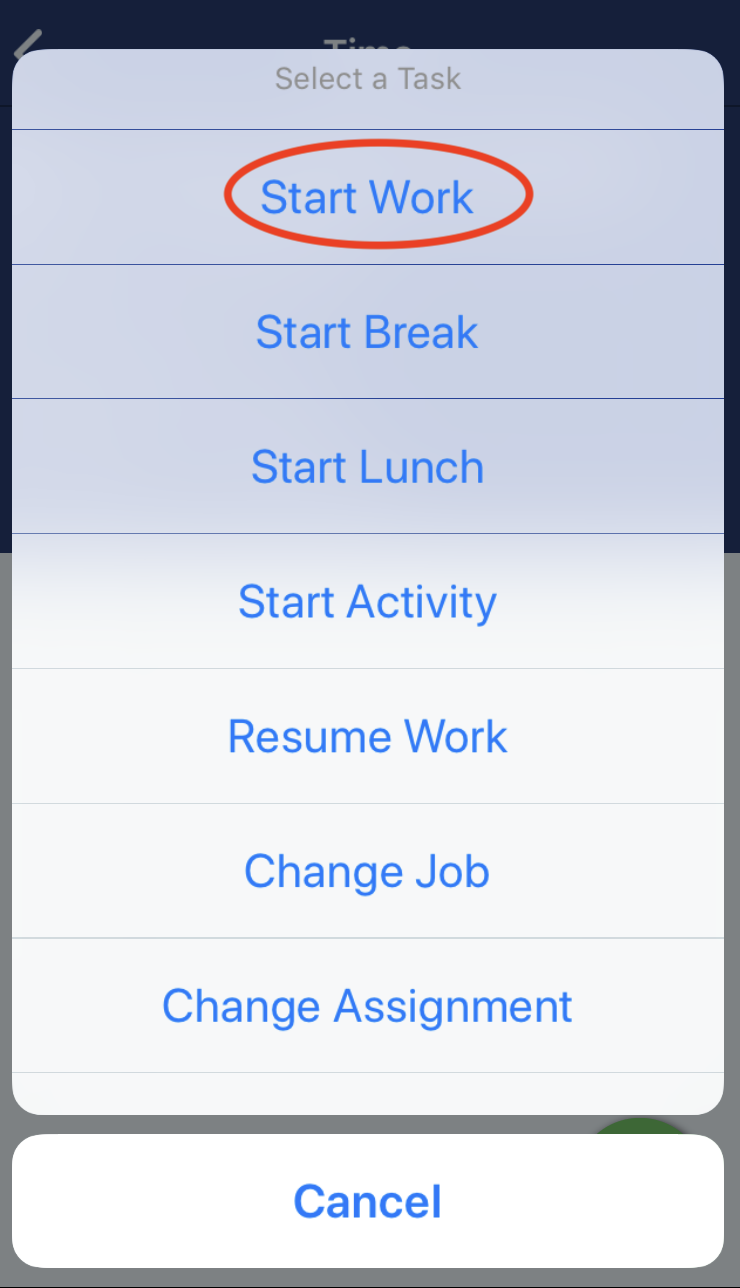
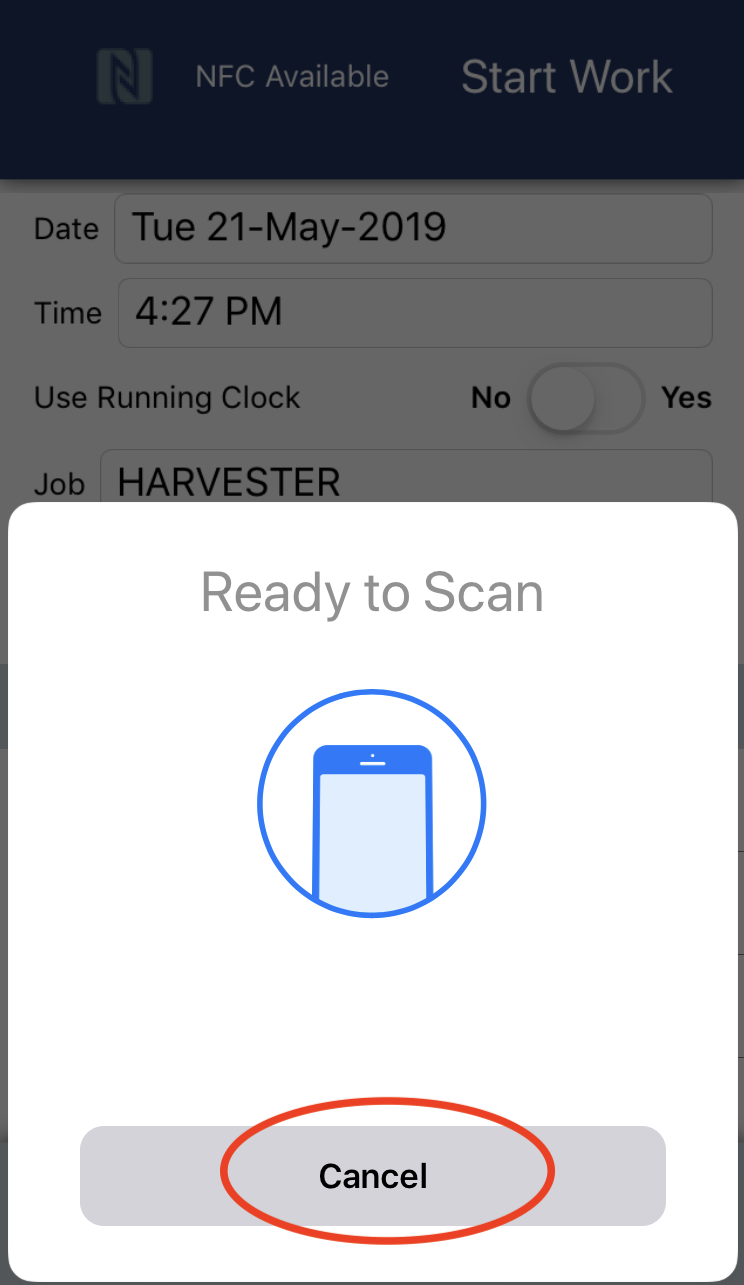
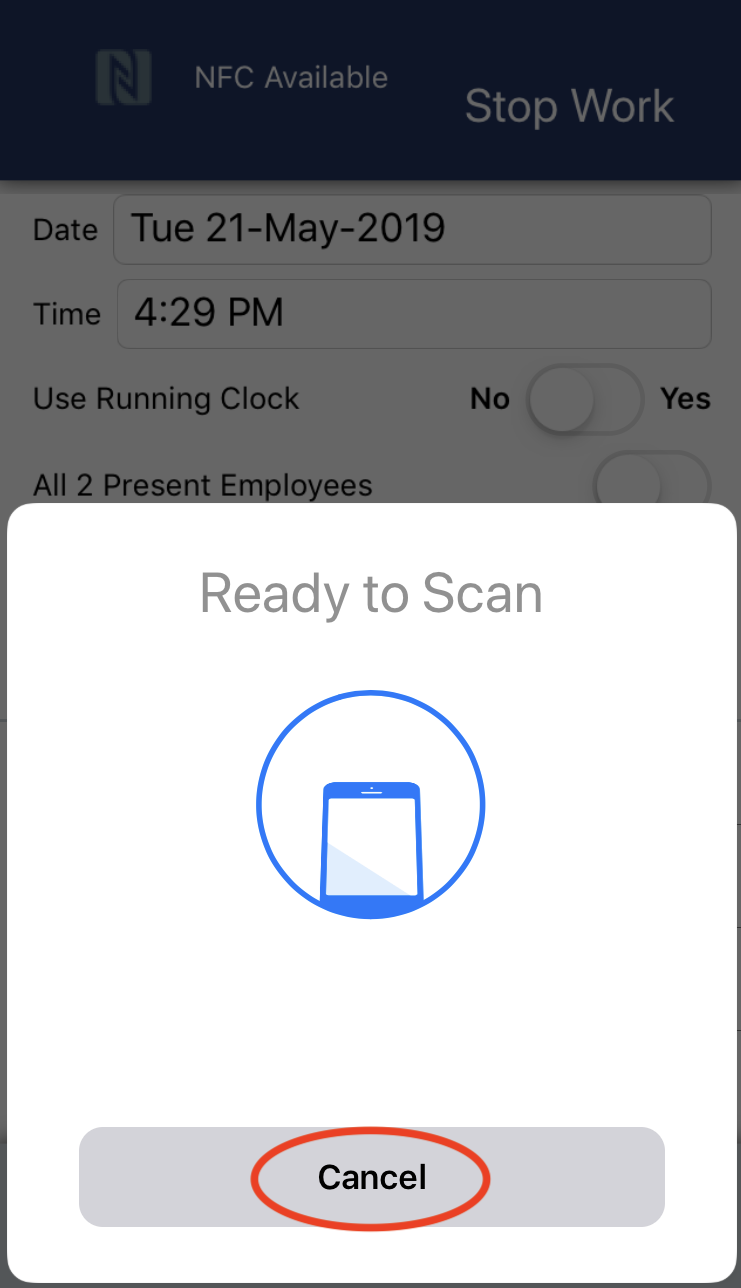
5) Once you select Start Work option, the Start Work entry page will display. You can start scanning employee badges, or you can change the settings of the Start Work data before you scan employee badges. Tap the Cancel button if you want to change the Start Work settings.
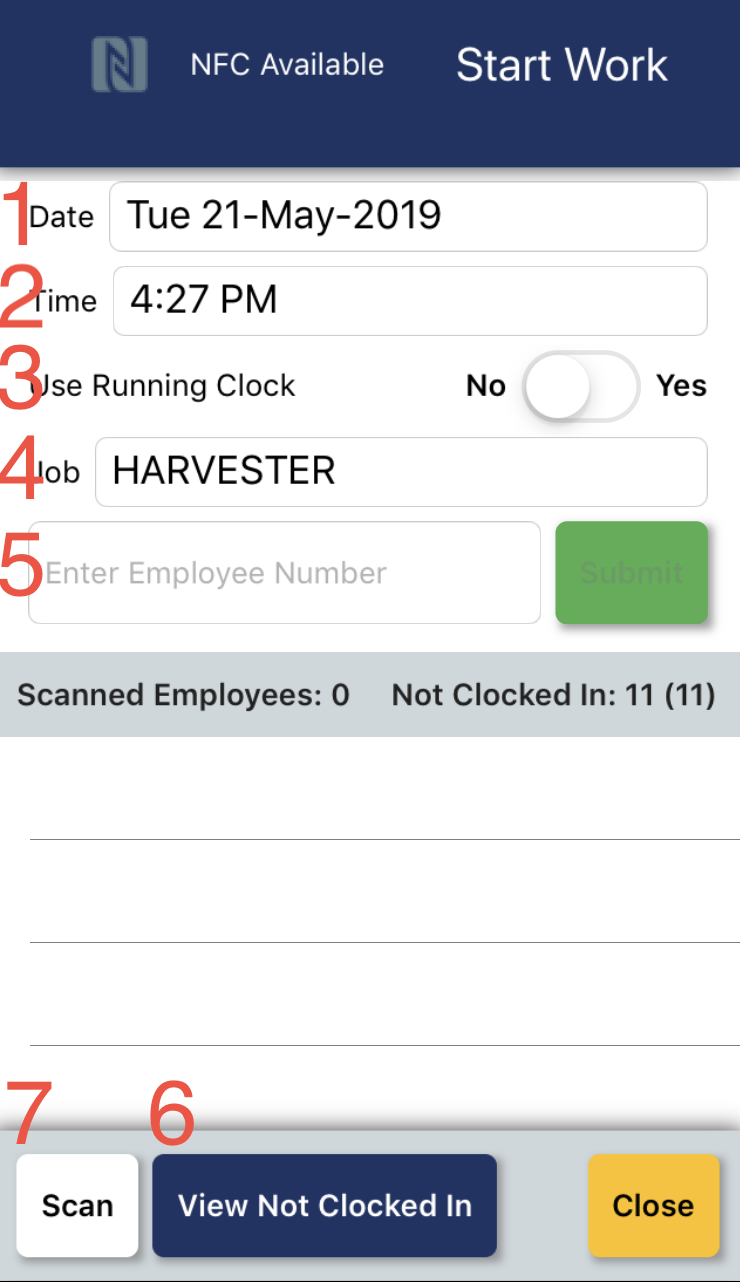
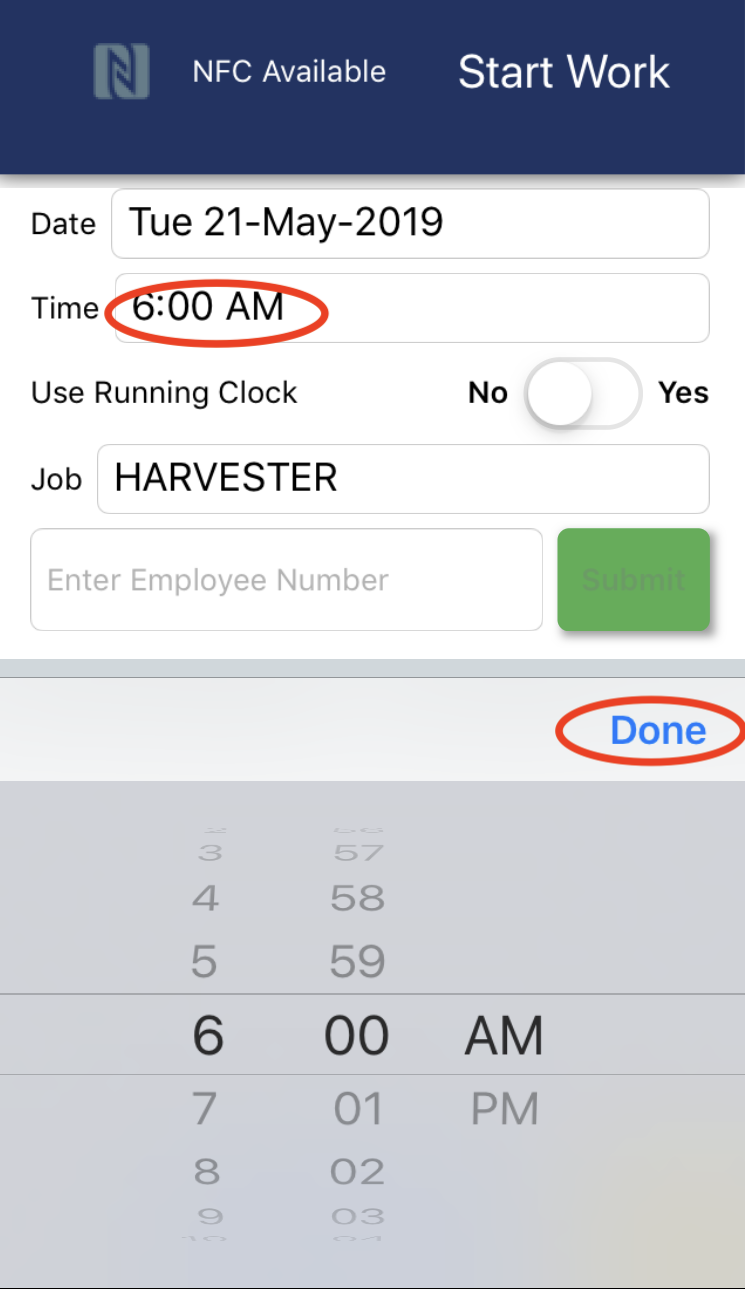
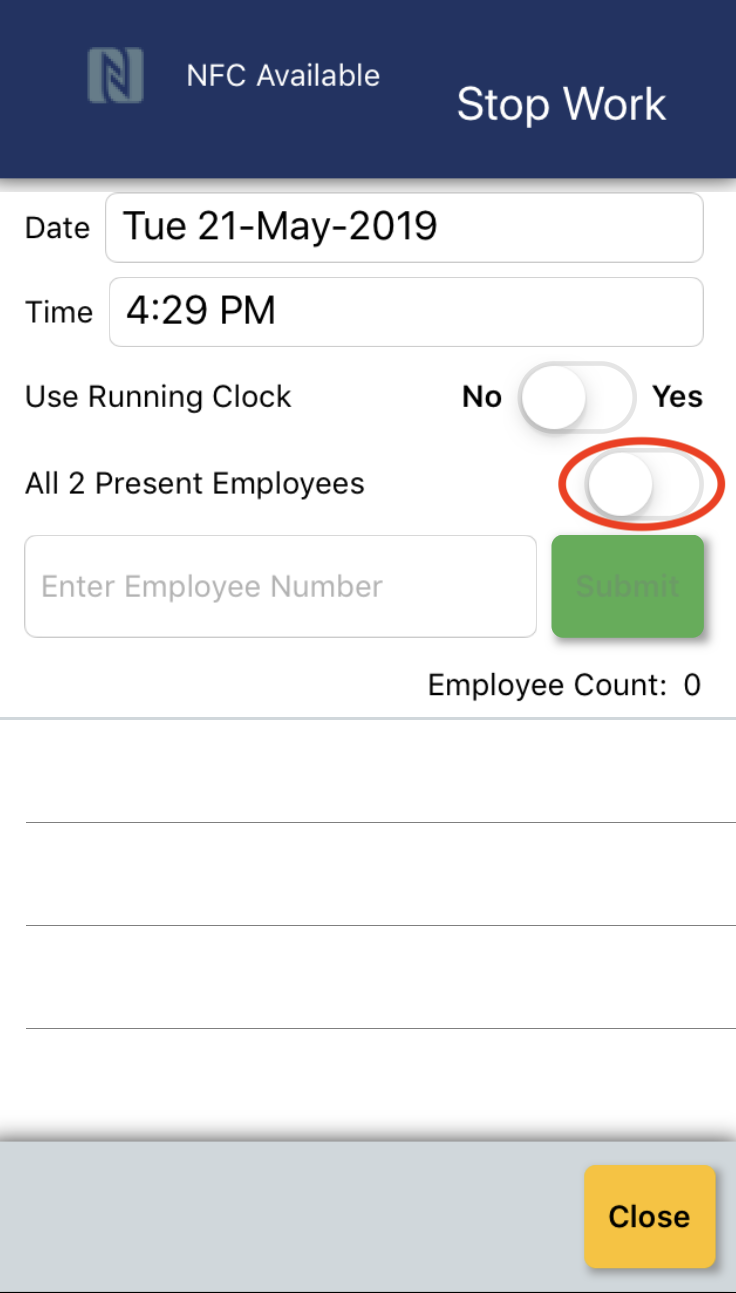
6) Once you cancel, the Start Work page will display and you can change the settings. (1) The Date value is probably correct, but not you can tap the field and change the date value. (2) The Time value will be the clock in time for employees. It defaults to the current time, but you can change the time by tapping on the time value. (3) If you want to use a Running Clock instead of entering a time value, you can change the option to Yes, rather than No. With a running clock, employees will be clocked in at the exact time their badge is scanned rather than the time that you enter. (4) The default job for the work assignment will be displayed. If employees are going to perform a different job, then tab the job value to change it.
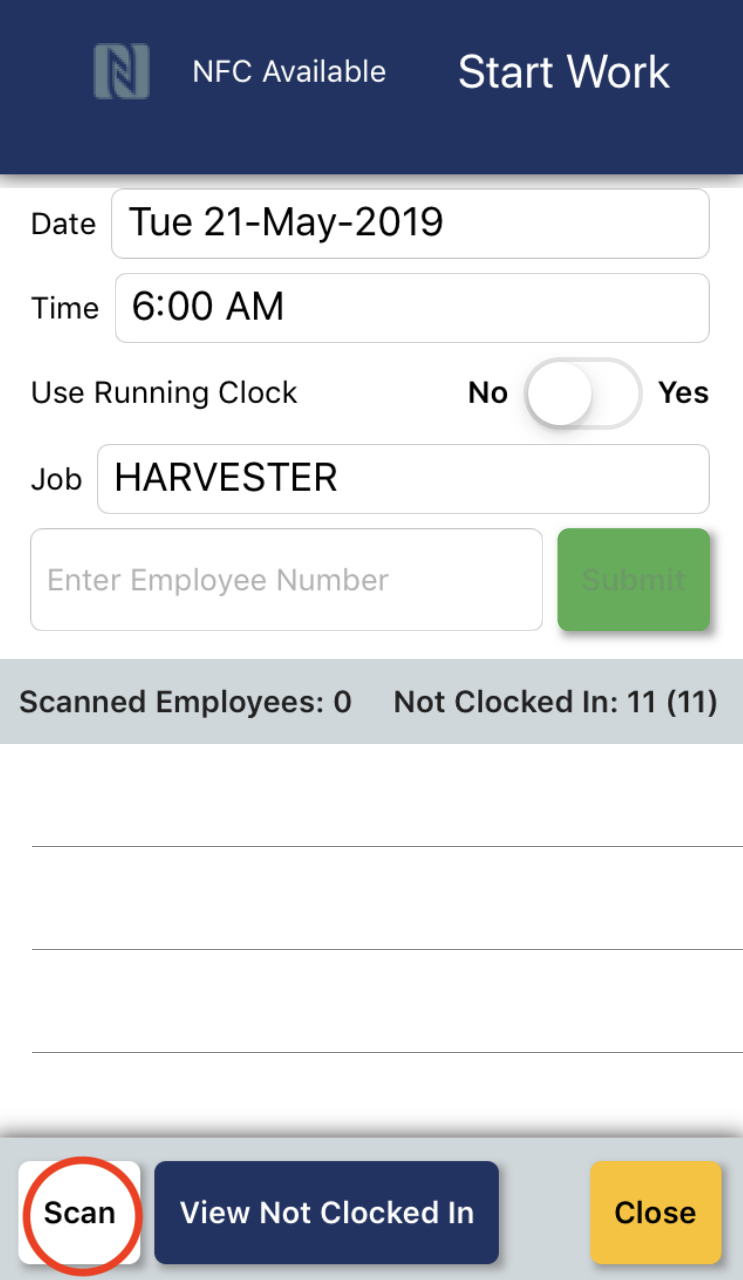
You are now ready to scan employee badges to clock them in.
If an employee forgot their badge you have the option of enter the employee number instead of scanning the employee badge.
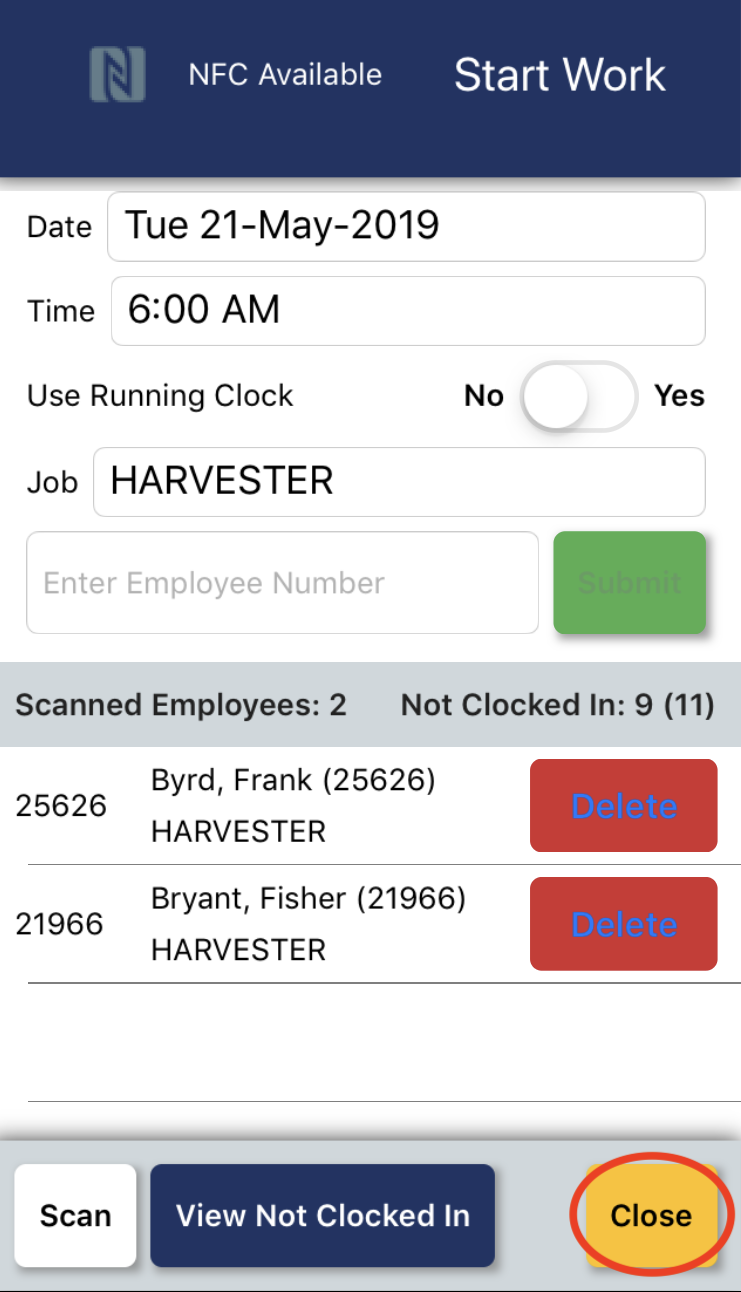
As employees are clocked in, each employee will be added to a list of clocked in employees. If you want to view a list of employees in the crew who have not clocked in you can tao the View Not Clocked In button.
Example: changing the time
If you tab the time value, a popup time selector will display and you can change the time.
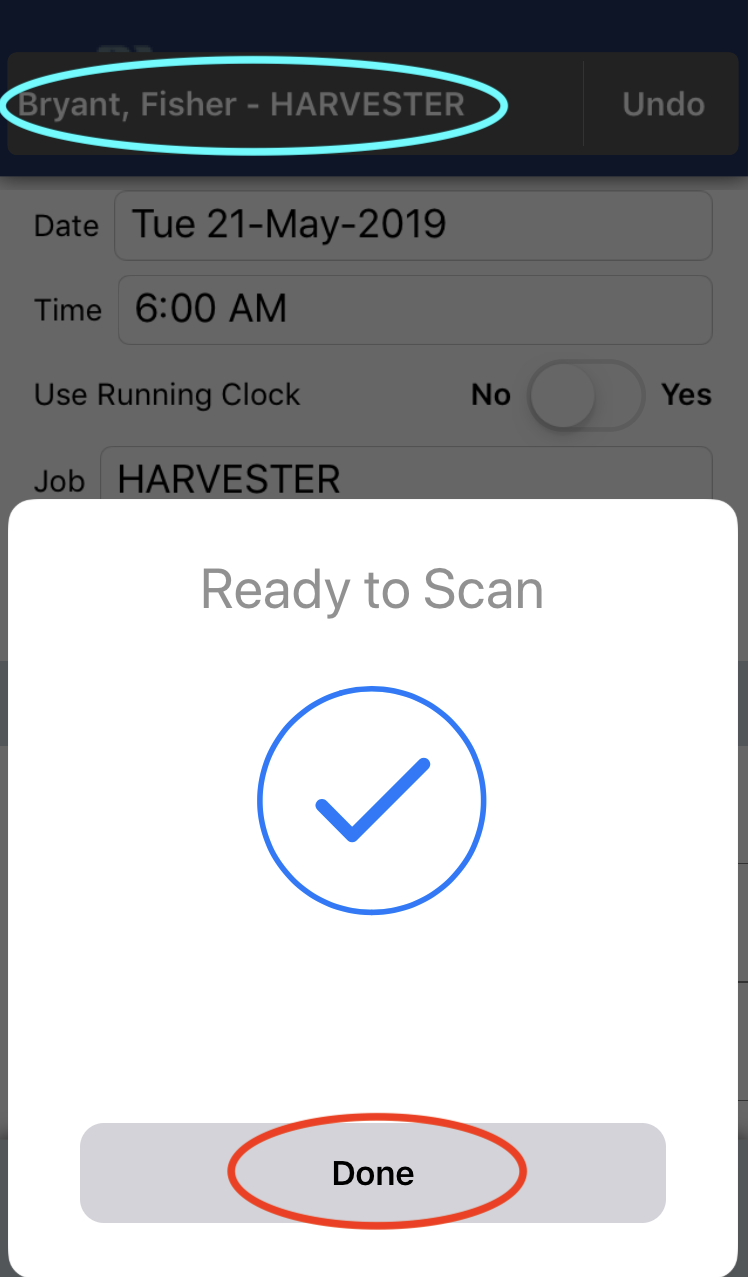
Example: Scanning employee badges
When you are ready to start scanning employee badges, tap the Scan button to get started. When the mobile app displays a window that says "Ready to Scan", you can hold an employee badge next to your mobile device to "scan" the badge. (Please note: on iPhones the NFC chip reader is located on the back of the phone at the the top). When you successfully scan a badge you will hear a noise indicating a successful scan. (Please note: if you do not hear a noise, you may have the sound volume turned down or off on your device).
When you are done scanning employee badges, you can tap the Done button to finish scanning.

Once you have clocked in all of the employees, you can tap the Close button to exit the Start Work screen.
End of Day
Once you have completed all of the time and production data entry for the work assignment, you are ready to finish timekeeping for the work assignment. In the time summary page, tap the green plus button to display a list of options., Select the Stop Work option.

In the Stop Work screen you have similar options to the Start Work screen including date, time, and running clock. One difference from Start Work screen is that you have an all present employees option. If you select all present employees, then you can clock everyone out at the same time. If you don't select all present employees, then you can scan employees badges to clock each employee out individually. If you want to clock out everyone together, then cancel the scan option and select the option for all present employees.
You have the option of using a running clock.
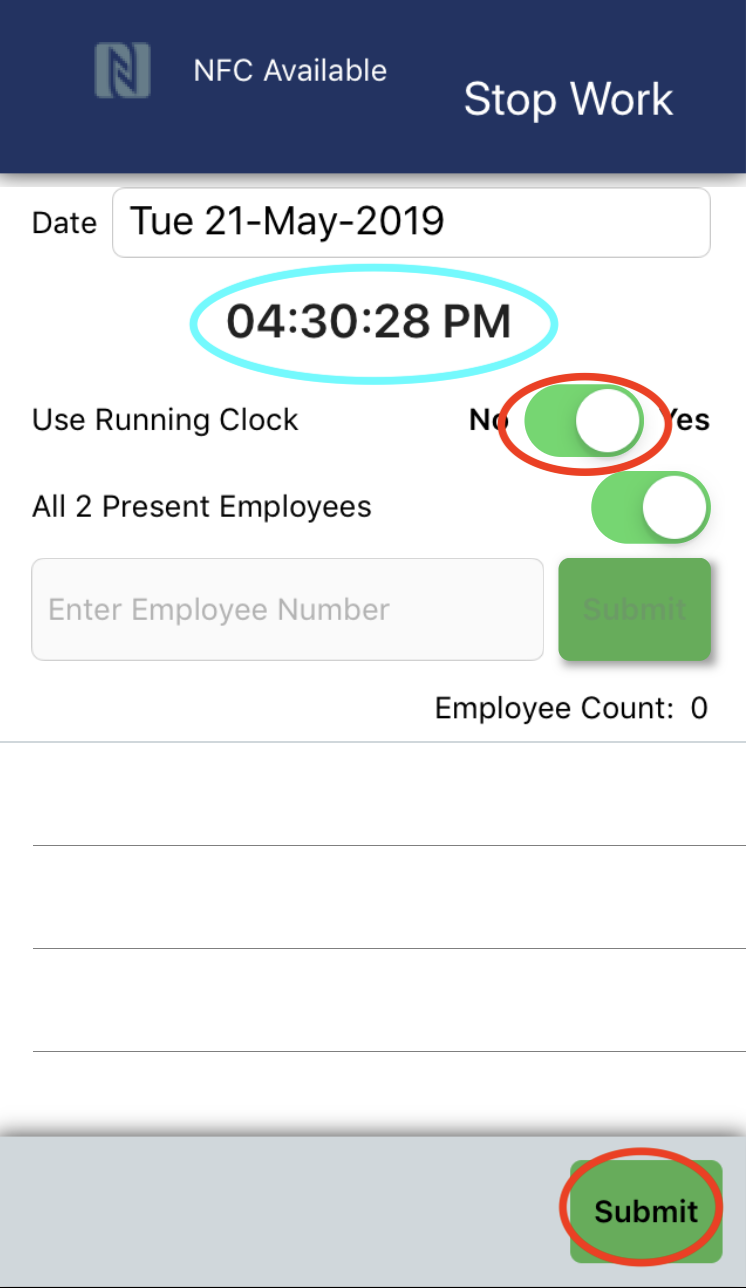
Or, you can set the clock out time.
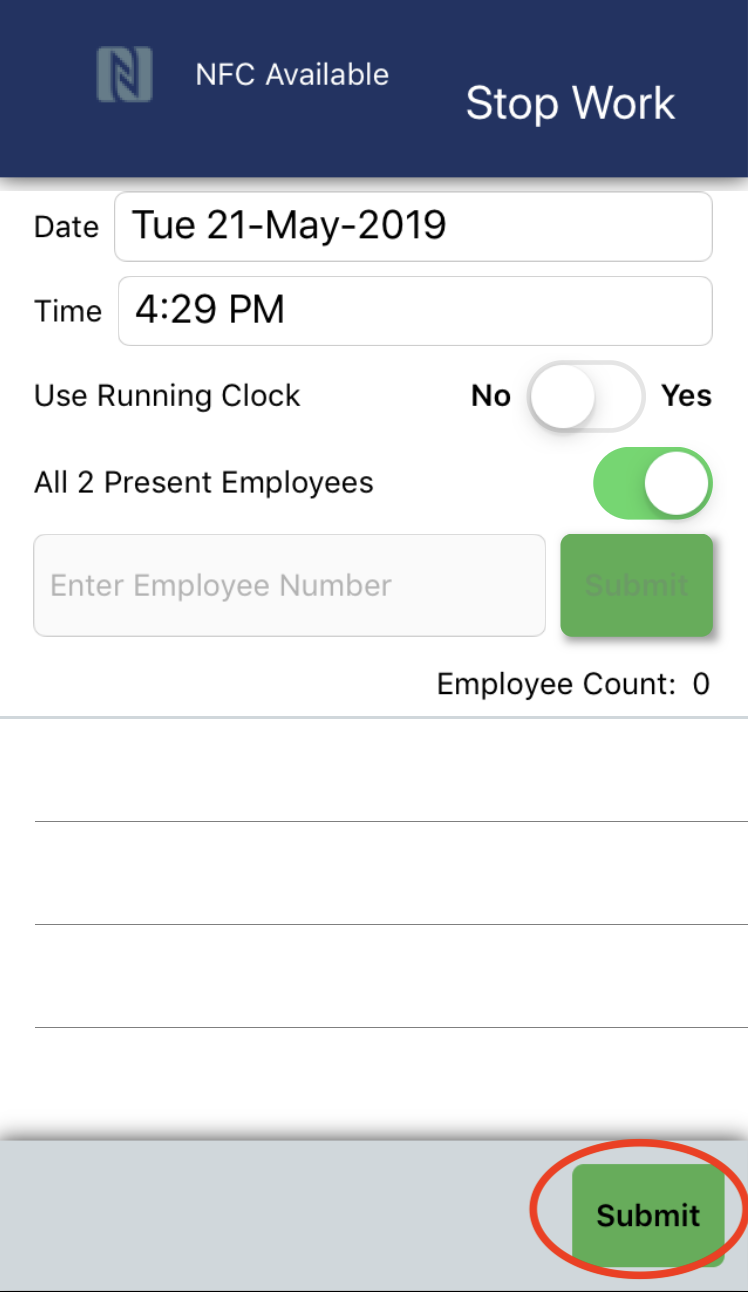
When you are done you can tap the Submit button to close the Stop Work screen.
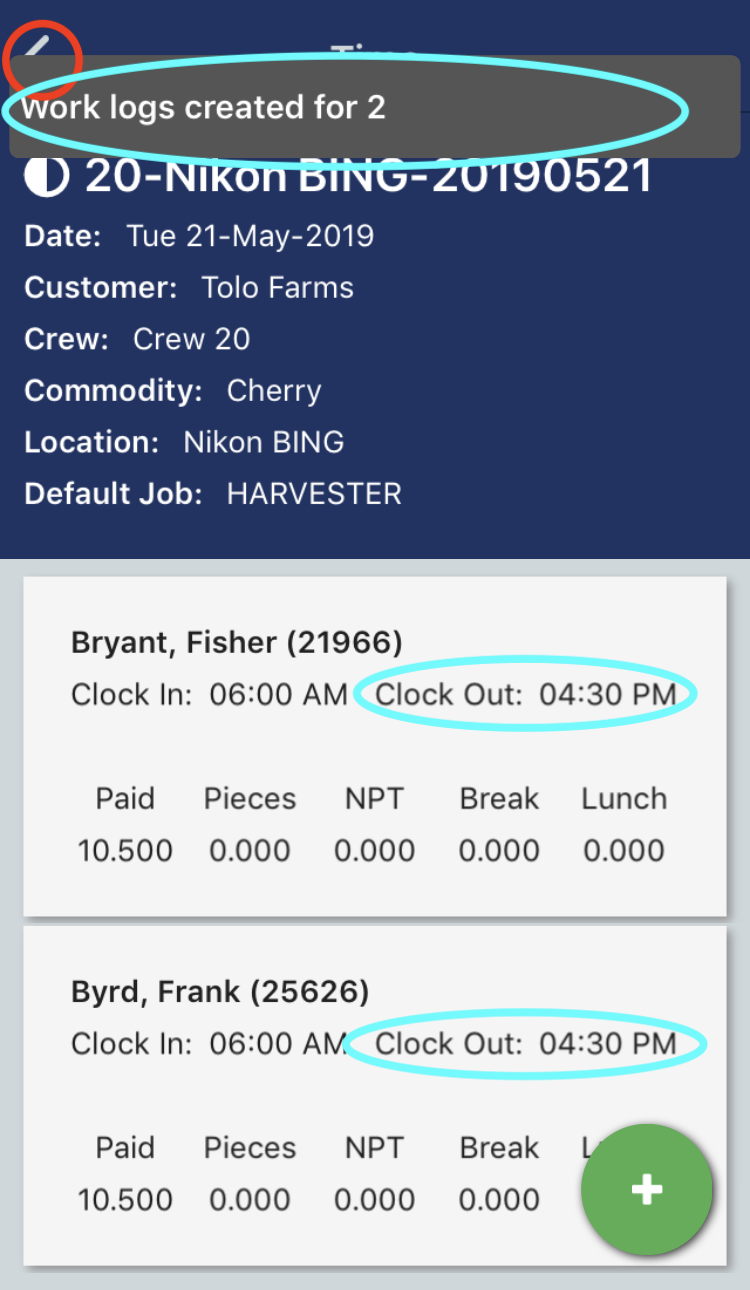
When you return to the time summary screen, you will now see that each employee will have a Clock Out time.
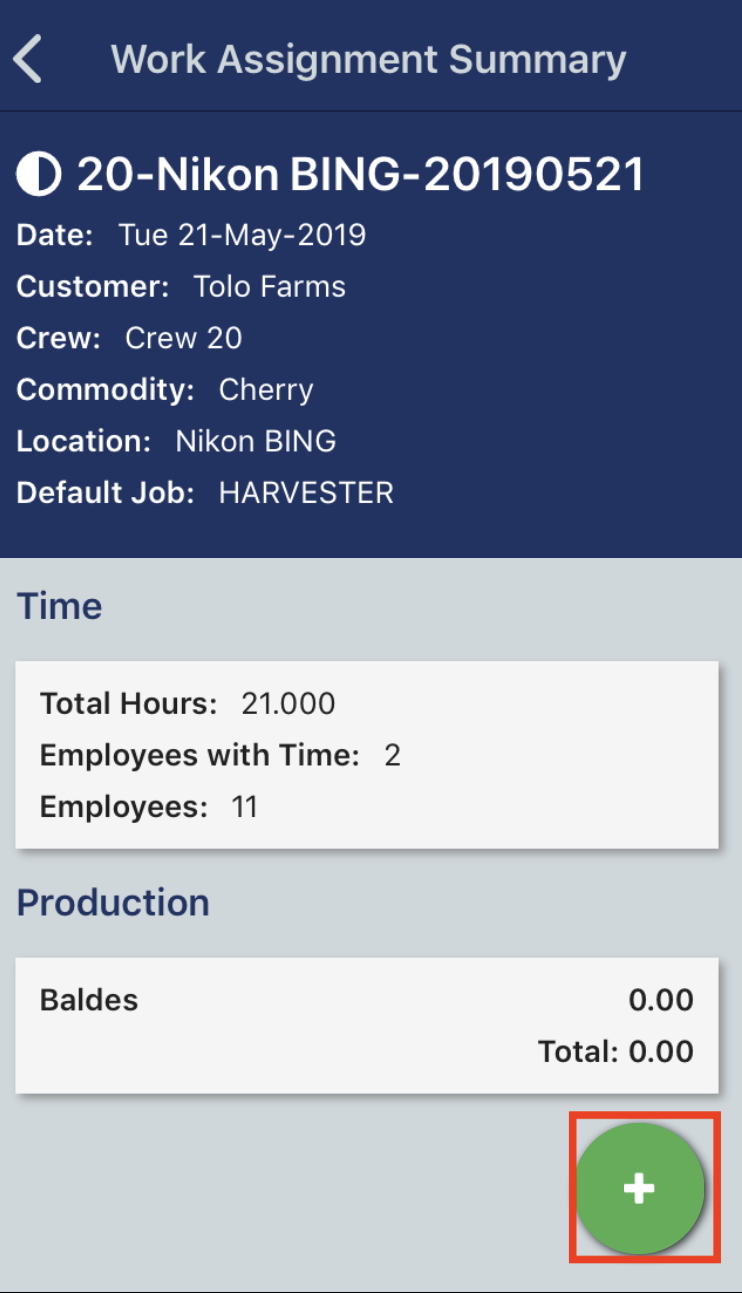
If you return to the work assignment summary screen, you can tap the green plus button and the the Finish Timekeeping option. This step finishes your time and production entry for the work assignment.
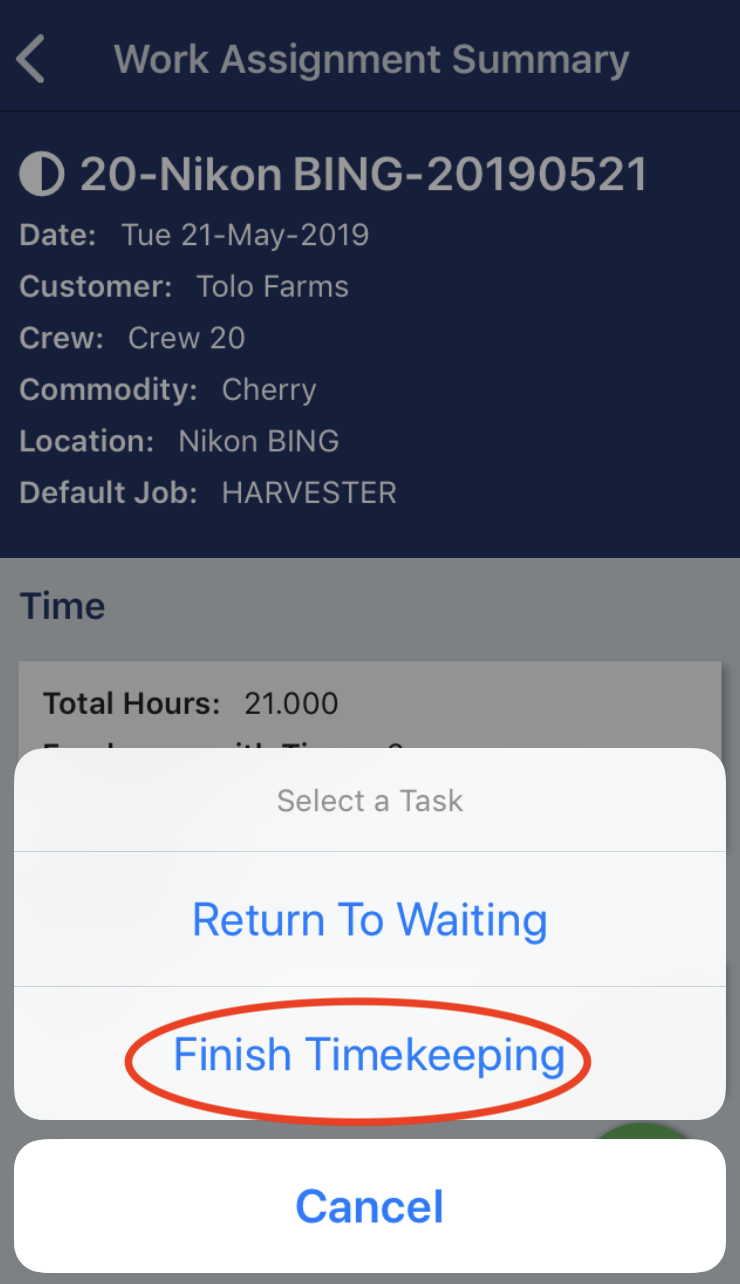
Notice the icon at the top left changes to a full circle. The work assignment is now in the Submitted status and is locked from any time or production data changes.

Comments
0 comments
Article is closed for comments.